background image


Assembly Instructions for Table 


1.


Unpack the unit and confirm that you have all the hardware and required parts. 


2.


Position the Table Top (A) upside down on a level and protective surface, as shown. 
 

3.


Remove the additional wood blocks attached at the corners by unscrewing the wood screws. These are 
used for shipping purposes only. After removing them, please discard. 


A

Summary of Contents for MS95-010-103-02

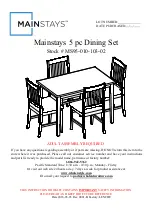
Page 1: ... if parts are missing DO NOT return this item to the store where it was purchased Please call our customer service number and have your instructions and parts list ready to provide the model name part name or factory number 1 866 942 5362 Pacific Standard Time 8 30 a m 4 30 p m Monday Friday Or visit our web site 24 hours a day 7 days a week for product assistance at www whalenstyle com Or e mail ...

Page 2: ...rdware part out of reach of children 4 Please wait until all steps are completed before tightening bolts 5 Make sure all bolts are tightly fastened before the unit is used MAXIMUM LOAD 400 lb 181 4 kg M AXIMUM RECOMMENDED W EIG HT LO ADS THIS UNIT IS INTENDED ONLY FOR USE WITHIN THE MAXIMUM WEIGHTS INDICATED USE WITH HEAVIER THAN THE MAXIMUM WEIGHTS INDICATED MAY RESULT IN INSTABILITY CAUSING POSS...

Page 3: ...hardware are present before beginning assembly A Table Top 1 B Table Leg 4 C Chair Left Back Leg 4 D Chair Right Back Leg 4 E Chair Backrest 4 F Chair Front Back Rail 8 G Seat Cushion 4 H Chair Left Front Leg 4 I Chair Right Front Leg 4 J Chair Upper Side Rail 8 K Chair Front Stretcher 4 L Chair Side Stretcher 8 ...

Page 4: ...a 2 Large Lock Washer 8 1 extra 3 Large Flat Washer 8 1 extra 4 M6 x 50 mm Bolt 48 2 extra 5 M6 x 65mm Bolt 16 1 extra 6 Small Lock Washer 32 1 extra 7 Small Flat Washer 32 1 extra 8 Barrel Nut 24 1 extra 9 M4 x 38 mm Screw 56 2 extra 10 Ø8 x 30 mm Wood Dowel 72 2 extra 4 mm Allen Wrench 2 5 mm Allen Wrench 1 Tools required Allen wrench provided and Phillips screwdriver not provided ...

Page 5: ... the hardware and required parts 2 Position the Table Top A upside down on a level and protective surface as shown 3 Remove the additional wood blocks attached at the corners by unscrewing the wood screws These are used for shipping purposes only After removing them please discard A ...

Page 6: ...shers 2 and Flat Washers 3 through the drilled holes on corner blocks and securely screw into the threaded inserts on the Legs with 5 mm Allen wrench 5 Stand the table upright and place it at your desired location A B B B B 1 2 3 Large Lock Washer 8 used in this step M8 x 80 mm Bolt 8 used in this step Large Flat Washer 8 used in this step ...

Page 7: ...ut 8 into the bottom side hole of one Chair Backrest E Be sure that the cross slot on the Barrel Nut faces out and that the threaded hole points towards the entry of the bolt along the bottom rail 7 Align and attach the Chair Backrest E to the Chair Right Back Leg D with three Wood Dowels 10 and two 50 mm Bolts 4 As shown 4 10 D E 4 8 10 Barrel Nut 1 used in this step Wood Dowel 3 used in this ste...

Page 8: ...d attach one Chair Back Rail F to the Chair Right Back Leg D by using two Wood Dowels 10 one 65 mm Bolt 5 and one Barrel Nut 8 As shown 5 8 10 D F E M6 x 65 mm Bolt 1 used in this step Wood Dowel 2 used in this step Barrel Nut 1 used in this step ...

Page 9: ...Repeat the same procedure to attach one Chair Left Back Leg C at the opposite end Barrel Nut 2 used in this step M6 x 65 mm Bolt 1 used in this step Wood Dowel 5 used in this step M6 x 50 mm Bolt 2 used in this step C 4 4 5 10 10 F E 8 10 ...

Page 10: ... F at both ends 11 Align and attach the Chair Front Rail F and one Chair Front Stretcher K between the Left and Right Front Legs H and I using two 65 mm Bolts 5 and two Barrel Nuts 8 As shown 5 8 10 5 8 10 F K I H Wood Dowel 4 used in this step Barrel Nut 2 used in this step M6 x 65 mm Bolt 2 used in this step ...

Page 11: ...olts 4 with the Small Washers 6 and 7 through the slant holes on the Chair Upper Side Rails J and screw into place 13 Repeat the same procedure to attach the other Chair Upper Side Rail J to the Chair Right Front Leg I 4 6 7 10 10 I H J J Small Lock Washer 4 used in this step Small Flat Washer 4 used in this step Wood Dowel 2 used in this step M6 x 50 mm Bolt 4 used in this step ...

Page 12: ...ir Upper Side Rails J to the Chair Back Legs C and D with two Wood Dowels 10 and insert both Side Stretchers L into the Front Legs H and I respectively Insert four 50 mm Bolts 4 with the Small Washers 6 and 7 through the slant holes on the Chair Upper Side Rails J and screw into place 4 6 7 10 L L J J C D J I H L C D C D H I Small Lock Washer 4 used in this step Small Flat Washer 4 used in this st...

Page 13: ... it in place by screwing eight 38 mm Screws 9 through the slant holes on the Chair Rails F and J 18 Secure the Chair Stretchers K and L to the Front and Back Legs by inserting six 38 mm Screws 9 Tighten the screws with a Phillips screwdriver 19 Stand the assembled unit upright on a flat surface Press down the Seat Cushion G to even all legs Now tightly fasten all bolts with the provided Allen wren...

Page 14: ...her advice about wood furniture care It is best to keep your furniture in a climate controlled environment Extreme temperature and humidity changes can cause fading warping shrinking and splitting of wood It is advised to keep furniture away from direct sunlight as sun may damage the finish Proper care and cleaning at home will extend the life of your purchase Following these important and helpful...

Page 15: ...está faltante no retorne esté producto a la tienda donde lo compró Por favor llame a nuestro departamento de ayuda al cliente teniendo su instructivo y lista de partes para proveer el modelo nombre de parte o el número de fábrica 1 866 942 5362 Hora Estandar del Pacífico 8 30 am 4 30 pm de Lunes a Viernes O visite nuestra página de Internet 24 horas al dia 7 días a la semana para asistencia www wh...

Page 16: ...stalar todas las partes antes de apretar completamente todos los tornillos 5 Asegurese que todos los tornillos esten bien apretados antes de utilizar al unidad MÁXIMA CARGA 400 lb 181 4 kg MÁXIMOS PESOS RECOME NDADOS I N F O R M A C I Ó N G E N E R A L R E C O M E N D A C I O N E S Y T R U C O S MÁXIMA CARGA 300 lb 136 kg ESTA UNIDAD DEBE UTILIZARSE CON LOS PRODUCTOS ADECUADOS Y PESOS MÁXIMOS INDI...

Page 17: ...samblado A Tapa de mesa 1 B Pata de mesa 4 C Pata posterior izq de silla 4 D Pata posterior der de silla 4 E Respaldo de silla 4 F Riel frontal posterior de silla 8 G Cojín de silla 4 H Pata frontal izq de silla 4 I Pata frontal der de silla 4 J Riel lateral superior de silla 8 K Soporte frontal de silla 4 L Soporte lateral de silla 8 ...

Page 18: ... extra 3 Arandela plana grande 8 1 extra 4 Tornillo de M6 x 50 mm 48 2 extra 5 Tornillo de M6 x 65 mm 16 1 extra 6 Arandela presión chica 32 1 extra 7 Arandela plana chica 32 1 extra 8 Tuerca barril 24 1 extra 9 Perno M4 x 38 mm de madera 56 2 extra 10 Perno Ø8 x 30 mm de madera 72 2 extra Llave 4 mm Allen 2 Llave 5 mm Allen 1 Herramienta requerida Llave Allen proveida y destornillador estrella no...

Page 19: ...etería y partes requeridas 2 Ponga la tapa de mesa A boca abajo en una area limpia y libre como se muestra debajo 3 Retire los bloques de madera adicionales unidos en las esquinas aflojando los tornillos de madera Estos se utilizan sólo con fines de envío Después de la eliminación de ellos por favor deseche A ...

Page 20: ...e presión grandes 2 y arandelas planas 3 a través de los agujeros perforados en bloques de esquina y fije en los insertos roscados en las patas 5 Coloque la mesa en posición vertical y colocarla en el lugar deseado Arandela presión grande 8 usados en este paso Tornillo de M8 x 80 mm 8 usados en este paso Arandela plana grande 8 usados en este paso A B B B B 1 2 3 ...

Page 21: ...rior de un respaldo de silla E Asegúrese de que la ranura transversal en la tuerca barril se enfrenta al agujero y la entrada del hacia la entrada del tornillo a lo largo del riel inferior 7 Alinear y unir el respaldo de silla E a la pata de silla trasera D con tres pernos de madera 10 y dos tornillos de 50 mm 4 Como se muestra Tuerca barril 1 usados en este paso Perno de madera 3 usados en este p...

Page 22: ...la silla F a la pata de silla trasera D mediante el uso de dos pernos de madera 10 un tornillo de 65 mm 5 y una tuerca barril 8 Como se muestra 5 8 10 D F E Tornillo de M6 x 65 mm 1 usados en este paso Perno de madera 2 usados en este paso Tuerca barril 1 usados en este paso ...

Page 23: ...roceso para adjuntar una pata posterior izquierda C al extremo contrario Tuerca barril 2 usados en este paso Tornillo de M6 x 65 mm 1 usados en este paso Perno de madera 5 usados en este paso Tornillo de M6 x 50 mm 2 usados en este paso C 4 4 5 10 10 F E 8 10 ...

Page 24: ...os extremos 11 Alinear y unir el riel de la silla F y un soporte frontal de silla K entre las patas delantera izquierda y derecha H e I usando dos tornillos de 65 mm 5 y dos tuercas barril 8 Como se muestra 5 8 10 5 8 10 F K I H Perno de madera 4 usados en este paso Tuerca barril 2 usados en este paso Tornillo de M6 x 65 mm 2 usados en este paso ...

Page 25: ...on las arandelas pequeñas 6 y 7 a través de los agujeros rasgados en el riel superior lateral J y el fije en su lugar 13 Repetir el mismo proceso para adjuntar el otro riel de silla superior J a la pata frontal derecha I 4 6 7 10 10 I H J J Arandela presión chica 4 usados en este paso Arandela plana chica 4 usados en este paso Perno de madera 2 usados en este paso Tornillo de M6 x 50 mm 4 usados e...

Page 26: ...la silla posteriores C y D con dos pernos de madera 10 e insertar ambos lados del soporte L en las patas delanteras H e I respectivamente Inserte cuatro tornillos de 50 mm 4 con las arandelas pequeñas 6 y 7 a través de los agujeros rasgados en los rieles de la silla lateral superior J y fije en su lugar 4 6 7 10 L L J J C D J I H L C D C D H I Arandela presión chica 4 usados en este paso Arandela ...

Page 27: ...los agujeros rasgados en los rieles de la silla F y J 18 Fije los soportes de silla K y L para las patas delanteras y traseras mediante la inserción de seis tornillos 38 mm 9 Apriete los tornillos con un destornillador estrella 19 Coloque la silla montada en posición vertical sobre una superficie plana Presione hacia abajo el cojín de asiento G incluso para todas las patas Ahora bien fijar todos l...

Page 28: ...controlado Temperatura extrema y cambios de humedad pueden causar cambios como partes pandas molduras que se contraigan o que la madera se raje Es recommendable mantener la unidad lejos del sol directo ya que puede dañar el terminado Cuidados adecuados y limpieza pueden extender la vida útil de su unidad Siga estas recomendaciones y mantendra su mueble en buenas condiciones de uso por muchos años ...

Reviews: