background image

Hardware Note:

Please do not completely tighten all the hardware,
until the entire assembly is complete, unless
indicated otherwise in the step-by-step
instructions.

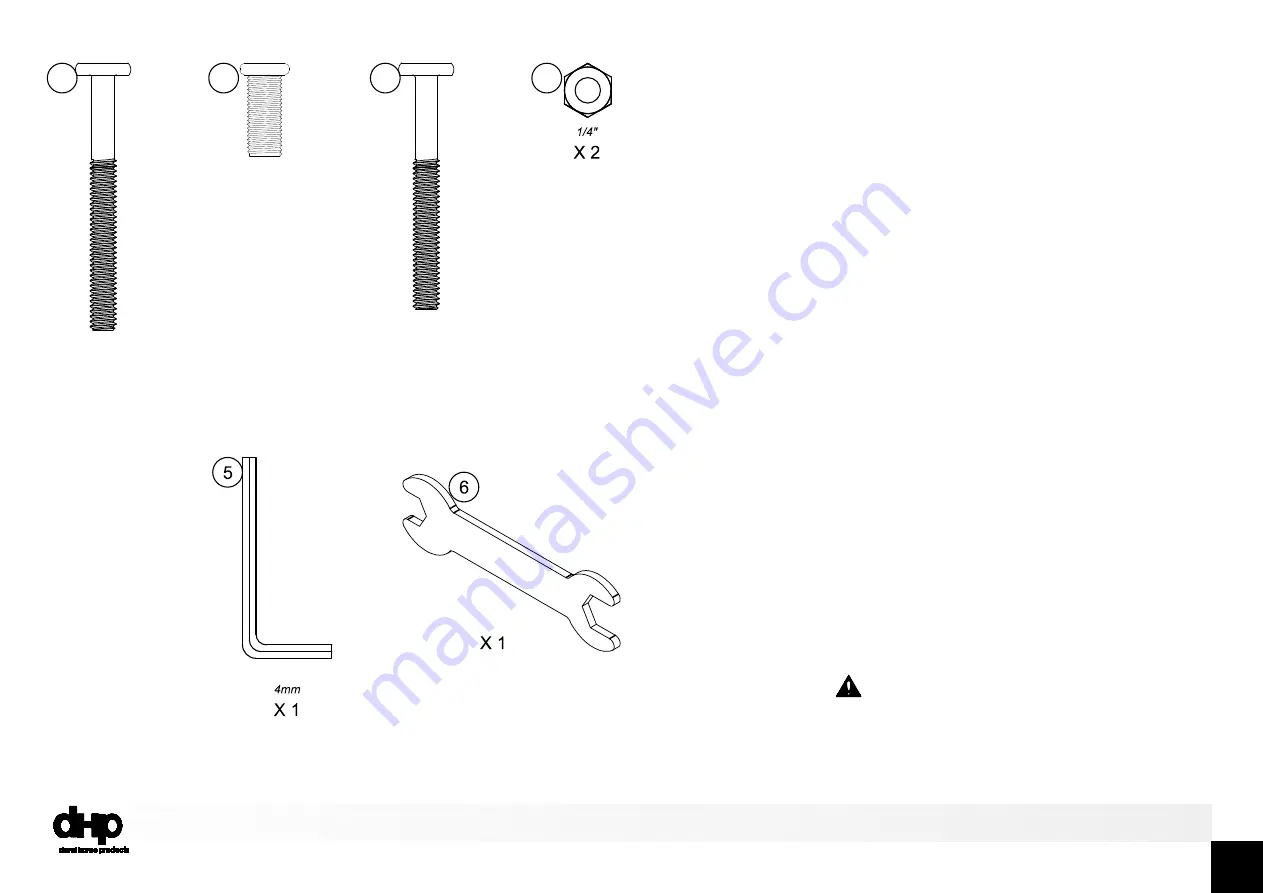
Hardware Pack

Hardware Pack #: T 4060019WE-00

B344

060019WE00

5

1

2

3

4

X 24

1/4"X 2 3/8"

X 16

5/16"X 3/4"

X 2

1/4"X 2 3/16"

Summary of Contents for 4060019WE

Page 1: ...7 1 2015 If parts are missing or damaged we will gladly ship your replacement parts free of charge Lot Number Thank you for purchasing from DHP THIS INSTRUCTION BOOKLET CONTAINS IMPORTANT SAFETY INFO...

Page 2: ...tent exclusion is permitted by law This warranty gives you specific legal rights and you may also have other rights which vary from state to state To obtain warranty service purchaser must present ori...

Page 3: ...B344060019WE00 3...

Page 4: ...arts needed for the assembly B344060019WE00 4 X 2 T922220 Post 1 X 1 T922210 Post 2 X 1 T924790 End Guard Rail 02 E X 1 T922300 Guard Rail 01 F T O X 42 T919490 Slat Spacer 02 X 88 T392590 Plastic Plu...

Page 5: ...tighten all the hardware until the entire assembly is complete unless indicated otherwise in the step by step instructions Hardware Pack Hardware Pack T4060019WE 00 B344060019WE00 5 1 2 3 4 X 24 1 4 X...

Page 6: ...Step 1 Attach END GUARD RAILS G T to POSTS A B with BOLTS 1 B344060019WE00 6 X8 A G T 1 1 1 2 A A G T 1 1 1 1 B...

Page 7: ...Step 2 B344060019WE00 7 X8 A C I T 2 1 2 2 A A I T 1 1 1 1 Attach END GUARD RAILS I T to POSTS A C with BOLTS 1...

Page 8: ...Step 3 B344060019WE00 8 B C A A J J J H I T T G Wide side of the slots of all side rails should be facing up A J 2 2 X16 Attach SIDE RAILS J H to POSTS A B C with BOLTS 2 as shown...

Page 9: ...Step 4 4 1 Attach GUARD RAILS E to POTS A B with BOLTS 1 as shown 4 2 Attach GUARD RAIL F to POST A and SIDE RAIL H with BOLTS 1 as shown B344060019WE00 9 E F H J A B A C A E 4 1 1 1 1 H F 4 2 1 X8 1...

Page 10: ...Step 5 Insert the SLATS O into the slots in the SIDE RAILS J H lock O into place with Y B344060019WE00 10 O O J Y J...

Page 11: ...Step 6 B344060019WE00 11 O Q Q 6 1 6 2 6 3 W W 6 1 Press W onto O as illustrated 6 2 6 3 Press Q onto W alternating left and right...

Page 12: ...Step 7 Attach LADDER Z to SIDE RAIL H with BOLTS 3 and NUTS 4 as shown B344060019WE00 12 Z H H Z 3 3 3 4 3 X2 4...

Page 13: ...60 End Cap 1 X 4 T392510 End Cap 2 Weight Limit 200 Lbs 91 Kgs for upper bed 225 Lbs 102 Kgs for lower bed lifting and carrying the unit to it s new location reassembled to move They are illustrated o...

Page 14: ...B344060019WE00 14 WARNINGS for Bunk Bed against the wall to prevent entrapment between the bed and wall and jump ropes...

Page 15: ...oducto y descubre cual es el premio para este trimestre Como registrarse www twitter com DHPfurniture www pinterest com dhpfurniture para tener acceso a promociones de DHP Gracias por comprar un produ...

Page 16: ...rande Hay 1 caja s interna s que incluyen los componentes necesarios para completar este ensamblaje Nota Por favor no apriete completamente las piezas hasta que el las instrucciones de paso a paso ide...

Page 17: ...O 6 2 6 3 Una la parte Q en W alternando de derecha a izquierda Paso 7 Una la parte Z en H con TORNILLOS 3 y TUERCA 4 inferior de la litera y en el empaque recomendado o ambos para ayudar a prevenir l...

Page 18: ...our enregistrer votre produit et vous obtiendrez Enregistrez votre produit pour savoir le prix du trimestre Comment s inscrire Scannez le code QR ou visitez nous au www dhpfurniture com eng registrer...

Page 19: ...l vaut de 2 heures lors de l assemblage commercial enfants l assemblage Remarque A Poteau T922220 B Poteau T922210 C Poteau T931670 E Garde corps 01 T922300 F Garde corps 02 T922310 G Fin garde corps...

Page 20: ...1 2 54 1 2 POUCES DE LARGE MAXIMUM NE PERMETTEZ PAS DES ENFANTS DE MOINS DE 6 ANS D UTILISER LE LIT DU HAUT NE JOUEZ PAS SUR OU SOUS LE LIT ET NE SAUTEZ PAS SUR LE LIT NE PERMETTEZ PAS PLUS D UNE PERS...

Reviews: