


Magtec MT858 & MT8516, 8ch and 16ch DVR quick guide P.10
Switch to PLAYBACK mode by pressing “PLAY” under the LIVE mode, the graphical icon
will show up on the upper center of the screen and the operation panel ( see below picture) will
show up at right lower corner of the screen. You can drag the panel by mouse to place it on any
location of your screen.
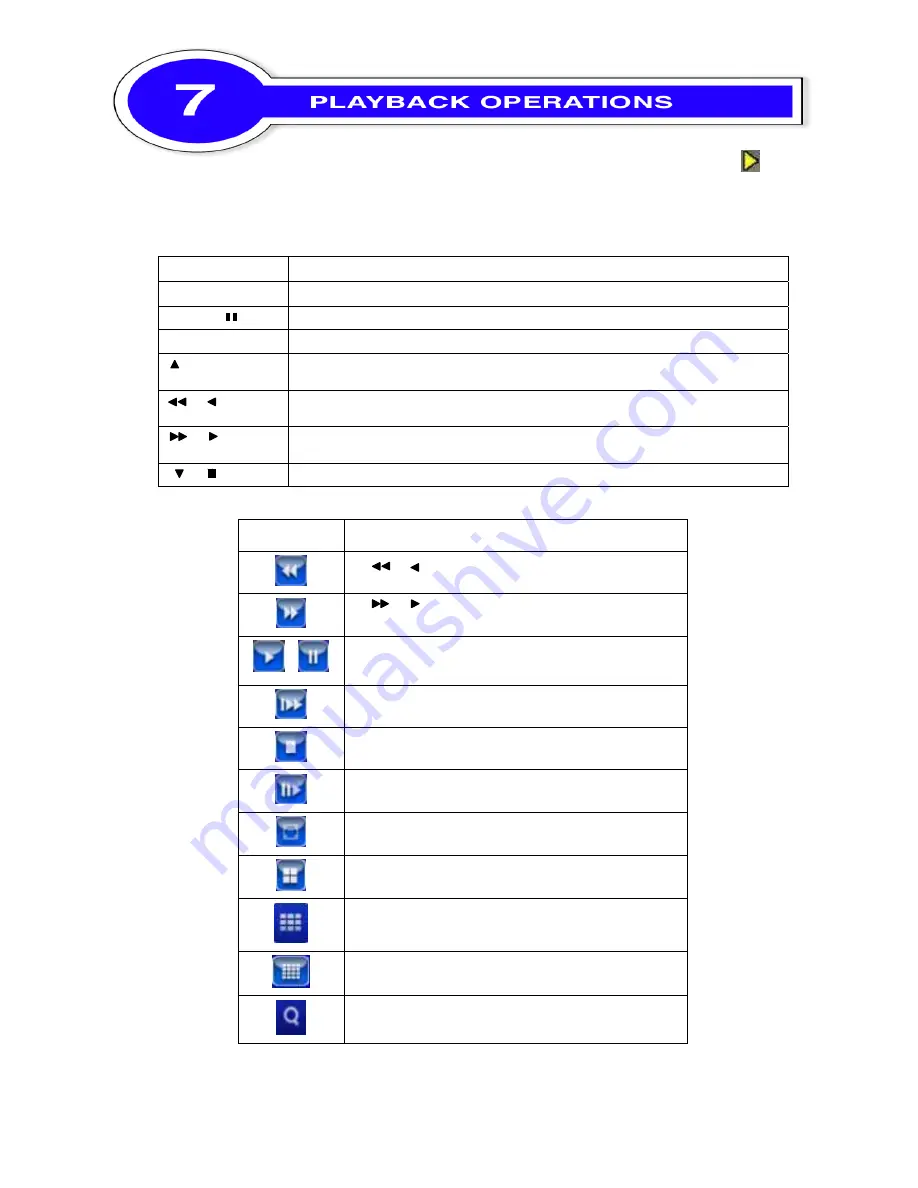
Table 7-1.1
Remote control functions under the PLAYBACK mode
Button Description
ENTER / MODE
Switch to full screen, quad
MENU /
Turn on/off PAUSE.
PLAY
Play back at normal speed.
/ SLOW
Play back at slower speed. The speed will be slowed to 1/2, 1/4, 1/8, by each
pressing of the button till the slowest limitation of the normal speed.
/
Fast rewind. Each press increases the speed to the next level. There are six
speeds: 2x, 4X, 8X, 16x, 32X and 64X.
/
Fast forward. Each press increases the speed to the next level. There are six
speeds: 2x, 4X, 8X, 16x, 32X and 64X.
/
Stop playback.
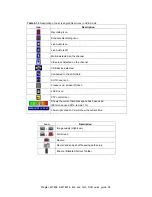
Table 7-1.2
The mouse operation under the PLAYBACK mode.
Icon Description
「
/
」
Fast rewind
「
/
」
Fast forward
∕
Play/pause
「▲
/ SLOW
」
,
slow playback
「▼
/
■」
stop playback
Playback channel by channel with snap shot display
Full screen display
Quad display
9 screen display
16-channel display
Zoom-in display
If you want to monitor single channel, please choose a channel and click left butt
on of mouse two times.