15
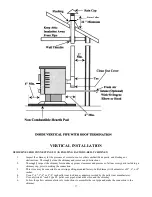
VENT TERMINATION GENERAL INSTRUCTIONS
NOTE:
The following are general instructions for installing this appliance.
THE PELLET VENT MANUFACTURER’S INSTRUCTIONS SHOULD BE
FOLLOWED FOR THE VENT PIPE BEING USED. USE ONLY 3” or 4” INCH
LISTED TYPE PL PELLET VENT PIPE.
WARNING: Shut off all electrical power to the wall or room where the appliance is going to be installed
before cutting any holes. Be careful not to drill or cut into any water lines or electrical wiring as water
damage or electrical fire may result.
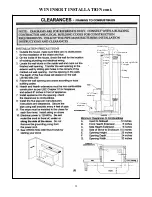
Upon determining the best location for your new appliance, maintain at least the minimum allowable clearances.
Line up a plumb bob to the flue collar on the stove with the location for the hole in the wall or ceiling before
drilling or cutting any holes. (See rear exhaust and air inlet locations under the
CLEARANCE
section of this
manual.)
Be sure to allow for any stove pad that you will be placing underneath the unit.
Prepare the vent pipe for painting (if you are painting the venting) by wiping down with straight vinegar. Rinse
vinegar off with clean water and allow the pipe to dry. Use high temperature paint as directed by the manufacturer
(the standard paint is Stove Bright Metallic Black). Let the paint dry for a couple hours before assembling.
Drill and enlarge the hole as required for installation of the wall thimble, vent pipe and components
per the pellet
vent manufacturer’s instructions.
Connect the pipe and lock the joints as directed by the pellet vent manufacturer, and secure the vent pipe to the flue
collar on the back of the stove. Add a small bead of RTV high temperature silicone around the outside edge of the
flue collar prior to securing the vent pipe. Drill and attach the vent pipe to the flue collar with sheet metal screws.
Alternate (preferred) method:
Attach the approved PL pipe adaptor on the back of the exhaust pipe located on the
rear of the appliance, secure with a 3” hose clamp and then attach all venting to the pipe adaptor.
Do not terminate the vent in any enclosed or semi-enclosed area, such as a carport, garage, attic, crawl space, under
a sun deck or porch, in a narrow walkway or closely fenced area, stairway, covered breezeway, or any other
location which can build up a concentration of flue gases.
Vent surfaces can become hot enough to cause burns if touched. Non-combustible shielding or guards may be
required.
Note:
Make sure that you leave adequate clearance between the back of the unit and the wall to allow for proper
cleaning, servicing, and for when you open the hopper lid, that it does not hit the wall. It is recommended that you
leave 4”-6” inches of clearance between the appliance and the back wall of the home.
NOTE: THE VENT PIPE SHOULD BE INSPECTED FREQUENTLY TO VERIFY THE INTEGRITY OF
THE VENTING SYSTEM AND TO INSURE THAT NO OBSTRUCTIONS OR BUILD-UP EXIST
WITHIN THE VENT PIPE. FAILURE TO INSPECT THE VENT PIPE CAN CAUSE A MALFUNCTION
OR HAZARDOUS OPERATION OF THE STOVE.
Summary of Contents for Winchester WINACI
Page 21: ...21 MAGNUM WIN INSERT INSTALLATION ...
Page 25: ...25 ...
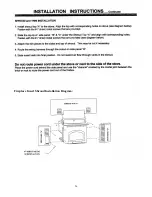
Page 26: ...Fireplace Insert Shroud Installation Diagram 26 ...
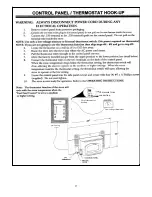
Page 27: ...27 Thermostat wire connection Low voltage thermostat Molex Plug 24 volt thermostat hookup ...
Page 42: ...42 DC MODEL DDC 3000 WIRING DIAGRAM WARNING DISCONNECT POWER BEFORE SERVICING THIS UNIT ...


