background image

14

Use Menu

Using the product menu system can easily and intuitively set the machine

to meet the user's use requirements

The all-in-one video controller uses a full-color LCD display to display the

entire user menu. When the user does not operate or the operation times out,
the default state will be displayed on the LCD screen. If you use the buttons on
the front panel of the machine to set the machine, the LCD screen will display
the corresponding menu according to the user's operation to prompt the user
to operate better, faster and more intuitively.

The following will combine the button functions and the display of the

LCD screen to introduce the menu system of the all-in-one video controller in
detail.

How to use the buttons

The front panel button of controller divide to 3 areas, MENU、LAYER、

INPUT

MENU Area:

This area contains 1 buttons and a knob that can be pressed;

button

and a knob.

Short press the "knob", its function is the same as the confirmation

button(OK) ; when press the return button(

) , the menu system will return

to the previous menu in turn, until it returns to the default state.

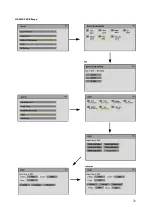
In the main menu, the enter button can also used for switch between

browsing mode and setting mode, for example:

Summary of Contents for LED-F816-3D

Page 1: ...o Control Server User Manual V1 0 Document Version V1 0 Document Release Date 2023 10 20 Before using this LED video processor please read this instruction manual carefully and keep it for future refe...

Page 2: ...tocopying recording or other possible means for commercial or commercial purposes The product specifications and information mentioned in this manual are for reference only and are subject to update w...

Page 3: ...s 8 Overview 8 Technical Specifications 12 Use Menu 12 How to use the buttons 14 MENU Area 14 LAYER Area 15 INPUT Area 15 Introduction to Default State 16 Main Menu Introduction 17 Main Menu 18 LED SC...

Page 4: ...benefit from your equipment as much as possible please follow the relevant instructions in this manual when installing and operating the product Trademark Credit VESA is a trademark of the Video Elect...

Page 5: ...achine can carry maximum width 16380 pixels and maximum height 7680 pixels Support template save and load Support connection with C Link series receiving card Support the read and load of configuratio...

Page 6: ...cable or control cable please make sure that all power cables have been unplugged beforehand When you want to add hardware devices to this product or remove hardware devices from this product please m...

Page 7: ...p it away from fire water and flammable and explosive dangerous goods There are high voltage components in this product please do not open the case or repair the device by yourself If you find any abn...

Page 8: ...ty of all in one video controller is twice of the ordinary all in one video controller and supports EDID management and customize output resolution single controller output max width can be 16380 pixe...

Page 9: ...ER 1 Rotary knob Button Description DVI2 DVI1 Layer4 Layer3 Layer2 Layer1 Return button return to the previous menu select menu items and adjust parameters INPUT7 INPUT6 INPUT5 INPUT4 INPUT3 Extend in...

Page 10: ...10 Back Panel LED F816 3D LED F816DS 3D LED F816S 3D...

Page 11: ...11 Back Panel LED F816D 3D LED F816H 3D...

Page 12: ...it load 15 68 million pixels HDMI Loop Out Can loop out HDMI2 0 input source HDMI Monitor Output monitoring OPT1 OPT2 10G Optical Fiber Interface Input Information Port Quantity Of Resolution Specific...

Page 13: ...monitoring OPT1 OPT2 2 10G Optical Fiber Interface Control Port Ethernet Communication Port Two way RJ45 control port used to connect to the host computer or multi machine cascade communication Squar...

Page 14: ...user to operate better faster and more intuitively The following will combine the button functions and the display of the LCD screen to introduce the menu system of the all in one video controller in...

Page 15: ...u want to return to the previous menu please use the return button if the adjustment is completed press the return button to return to the previous menu until the default state LAYER Area This area co...

Page 16: ...low LED F816 3D The information in the above figure is explained as follows Symbol Description Resolution Current output resolution Current screen brightness IP Machine IP address The serial number of...

Page 17: ...tion and represents backspacing to delete the entered number The numeric buttonpad is shown in the following figure Operate Introduction Open Main Menu In the default state press the rotary knob or sl...

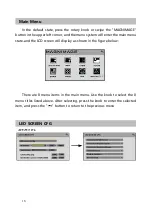
Page 18: ...nu system will enter the main menu state and the LCD screen will display as shown in the figure below There are 8 menu items in the main menu Use the knob to select the 8 menu titles listed above Afte...

Page 19: ...19 Connection Sequence Manual...

Page 20: ...20 Udisk Operation Manual Files By Local Flash...

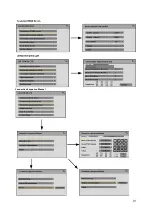
Page 21: ...licing function of the machine copy and light up multiple sending card screens Connection Sequence Man ual When the wiring method of each network port is inconsistent with the width and height quantit...

Page 22: ...st Patten Range 1 10 Cabinet Label When the cabinet label function is on the led screen will display the serial number of the network port and the serial number of the receiving card of each cabinet s...

Page 23: ...23 HDMI DP RGB Range...

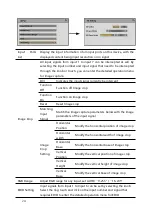
Page 24: ...Input Signal Match the image capture parameters below with the image parameters of the input signal Image Crop Setting Horizontal Position Modify the horizontal position of image crop Horizontal width...

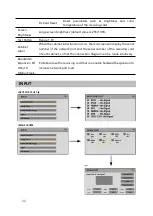
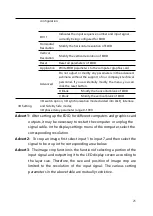
Page 25: ...The various setting parameters in the above table are mutually restrictive configuration DVI 1 Indicates the input sequence number and input signal currently being configured for EDID Horizontal Resol...

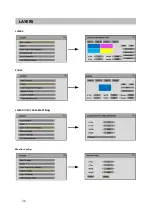
Page 26: ...26 LAYERS LAYERS ZOOM LAYER OUTPUT AREA MAPPING Monitor Config...

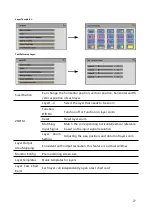
Page 27: ...om Reset Reset layer zoom Matching Input Signal Match the corresponding horizontal vertical reference based on the input signal resolution Layer Zoom Setting Adjusting the size position and datum of l...

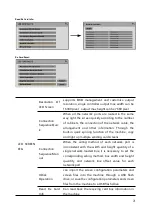
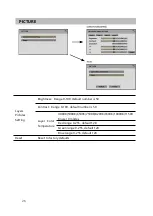
Page 28: ...t number is 50 Contrast Range 0 100 default number is 50 Layer Color Temperature 4000K 5000K 6500K 7500K 8200K 9300K 10000K 11500 K user 9 modes Red range 0 255 default 128 Green range 0 255 default 1...

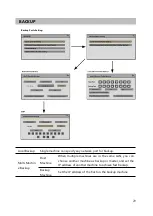
Page 29: ...rk port for backup Multi Machin e Backup Host Machine When multiple machines are in the same LAN you can choose another machine as backup or master and set the IP address of another machine to achieve...

Page 30: ...another group and they are in the same local area network Ethernet Output Depend On Layer Signal After being used as a multi machine backup this function can be used When the layer signal is lost a b...

Page 31: ...backup if the current input signal is lost it will switch to the backup preset according to priority to prevent situations such as screen blackout after signal loss Optical Port Copy Long distance tr...

Page 32: ...32 PRESETS...

Page 33: ...set Delete Preset Enter the deletion interface click the number buttons on the screen or press the rotary knob to delete the preset that has been saved Delete All Preset Delete all saved presets Time...

Page 34: ...2 delete presets will clear all presets on the machine so please use this function with caution Advert 3 Brightness tasks and preset tasks can only be used for one time task at the same time Task Type...

Page 35: ...35 MISC Video Processor Fiber Converter...

Page 36: ...36 Label Sync Lock Setting Screen Touch...

Page 37: ...It is convenient to label the areas that the machine is loaded with You can define a serial number for the machine When this function is turned on it can be displayed on the LCD screen of the machine...

Page 38: ...38 Status Info...

Page 39: ...39 Caption Test Pattern Of LCD Screen...

Page 40: ...on Three subtitles can be selected Subtitle Adjust Scrolling Speed Including stationary speed 1 speed 2 speed 3 Scrolling Direction Including Left and Right Foreground Transparency 0 100 Background Tr...

Page 41: ...screen of the machine Button Lock Machine button lock function set lock button function password 1234 Restore Factory Settings Restore this machine to its factory settings and after confirming to cont...

Page 42: ...l use reasons such as stains or surface scratches caused by machine immersion collision or use Dismantling or modification without our company s consent Failure or damage caused by use in a working en...

Reviews: