background image

10

Control unit MGC mTripod

Digital inputs, digital outputs and relay outputs

Digital inputs, digital outputs and relay outputs

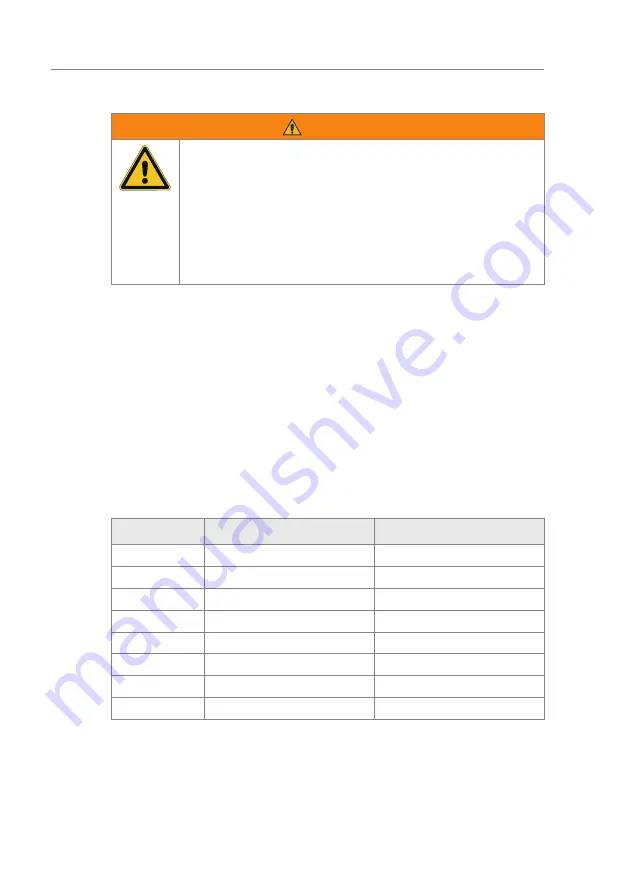
 WARNING

Improper wiring and parameterisation of the control unit!

Improper wiring and parameterisation of the control unit can 

lead to undesired functions and thus to injuries.

 ›

Only MHTM™ FlowMotion® service experts, skilled technicians 

or electrical safety experts may wire up and parameterise the 

control unit.

 ›

The electrical connection of the signal transmitters to the IN1 

to IN8 inputs must fit the parameterisation. 

Parameterisation: 

ä

 Page 18, chapter 3.

2.1 

Digital inputs

Definition of "Left" and "Right": 

ä

 Page 62, chapter 7.1.

By parameterising the inputs, you assign certain functions to the inputs. For 

example, if you parameterise the "Illumination off" function for input IN7, 

switch the illumination on and off via this input.
If the function is marked with "|", the input is inverted (closed-circuit 

principle). 

ä

 Page 54, chapter 6.3.3.

The following functions are assigned to the inputs as default settings:

Clamp

Description

Input function

IN1

Digital input 1

| Emergency open

IN2

Digital input 2

Open from left

IN3

Digital input 3

Open from right

IN4

Digital input 4

Random check function

IN5

Digital input 5

Confirm warnings

IN6

Digital input 6

Inhibit opening

IN7

Digital input 7

Illumination off

IN8

Digital input 8

| End switch drop arm

Table 3: 

Factory setting "Digital inputs"

Summary of Contents for mTripod

Page 1: ...t MGC mTripod Doc ID 5817 0025EN Version 03 1 2 3 4 5 6 7 8 1 2 3 4 1 2 3 4 5 6 IN 1 IN 2 IN 3 IN 4 IN 5 IN 6 IN 7 IN 8 C O M D O 1 D O 2 D O 3 D O 4 O V O V O V O V N O 1 N O 2 N O 3 N O 4 N O 5 N O...

Page 2: ...50 Schopfheim Germany Phone 49 7622 695 5 Fax 49 7622 695 802 info magnetic germany com www magnetic access com Original description This document is available as PDF in the Magnetic Autocontrol downl...

Page 3: ...ation 17 2 4 1 Floor illumination 17 2 4 2 Frame illumination 17 3 Parameterising the mTripod 18 3 1 Parameterisation directly at the control unit 18 3 2 Parameterisation via the MGC Connect programme...

Page 4: ...41 5 9 Switching the Service mode on and off 43 6 Description of menus and parameters 45 6 1 Information menu 45 6 2 Settings menu 46 6 2 1 Hold open time 46 6 2 2 Permanent open 46 6 2 3 Interlock 47...

Page 5: ...arance in both directions 66 7 5 Special cases within the motion sequence 67 7 5 1 Stopping in mid movement 67 7 5 2 Vandalism attempt Passage without authorisation 67 7 5 3 Vandalism attempt Turning...

Page 6: ...ntents 8 6 4 Event warning and error messages Safety controller 79 8 6 5 Event warning and error messages All modules 80 8 7 Performing reset 81 9 Menu structure 82 9 1 Menu structure directly on the...

Page 7: ...splayed in the menu Module info Designation Software SW version Gate Controller 4915 1006 2 2 MHP2 motor 4915 4003 1 5 Safety Controller 4915 3014 1 5 MGC Connect 4910 5052 1 5 Table 1 Programme versi...

Page 8: ...ent accidents as well as personal injuries and property damage Warning notes DANGER The signal word DANGER indicates an immediately dangerous situation which leads to death or severe injuries if not a...

Page 9: ...alifications Designation Qualification Technician Has completed training as a systems mechanic machinery technician installation mechanic installation technician or has comparable technical training H...

Page 10: ...puts Definition of Left and Right Page 62 chapter 7 1 By parameterising the inputs you assign certain functions to the inputs For example if you parameterise the Illumination off function for input IN...

Page 11: ...for passage from left If the signal is present for longer than 3 seconds permanent open is activated Permanent open parameter Page 46 Open from right Validation for passage from the right If the sign...

Page 12: ...u must parameterise two inputs with the function Multi valid left Multi valid right Multi validation for a passage from right Function when multiple signals are required to trigger a validation for a...

Page 13: ...utput 1 Random hit NO2 Relay output 2 Buzzer Siren alarm NO3 Relay output 3 Climbing Crawling NO4 NC4 Relay output 4 Passage clear Left NO5 NC5 Relay output 5 Passage clear Right NO6 NC6 Relay output...

Page 14: ...ted in the Permanent open operating mode Passage clear left Display for the free passage from left When the passage from left is cleared a permanent signal is output from this output You can also use...

Page 15: ...nal is to be triggered via the Buzzer Siren parameter in the Signalling menu Random hit Hits of the random check function signal transmitter The random check function generated a hit You can connect a...

Page 16: ...Fig 1 Slot numbers Slot number Terminal plug in module LED plug in module Function 1 Locking unit drop arm 1 Red Locking magnet left 2 Green Locking magnet right 3 Yellow Drop arm 2 Passage right fra...

Page 17: ...dules slot 2 OUT 1 and OUT 2 and slot 3 OUT 1 and OUT 2 by default You can switch the frame illumination on and off via the Illumination off input function The following conditions are signalled via t...

Page 18: ...pedestrian gate 3 1 Parameterisation directly at the control unit The control unit can be accessed when the cover is dismounted IN A C C E S S TO P R O G R E S S X20 DO5 OUT 0V 0V EN P P E D O I X11...

Page 19: ...length of 3 meters Additional options Ethernet module EM01 for connection via Ethernet System requirements laptop Windows 10 or higher NET Framework 4 5 or higher USB connection 3 2 1 Establishing th...

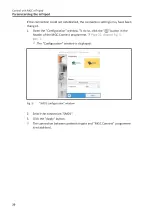
Page 20: ...ged 1 Open the Configuration window To do so click the button in the header of the MGC Connect programme Page 22 chapter Fig 5 pos 1 The Configuration window is displayed Fig 3 SM01 configuration wind...

Page 21: ...2 Check whether the LEDs on the EM01 Ethernet module are flashing If the LEDs flash the Ethernet module is connected correctly 3 If necessary set the IP address of the Ethernet module DHCP is activate...

Page 22: ...T If necessary download and update via the SM Downloader programme 4 Description of the MGC Connect programme 4 1 Overview Fig 5 Exemplary view MGC Connect 1 Button to open the Configuration window 2...

Page 23: ...urrently being established Connection available The pedestrian gate and the MGC Connect programme are connected If you click on the Disconnect button the connection is interrupted Table 9 Description...

Page 24: ...een right depending in the parameterisation of the GED mode right parameter If no LED symbol is displayed the option Off has been set for the parameter GED mode right Page 49 chapter 6 2 6 3 Current p...

Page 25: ...resh Acknowledge button the warning is confirmed and the display is refreshed ERROR There is an error After correcting the fault and a reset you can acknowledge the fault and refresh the display via t...

Page 26: ...GC Connect programme Symbol Description The random check function generated a hit Table 10 Status display Description symbols 4 4 Passage control tab Use the Passage control tab to test the behaviour...

Page 27: ...n from left A passage from left is possible Test input function Inhibit opening Lock the pedestrian gate in both passage directions and delete validations No opening signals are accepted anymore Test...

Page 28: ...and Random check function Use the Settings tab to check and adjust the settings Fig 9 Settings tab General section Button Description Read Read current settings from the control unit MGC into the MGC...

Page 29: ...Buzzer Siren parameter Page 49 Movement Signal move parameter Page 49 GED left GED mode left parameter Page 50 GED right GED mode right parameter Page 50 Table 14 Settings tab Signalling section Rando...

Page 30: ...gn the blocking element for the Closed 0 position Fig 10 Service tab Align positions section 4 6 1 Align blocking element for the Closed position Procedure IMPORTANT After you have clicked the button...

Page 31: ...n you have 10 seconds to move the blocking element The remaining time is displayed in the Align positions section Experte Deactivate motor Disconnect the motor from mains You can move the blocking ele...

Page 32: ...C control unit is the menu language English Change the menu language as follows The operational view is displayed Mag00826 10 FlowMotion mTripod M 1 0 Fig 11 Example Operational view 1 Press right ope...

Page 33: ...a Settings In Outputs Service System Main menu Fig 13 Main menu Settings view 4 Select the System menu with the two middle buttons Mag00820a Settings In Outputs Service System Main menu Fig 14 Main me...

Page 34: ...ench Mag00822 English Language Fig 16 Language English view 7 Select the language German with the two middle buttons The language German has a dark background French Mag00823 German English Language F...

Page 35: ...anges view 10 Push the left button if you do not want to save the changes The menu language English remains active 11 Confirm safety prompt with the right button The new menu language German is activa...

Page 36: ...is required the following view is displayed Mag00818 0 Password Fig 21 Password view 1 Use the two middle buttons to enter the first digit of the password 2 Use the right button to select the second d...

Page 37: ...g00829 0 Password Fig 23 Enter fourth digit of the password view 7 Use the two middle buttons to enter the fourth digit of the password 8 Confirm the password with the right control button 5 3 Control...

Page 38: ...enu Main menu 5 Validations validation pulses for passage from right here blocked 6 Hold open time for passage from right here blocked 7 Operating display here passage from left is released 8 Current...

Page 39: ...current menu level The next higher menu level is displayed Access next lower menu level Select desired option or desired value When the desired option was selected the symbol is displayed Option was...

Page 40: ...000 There is an information Check the Information menu To do this press the left operating button There is a warning Check the Information menu To do this press the left operating button There is an e...

Page 41: ...on Page 36 chapter 5 2 5 8 Parameterising value Example Change hold open time The operational view is displayed Page 38 Fig 25 1 Press the right button The Main Menu menu is displayed 2 Select the Set...

Page 42: ...ges are to be saved press the right button The new hold open time is activated If the changes are not to be saved press the left button The previous hold open time remains active The Settings menu is...

Page 43: ...in the operating display changes Switching the Service mode off After the service work the switch Service must be switched The LED must light green SERVICE BAT F IN A C C E S S TO P R O G R E S S X20...

Page 44: ...mode Signals via the inputs of the control unit or via the interface are ignored In Service mode you can control the motor with the two middle control buttons Middle left button Open the pedestrian g...

Page 45: ...time Use the and buttons to navigate through the messages If no messages are present the menu is not displayed Inputs Displays the current settings for the digital inputs IN1 to IN8 Separate inputs ca...

Page 46: ...akes place Setting range 0 to 60 s Factory setting 7 s Table 20 Hold open time 6 2 2 Permanent open Operational view Main menu Settings Permanent open Parameter Description Permanent open You use this...

Page 47: ...ty Security Operational view Main menu Settings Safety Security Parameter Description Security mode Adjust the security mode for breakthrough attempts Options Without locking Select the Without lockin...

Page 48: ...nal view Main menu Settings Vend count Parameter Description Counter left Displays the current counter for validations in Left direction Counter right Displays the current counter for validations in R...

Page 49: ...Error Random hit Passage Climbing Crawling Options Deactivated X Activated Factory setting Vandalism X Signal move Activate and deactivate the Signal move function If the function has been activated...

Page 50: ...n The display is red during a passage in the opposite direction Standby off The display is off when locked When released the display turns green The display is red during a passage in the opposite dir...

Page 51: ...ion is blocked by the random check function the following symbol appears on the display of the control unit For the random check function you can choose between Counting or Random modes You activate t...

Page 52: ...e For example if you set the value 100 for the Hit range parameter and 10 for the Count of hits parameter hits are generated randomly for 10 people out of 100 A hit is confirmed via the Random check f...

Page 53: ...er the validation is to be deleted automatically in the event of a random hit Options Activated X Select this option if you want the check to take place before the passage The user leaves the area via...

Page 54: ...ional floor illumination and frame illumination are switched off as soon as a voltage of 24 V is applied to this input If the illumination is to be switched off as soon as a voltage of 0 V is applied...

Page 55: ...menu This menu is only intended for Magnetic s service and only accessible with a password 6 4 1 Gate HW Operational view Main menu Service Gate HW Parameter Description Homing offset Mechanical toler...

Page 56: ...g offset parameter is adjusted Options Deactivated X Activated Factory setting Deactivated Drop arm For turnstiles with Drop arm option select the X Activated option For turnstiles without Drop arm op...

Page 57: ...with the one for the Service menu Factory setting OFF Table 28 Service Further parameters 6 5 System menu Operational view Main menu System Parameter Description Language Select menu language Factory...

Page 58: ...tage Display of the logic voltage from hardware version E X20 EN Display of the analogue voltage 0 10 V at the terminal X20 EN from hardware version E onwards PSU FB Feedback signal of the mains unit...

Page 59: ...HP1 motor Operational view Main menu Motor GW Parameter Description Motor temperature Display of the current motor temperature Motor SW Display of the present motor software Information Displays infor...

Page 60: ...r settings as factory settings The current parameter settings are stored as factory settings These factory settings can be used to receive project specific settings Default settings as factory setting...

Page 61: ...is displayed 2 Select the menu Factory setting with the two middle buttons 3 Confirm selection with the right control button 4 Enter Service Password 5 Confirm password with the right control button...

Page 62: ...ion description 7 Function description 7 1 Definition of left and right Mag00833 2 1 Fig 28 Definition of left and right 1 Left function Open from left for a passage from left 2 Right function Open fr...

Page 63: ...ement completely The brake has been activated Depending on the configuration of the inputs only one direction can be released The free and the blocked directions can be signalled via optional displays...

Page 64: ...Start up routine for turnstiles without Drop arm option Turnstiles without Drop arm option are immediately ready for operation after the reference run Start up routine for turnstiles with Drop arm opt...

Page 65: ...ection the hold open time is deleted immediately Then it is no longer possible to return the blocking element in the other direction The passage must be completed in the cleared direction In this oper...

Page 66: ...lse operation it is still possible to pass the pedestrian gate in the permanent open direction After a successful passage the hold open time for the validation is set again in pulse operation After re...

Page 67: ...the home position in a direction that is not released the turnstile immediately tries to hold the position of the blocking element with maximum force until the user no longer pushes the blocking elem...

Page 68: ...unction Buzzer Siren alarm is set The output function Vandalism is set The output function Buzzer Siren alarm is parameterised ex works for the event Vandalism The output function Vandalism is not par...

Page 69: ...vere injuries Observe possible movements of the blocking element Defective control may lead to inadvertent movement of the blocking element In case of damaged components take the pedestrian gate out o...

Page 70: ...Control unit defective Replace the control unit MHTM FlowMotion service expert Locking signal present Remove locking signal Check input function Inhibit opening Page 11 MHTM FlowMotion service expert...

Page 71: ...ssages Messages are displayed and signalled as follows Status display in the MGC Connect programme Page 25 Fig 7 On the display of the MGC control unit The output with the function Error is deactivate...

Page 72: ...ou can generate a current system report for the pedestrian gate The system report contains an event log with additional information about a fault message such as Node name Page 30 chapter 4 6 1 Correc...

Page 73: ...it If the error remains perform the update again via the service module 6101 ERROR Software error VS Software error Perform software update 6102 ERROR Software error System bus Within the control an e...

Page 74: ...uration of the safety controller is not consistent Reset parameters to factory settings Page 60 chapter 6 10 7530 WARNING Motor MPH2 Communication faulty No motor connected Cables and or plugs to the...

Page 75: ...er voltage Ucc Over voltage detected Vandalism or mains unit defective Check mains unit 3211 ERROR Over voltage Udc Over voltage detected Vandalism or mains unit defective Check wiring Check mains uni...

Page 76: ...erform software update Replace motor 5030 ERROR Hardware I2C Perform reset Page 81 chapter 8 7 Perform software update Replace motor 5040 ERROR Hardware SPI Perform reset Page 81 chapter 8 7 Perform s...

Page 77: ...ection with an impact If no impact has occurred check the wiring If required contact Service 3211 WARNING Over voltage Over voltage detected Warning may occur in connection with an impact If no impact...

Page 78: ...between motor and control disturbed or interrupted Check wiring If required contact Service FF36 WARNING Motor reset Homing is performed automatically A short overload or drop of the voltage supply o...

Page 79: ...ty Perform reset Page 81 chapter 8 7 Reset parameters to factory settings Page 60 chapter 6 10 Perform software update FFB1 WARNING Emergency stop The speed or torque has been exceeded during movement...

Page 80: ...eatedly replace the control unit MGC 5532 WARNING EEPROM 2 checksum After a software update Perform reset Page 81 chapter 8 7 If the error occurs repeatedly replace the control unit MGC 5600 WARNING M...

Page 81: ...gain after 10 s Press the two middle operating buttons on the control unit display for 5 s In the MGC Connect programme click on the Service tab and select the Reset button NOTICE Restarting quickly R...

Page 82: ...structure directly on the control unit MGC Mag00835b 10 FlowMotion mTripod M 1 0 System Passage counter Information Main menu Settings Error Warning Event messages Inputs Modul info Outputs In Output...

Page 83: ...ld open time Permanent open Interlock Holding force Random check function Passage counter Safety mode Mode Hit range Count of hits Delete validation Direction Safety Security Vend count Counter left C...

Page 84: ...igital inputs 1 8 Digital outputs 1 4 Relay outputs 1 6 System Passage counter Information Motor MHP2 Factory settings Service Cycles Fraud L Lifetime Main menu password Fraud R System time Gate HW Ho...

Page 85: ...emperature Information Syst me Information Motor MHP2 Factory settings Service Passage counter Temperature Date Time Language Software Logic voltage Hardware version SW version Serial no From right Fr...

Page 86: ...86 Control unit MGC mTripod...

Page 87: ...58 59 Menu 58 Operating display menu 45 Inhibit opening 11 Inputs 10 45 Factory setting 10 Interlock 47 Index Symbole Emergency open 11 End switch drop arm 12 Error 14 Over climb detection 11 Under cr...

Page 88: ...52 Random check function 12 51 Random hit 15 Reference run 64 Relay outputs 10 13 Reset 81 Restore factory settings 60 Right Definition 62 Rotating from left 14 Rotating from right 14 Inverted In Out...

Page 89: ...01 19 Settings 46 MGC Connect 28 Signalling 49 Signal move 49 Software 58 Start up routine With drop arm 64 SW version 58 System Menu 57 System time 56 T Target groups 9 Temperature 58 U Under crawl d...

Page 90: ...90 Control unit MGC mTripod...

Page 91: ...91 Control unit MGC mTripod...

Page 92: ...TIC AUTOCONTROL GMBH Grienmatt 20 D 79650 Schopfheim Germany Phone 49 7622 695 5 Fax 49 7622 695 802 info magnetic germany com www magnetic access com Sales partner Doc ID 5817 0025EN Version 03 F1004...

Reviews: