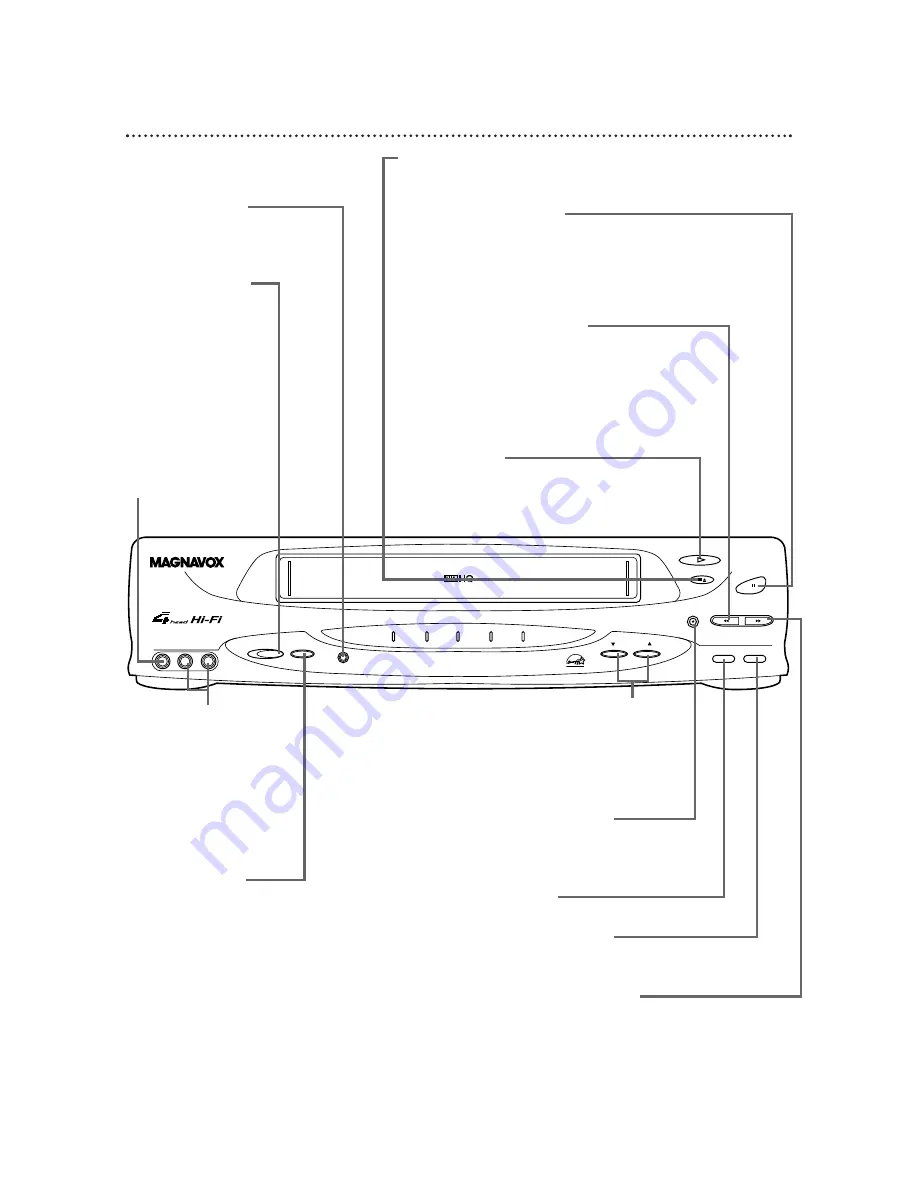
22 Front Panel
PAUSE Button
While recording, press to pause the recording. Press
again to resume recording. Details are on page 25. You
can not pause a One-Touch Recording. During tape
playback, press to freeze the picture. Press again to
resume playback. Details are on page 36.
POWER Button
Press to turn the
VCR power on and off.
VCR/TV Button
Press to select VCR or TV position.
●
VCR Position
Use to watch a tape, to watch a program
while recording it, or to watch a TV pro-
gram (changing channels at the VCR). When
the VCR/TV light appears on the display
panel, the VCR is in VCR position.
●
TV Position
Use to watch TV (changing channels at the
TV) or to watch one program while record-
ing another. When the VCR/TV light does
not appear on the display panel, the VCR is
in TV position.
REC(ord)/OTR Button
Press once to start a recording. Press
repeatedly to start a One-Touch
Recording. Details are on page 27.
CHANNEL (
p
/
o
) Buttons
Press to change channels at the VCR.
Or, press to adjust the tracking of a
tape during normal playback or slow
motion playback. Also, press to
remove vertical jitter in a Still picture.
PLAY Button
Press to play a tape. Press to release Slow,
Search, or Still mode and return to play-
back. Details are on page 36. Press to
select an item in the menu.
REW(ind) Button
When playback is stopped, press to
rewind the tape at high speed.
During playback, press to rewind the
tape while the picture stays on the
screen. Details are on page 36. Press
to return to a previous menu.
STOP/EJECT Button
Press once to stop the tape. When playback is stopped,
press to eject the tape. Press to select an item in the menu.
F.FWD (Fast Forward) Button
When playback is stopped, press to fast forward the tape at
high speed. During tape playback, press to fast forward the
tape while the picture stays on the screen. Details are on
page 36. Press to advance to the next menu or to change
the setting of an item in the menu.
STOP/EJECT
REC/OTR
MENU
STATUS/EXIT
F.FWD
PAUSE
REW
CHANNEL
PLAY
POWER
POWER
VCR/TV
VCR/TV
CST.IN
TIMER
REC
VIDEO
L - AUDIO -R
Remote Sensor
Receives a signal from your
remote control so you can oper-
ate your VCR from a distance.
VR601BMX
AUDIO In Jacks
Connect audio cables com-
ing from the audio out jacks
of a camcorder, another
VCR, or an audio source
here. Details are on page 32.
The VR601BMX is shown
here. The VR401BMX has
only one AUDIO IN jack.
VIDEO In Jack
Connect a cable com-
ing from the video
out jack of a cam-
corder, another VCR,
or an audio-visual
source (laser disc
player, video disc
player, etc.) here.
Details are on page 32.
MENU Button
Press to access the VCR menu.
STATUS/EXIT Button
Press to access or remove the on-screen status display.
Details are on page 20. Press to exit on-screen menus.