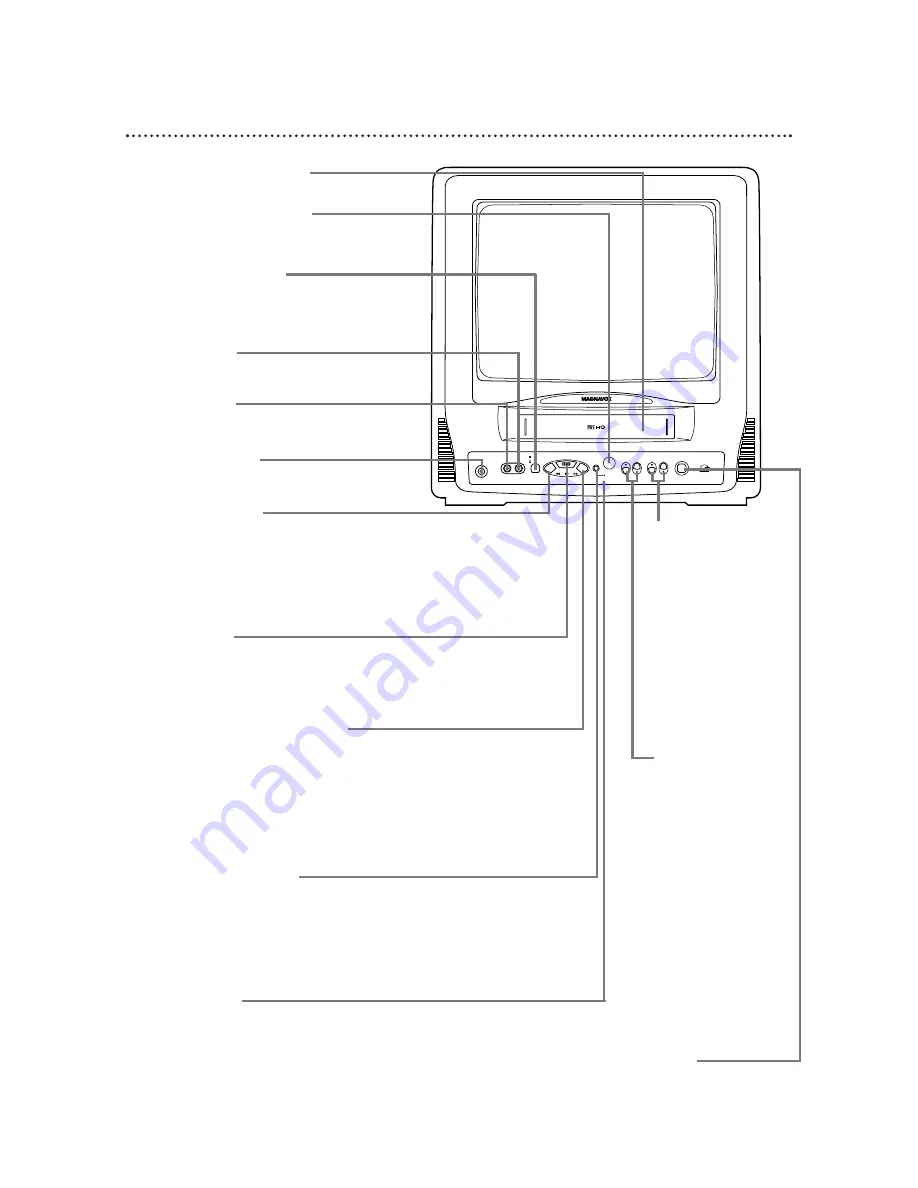
20 Front Panel
AUDIO VIDEO
STOP
EJECT
REW
PLAY
F.FWD
REC
OTR
CHANNEL
VOLUME
POWER
EARPHONE
Cassette Compartment
Insert a video cassette tape here.
POWER Button
Press to turn the power on or off.
VOLUME
o
/
p
Buttons
Press to adjust the
sound level.
Press the CHANNEL
o
button and the
VOLUME
p
button
on the TV/VCR at
the same time to
display the main menu.
Press again to remove
the main menu.
STOP/EJECT Button
Press once to stop the tape. When playback
is stopped, press to eject the tape. Press to
select an item in the menu.
PLAY Button
Press to play a tape. Details are on page 28.
Press to release Search or Still mode and
return to normal playback. Details are on page
41. Press to select an item in the menu.
REC(ord)/OTR Button
Press once to start a recording. Details are on
page 29. Press repeatedly to start a One-
Touch Recording (an immediate timed
recording, 30 minutes to eight hours long) of
the channel you are watching. Details are on
page 30.
REW(ind) Button
When tape playback is stopped, press to rewind
the tape at high speed. During playback, press to
rewind the tape while the picture stays on the
screen. Press to change a setting of a menu item
(for example, to adjust the BRIGHTNESS) or to
return to a previous menu.
F.FWD (Fast Forward) Button
When tape playback is stopped, press to fast
forward the tape at high speed. During play-
back, press to fast forward the tape while the
picture stays on the screen. Press to change a
setting of a menu item (for example, to adjust
the BRIGHTNESS) or to advance to the next
menu.
Record Light
This light appears during a recording. It flashes slowly when
the TV/VCR power is off for a timer recording. It blinks
rapidly when a recording is paused or when the power is off
for a timer recording, but there is no tape in the TV/VCR. It
will blink rapidly two minutes before a timer recording is set
to begin if the TV/VCR power is on.
Wireless Remote Sensor
Receives a signal from your remote control so
you can operate the TV/VCR from a distance.
CHANNEL
o
/
p
Buttons
Press to scan through
the TV/VCR’s memo-
rized channels. During
tape playback, press to
adjust the tracking.
Details are on page 52.
Press the CHANNEL
o
button and the
VOLUME
p
button
on the TV/VCR at
the same time to
display the main menu.
Press again to remove
the main menu.
EARPHONE Jack
Connect earphones (not supplied) here for
personal listening.
AUDIO In Jack
Connect this jack to the audio out jack of a
camcorder or a VCR. Details are on page 31.
VIDEO In Jack
Connect this jack to the video out jack of a
camcorder or a VCR. Details are on page 31.
CC13C1MG
Summary of Contents for CC13C1MG
Page 57: ...RENEWED 90 DAY LIMITED WARRANTY...
Page 59: ......


