background image

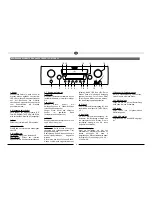
1  Power

Schaltet das Gerät ein, wenn es sich im

Standby Modus befindet. Leuchtet die

LED nicht, müssen Sie den Netzschalter

auf der Rückseite des Gerätes

einschalten. Umgekehrt kann das Gerät

vom Power-Betrieb auf Standby

geschaltet werden.

2  Eingangswahlschalter

Zur Auswahl der Eingangsquelle (CD,

TUNER, PHONO, TAPE, AUX, LINE). Sie

wird kurz auf dem Display (15) angezeigt.

3  Eject

Öffnet oder schließt die CD Schublade.

4  Play/Pause CD

Startet bzw. unterbricht die Wiedergabe

einer CD. 

5  Stop/Memory

CD Betrieb: Stoppt eine laufende CD.

Radiobetrieb: Öffnet den internen

Speicher für die Sendervoreinstellungen.

6, 7  Search/Auto tuning

CD Betrieb: 

Ein kurzer Tastendruck startet die Suche

(aufwärts/abwärts), ein weiterer stoppt

sie.

Radiobetrieb:

Kurzer Druck: Ändert die

Emfangsfrequenz in 50kHz-Schritten

(manuelle Sendersuche)

Langer Druck: Sucht den nächsten

Sender im gewählten Band

(automatische Sendersuche)

8  FM/AM

Schaltet zwischen FM-stereo, FM-mono

und AM (nur mono) um.

9  Tone/Skip/Balance/Preset

CD Betrieb: Durch Drehen können die

nächsten und vorangegangenen Titel

ausgewählt werden.

Radiobetrieb: Durch Drehen können die

Sendervoreinstellungen abgerufen

werden.

Drückt man den Knopf, können Bässe,

Höhen und Balance eingestellt werden 

(Display: BASS, TREBLE, L/R). Durch

Drehen kann die jeweilige Einstellung

geändert werden. Ferner kann DSM

(Direct Sound Mode) aktiviert werden,

das jede Klangregelung abschaltet.

10  Line-in

3,5 mm Stereo-Klinkeneingang für eine

zusätzliche Audioquelle (MP3-Player 

o. ä.).

11  Kopfhörer

3,5 mm Stereo-Klinkenausgang für

Kopfhörer. Bei Benutzung schalten sich

die Lautsprecher aus. Stellen Sie die

Lautstärke niedrig, wenn Sie einen

Kopfhörer anschließen.

12 Lautstärkeregler

Stellt die Lautstärke ein. Um von

minimaler auf maximale Lautstärke zu

stellen, benötigen Sie etwa 2

Umdrehungen. Die Lautstärke wird dabei

im Display (15) angezeigt. (VOL 00 –

VOL 40/max)

13  Sensor für Fernbedienung

Um die Fernbedienung zu benutzen,

zielen Sie bitte auf diese Stelle.

14  CD-Schublade

Legen Sie die CD mit der Beschriftung

nach oben in diese Schublade.

15  Display

Zeigt Ihnen Ihre vorgenommenen

Einstellungen an.

16  SACD Anzeige

Zeigt Ihnen an, ob eine SACD eingelegt

ist.

1

4

2

3

5

6

7 8 9

10

11

12

14

15

13

16

D

5

BEDIENUNGSELEMENTE UND ANSCHLÜSSE - FRONT PANEL

Summary of Contents for MC 1

Page 1: ...MC 1 Wichtige Hinweise zur Installation Important notes for installation Mode d emploi Avvertenze importanti per l installazione Notas importantes sobre la instalación SACD CD RECEIVER ...

Page 2: ...3 D 11 GB 19 F 27 I 35 E 43 RUS ...

Page 3: ...liche Audiogeräte 7 Inbetriebnahme 7 Fernbedienung 8 Funktionen des MC 1 8 Funktionen des CD Spielers 8 Funktionen des Tuners 9 RDS Radio Data Service Funktionen des Tuners 9 Klangeinstellungen 9 Sleep Funktion 10 Weitere wichtige Hinweise 10 Technische Daten 1 Bedienungsanleitung 2 Fernbedienung 3 Batterien für Fernbedienung 2x AA 4 Netzkabel 5 MW Rahmenantenne 6 UKW Innenantenne D 3 1 2 3 4 5 6 ...

Page 4: ...eit nicht benutzt ist das Gerät mittels des Netzschalters POWER auf der Rückseite des Gerätes auszuschalten Bei Gewitter bitte den Netzstecker ziehen Das Gerät nur mit einem 3poligen Stromkabel mit Schutzleiter Erde anschließen Dieses gehört zum Originalzubehör Verwenden Sie nur dieses Originalzubehör zur Stromversorgung oder ein auf Sicherheit geprüftes Stromkabel z B mit TÜV oder VDE Zertifikat ...

Page 5: ...hsten und vorangegangenen Titel ausgewählt werden Radiobetrieb Durch Drehen können die Sendervoreinstellungen abgerufen werden Drückt man den Knopf können Bässe Höhen und Balance eingestellt werden Display BASS TREBLE L R Durch Drehen kann die jeweilige Einstellung geändert werden Ferner kann DSM Direct Sound Mode aktiviert werden das jede Klangregelung abschaltet 10 Line in 3 5 mm Stereo Klinkene...

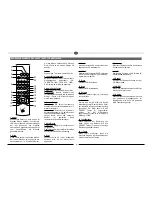
Page 6: ...sten Sendervoreinstellung 8 Play Wenn sich eine CD in der Schublade befindet wird sie mit dieser Taste abgespielt 9 Pause Hält eine laufende CD an oder lässt eine angehaltene CD weiterlaufen 10 SACD Schaltet bei eingelegter SACD zwischen SACD und CD Layer um Nur bei SACD Hybrid Discs möglich 11 Eject Öffnet die CD Schublade 12 Stop Stoppt die CD Wiedergabe 13 Volume Erhöht oder verringert verringe...

Page 7: ...eine Hausantennenanlage 1 2 3 7 8 9 6 4 5 12 10 11 Stellen Sie das Gerät unter Berücksichtigung der Mindestabstände auf eine feste ebene Unterlage LAUTSPRECHER Das Stereo Lautsprecherpaar Impedanz 4 bis 8 Ohm wird wie folgt auf der Rückseite angeschlossen Verwenden Sie nur hochwertige Audio Lautsprecherkabel mit einem Leiterquerschnitt von min 1 5 2 5mm Isolieren Sie die Kabel ca 10 mm ab und verd...

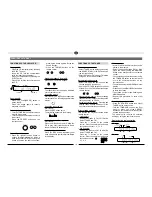
Page 8: ... AM Tasten AM mono FM mono oder FM stereo als Band aus Automatische Sendersuche TUNER als Audioquelle und Band auswählen siehe oben Benutzen Sie die AUTO TUNE Tasten auf der Front des MC 1 oder die TUNING Tasten auf der Fernbedienung Manuelle Sendersuche Kurzer Druck auf die Tasten erhöht bzw verringert die Abstimmfrequenz um 50 kHz Automatische Sendersuche langer Druck auf die Tasten sucht den nä...

Page 9: ...it der SLEEP Taste können Sie die Ausschaltzeit um jeweils 10 Minuten verkürzen Mit SLEEP 00 schalten Sie den Sleep Modus aus Nach dem Einstellen der Zeit schaltet sich das Display automatisch in den vorigen Zustand zurück Der eingeschaltete Sleep Modus wird aber weiterhin angezeigt Anzeige während des Radiobetriebs FM stereo FM mono RDS RADIO DATA SYSTEM FUNKTIONEN DES TUNERS RDS ist ein System m...

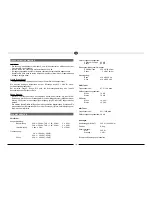
Page 10: ... oder einem Moving Coil System mit hochpegeligem Ausgang High Output MC angeschlossen werden Die meisten dieser Geräte verfügen über eine zusätzliche Masseleitung Schrauben Sie diese bitte auf der Rückseite des MC 1 mit der Schraube 10 fest um die Neigung zum Brummen zu minimieren TECHNISCHE DATEN Verstärker Ausgangsleistung Nennleistung 20 Hz 20 kHz THD 1 0 4 Ohm 2 x 80 W 20 Hz 20 kHz THD 1 0 8 O...

Page 11: ...ennas 15 Auxiliary audio devices 15 Initial operation 15 Remote control 16 Functions of the MC 1 16 Functions of the CD player 16 Functions of the tuner 17 RDS Radio Data Service functions of the tuner 17 Sound settings 18 Sleep function 18 Other important information 18 Specifications ACCESSORIES 1 Instruction manual 2 Remote control 3 Batteries for remote control 2x AA 4 Mains cable 5 MW loop an...

Page 12: ...device is not going to be used for a prolonged period switch it off by using the power switch 2 located on the rear of the device see the section entitled Rear connections Please remove the mains plug in the event of thunderstorms 10 cm 10 cm 10 cm Only connect the device using a 3 pin power cable with ground wire earth This is part of the original accessories Only use this original accessory for ...

Page 13: ...ono 9 Tone Skip Balance Preset CD operation Turning the knob selects the next and previous tracks Radio operation Turning the knob calls up the station presets The bass treble and balance can be adjusted by pressing the knob display BASS TREBLE L R The respective setting can be adjusted by turning the knob DSM Direct Sound Mode can also be switched on which deactivates any sound settings 10 Line i...

Page 14: ...ps to the next or previous track Radio operation Skips forwards backwards to the nearest station preset 8 Play Plays the CD if there is one located in the CD compartment 9 Pause Pauses a CD or resumes playback from a paused CD 10 SACD Switches between the SACD and CD layer if an SACD has been inserted only possible for SACD hybrid discs 11 Eject Opens the CD compartment 12 Stop Stops CD playback 1...

Page 15: ...connection For connecting the supplied FM indoor antenna or a house antenna Place the device on a firm even surface while paying attention to the minimum distances SPEAKERS The stereo speakers impedance of 4 to 8 ohms are connected to the rear as follows Only use high quality audio speaker cables with a conductor cross section of min 1 5 2 5mm Strip approx 10 mm from the cables and twist the ends ...

Page 16: ...ns Automatic station search Select TUNER as the audio source and choose the band see above Use the AUTO TUNE buttons on the front of the MC 1 or the TUNING buttons on the remote control Manual station search Briefly pressing these buttons increases or decreases the tuning frequency by 50 kHz Automatic station search Pressing and holding these buttons searches for the next or previous station on th...

Page 17: ...gain will display the station frequency and another press will display the CT time SOUND SETTINGS Setting the volume The volume can be adjusted by using the VOLUME regulator on the front panel or on the remote control VOL and a value between 00 and MAX 40 then appears in the display MUTE on the remote control The sound can be deactivated using this button MUTING flashes on the display The sound ca...

Page 18: ... of the MC 1 are designed for RCA cables If you should have any further queries please refer to the operating instructions for the respective device Phono input The MC 1 has a high quality phono preamplifier with RIAAequalisation Only record players with a magnetic system MM or a moving coil system with high level output high output MC may be connected here Most of these devices have an additional...

Page 19: ...s 23 Appareils audio supplémentaires 23 Mise en marche 23 Télécommande 24 Fonctions du MC 1 24 Fonctions du lecteur de CD 24 Fonctions du tuner 25 RDS Radio Data Service Fonctions du tuner 25 Réglages de la sonorité 26 Fonction Sleep 26 Autres consignes importantes 27 Caractéristiques techniques ACCESSOIRES 1 Manuel d instruction 2 Télécommande 3 Piles pour la télécommande 2x AA 4 Câble secteur 5 ...

Page 20: ...longée éteindre l appareil à l aide de l interrupteur d alimentation 2 situé sur la face arrière de l appareil cf le chapitre Face arrière connexions En cas d orage débranchez le cordon d alimentation Branchez l appareil uniquement à l aide d un câble d alimentation tripolaire doté d un conducteur de protection terre Celui ci fait partie des accessoires d origine Utilisez uniquement cet accessoire...

Page 21: ...éo FM mono et AM uniquement en mono 9 Tone Skip Balance Preset Mode CD les plages suivantes ou précédentes peuvent être sélectionnées en tournant ce bouton Mode radio les préréglages des stations de radio peuvent être consultés en tournant ce bouton Une pression sur ce bouton permet de régler les basses les aigus et la balance écran BASS TREBLE L R Chaque réglage peut alors être modifié en tournan...

Page 22: ... de passer à la plage suivante ou précédente Mode radio permet de passer à la station de radio préréglée suivante ou précédente 8 Play Si un CD se trouve dans le tiroir de CD celui ci est lu à l aide de cette touche 9 Pause Permet d interrompre un CD en cours de lecture ou de reprendre la lecture d un CD 10 SACD Si un SACD est inséré cette touche permet de commuter entre SACD et CD Possible unique...

Page 23: ... un système d antennes domestique Posez l appareil sur une surface plane et solide en respectant les écartements minimum HAUT PARLEURS La paire de haut parleurs stéréo impédance comprise entre 4 et 8 ohms est connectée sur la face arrière de la manière suivante Utilisez uniquement des câbles audio pour haut parleurs de haute qualité possédant une section de conducteur d au moins 1 5 2 5 mm Dénudez...

Page 24: ...ez AM mono FM mono ou FM stéréo comme bande Recherche automatique des stations de radio Sélectionnez TUNER comme source audio puis une bande voir ci dessus Utilisez les touches AUTO TUNE situées sur le panneau frontal du MC 1 ou les touches TUNING de la télécommande Recherche manuelle des stations de radio Une brève pression sur les touches permet d augmenter ou de réduire de 50 kHz la fréquence d...

Page 25: ... appuyant encore une fois sur la touche RDS RADIO DATA SERVICE FONCTIONS DU TUNER REGLAGES DE LA SONORITE Réglage du volume sonore Le volume sonore peut être réglé à l aide des boutons de réglage VOLUME situé sur le panneau frontal ou sur la télécommande VOL s affiche alors à l écran avec une valeur comprise entre 00 et MAX 40 Touche MUTE de la télécommande Cette touche permet de mettre en sourdin...

Page 26: ...nir des informations supplémentaires consultez la notice d utilisation des appareils que vous souhaitez raccorder Entrée Phono Le MC 1 dispose d un préamplificateur phono de haute qualité doté de la correction RIAA Seuls des tourne disques à système magnétique MM ou à système à cadre mobile dotés d une sortie de haut niveau High Output MC peuvent y être branchés La plupart de ces appareils dispose...

Page 27: ...enne 31 Dispositivi audio supplementari 31 Messa in funzione 31 Telecomando 32 Funzioni del MC 1 32 Funzioni del lettore CD 32 Funzione del sintonizzatore 33 Funzioni RDS Radio Data Service del sintonizzatore 33 Impostazioni del suono 33 Funzione Sleep 34 Ulteriori avvertenze importanti 34 Dati tecnici ACCESSORI 1 Manuale d uso 2 Telecomando 3 Batterie per il telecomando 2x AA 4 Cavo di alimentazi...

Page 28: ...ttore di rete 2 presente sul lato posteriore dell apparecchio vedi capitolo Lato posteriore Attacchi In caso di temporale tirare la spina di alimentazione Collegare l apparecchio solo con un cavo elettrico a 3 poli con conduttore di protezione terra Questo fa parte degli accessori originali Usare solo questi accessori originali per l alimentazione elettrica o un cavo elettrico testato per la sicur...

Page 29: ...FM mono ed AM solo mono 9 Tone Skip Balance Preset Funzionamento CD Ruotando è possibile selezionare la traccia successiva e precedente Funzionamento radio Ruotando è possibile richiamare le preimpostazioni delle stazioni Quando si preme il tasto è possibile impostare i bassi gli alti ed il bilanciamento display BASS TREBLE L R Ruotando è possibile modificare la relativa impostazione È inoltre pos...

Page 30: ...io Passa avanti indietro alla preimpostazione radio successiva 8 Play Quando nello scomparto è presente un CD viene riprodotto con questo tasto 9 Pause Arresta la riproduzione di un CD o fa riprendere un CD precedentemente interrotto 10 SACD Con un SACD inserito passa tra SACD e CD Layer possibile solo con SACD Hybrid Discs 11 Eject Apre lo scomparto del lettore CD 12 Stop Arresta la riproduzione ...

Page 31: ...erna FM compresa nella fornitura o di un antenna esterna Posizionare l apparecchio su un fondo resistente e piano rispettando le distanze minime ALTOPARLANTI La coppia di altoparlanti Stereo impedenza da 4 ad 8 Ohm viene collegata sul lato posteriore nel modo seguente Utilizzare solo cavi per altoparlanti audio di elevata qualità con una sezione del conduttore di almeno 1 5 2 5mm Isolare i cavi pe...

Page 32: ...sione Selezionare con SOURCE MC 1 o INPUT telecomando TUNER come fonte audio Selezionare con i tasti FM AM la banda AM mono FM mono o FM stereo Ricerca automatica della stazione Selezionare TUNER come fonte audio e banda vedi sopra Utilizzare i tasti AUTO TUNE sul alto frontale del MC 1 oppure i tasti TUNING sul telecomando Ricerca manuale della stazione Una breve pressione sui tasti aumenta o rid...

Page 33: ...ostazione del volume Il volume può essere impostato con i regolatori VOLUME sul pannello frontale o sul telecomando Sul display viene quindi visualizzata la voce VOL ed un valore compreso tra 00 e MAX 40 MUTE sul telecomando Con questo tasto è possibile disattivare il volume Sul display lampeggia la voce MUTING Un ulteriore pressione su questo tasto o una modifica del volume lo riattiva Impostazio...

Page 34: ...sistema Moving Coil con un valore di livello sonoro alto High Output MC La maggior parte di questi apparecchi dispone di un cavo di massa supplementare Si prega di avvitarlo sulla parte posteriore del MC 1 con la vite 10 per ridurre l inclinazione al ronzio DATI TECNICI Amplificatore Potenza di uscita Potenza nominale 20 Hz 20 kHz THD 1 0 4 Ohm 2 x 80 W 20 Hz 20 kHz THD 1 0 8 Ohm 2 x 60 W Potenza ...

Page 35: ...ares de audio 39 Primeros pasos 39 Control remoto 40 Funciones del MC 1 40 Funciones del reproductor de CD 40 Funciones del sintonizador 41 Funciones RDS servicio de datos de radio del sintonizador 41 Configuración de sonido 41 Función de sueño 42 Otra información importante 42 Especificaciones ACCESSORIOS 1 Manual de instrucciones 2 Control remoto 3 Batterias para control remoto 2 x AA 4 Cable de...

Page 36: ... cm Si no piensa utilizar el dispositivo durante un periodo prolongado de tiempo apáguelo utilizando el interruptor de encendido 2 que se encuentra en la parte posterior del dispositivo consulte la sección llamada Panel posterior conexiones Extraiga la toma de alimentación si se producen tormentas Conecte el dispositivo utilizando un cable de alimentación de 3 terminales con conductor de masa tier...

Page 37: ...FM mono y AM sólo mono 9 Tone Skip Balance Preset En el modo CD gire el mando para seleccionar las pistas anterior y siguiente En el modo de radio gire el mando para seleccionar una memoria de emisora El nivel de bajos agudo y balance puede ajustarse pulsando el mando pantalla BASS TREBLE L R Puede ajustar la opción correspondiente girando el mando También permite activar el modo DSM sonido direct...

Page 38: ...omática de emisoras 7 Skip Preset En el modo CD Salta a la pista anterior siguiente En el modo de radio Salta a la emisora predefinida anterior siguiente 8 Play Reproduce el CD si ha insertado alguno en el compartimento de CD 9 Pause Pausa un CD o continúa la reproducción de un CD pausado 10 SACD Cambia entre SACD y CD si se inserta un disco SACD sólo en el caso de discos híbridos SACD 11 Eject Ab...

Page 39: ...a FM Para conectar la antena FM de interior o una antena doméstica Coloque el dispositivo en una superficie firme y uniforme prestando atención a las distancias mínimas ALTAVOCES Conecte los altavoces estéreos impedancia de 4 a 8 ohmios al panel posterior de la siguiente forma Utilice sólo cables de altavoces de alta calidad con una sección mínima de 1 5 2 5 mm Pele aproximadamente 10 mm de cable ...

Page 40: ...o INPUT en el control remoto Seleccione AM mono FM mono o FM stereo utilizando uno de los botones FM AM Búsqueda automática de emisoras Seleccione el TUNER como fuente de audio y seleccione la banda consulte la sección anterior Utilice los botones de AUTO TUNE situados en la parte frontal del MC 1 o los botones de TUNING en el control remoto Búsqueda manual de emisoras Pulse brevemente cualquiera ...

Page 41: ...UME situado en el panel frontal o en el control remoto Aparecerá entonces en la pantalla VOL y un valor entre 00 y MAX 40 MUTE en el control remoto Es posible desactivar el sonido utilizando este botón Se mostrará la palabra MUTING en la pantalla Es posible volver a activar el sonido pulsando de nuevo este botón o cambiando el volumen Ajustar el nivel de bajos agudos Pulse repetidamente el botón T...

Page 42: ... salida MC de alta salida La mayoría de estos dispositivos tiene un cable de masa adicional Conecte este terminal al panel posterior del MC 1 utilizando el tornillo 10 para minimizar el grado de zumbido ESPECIFICACIONES Amplificador Potencia de salida Potencia nominal 20 Hz 20 kHz THD 1 0 4 ohmios 2 x 80 W 20 Hz 20 kHz THD 1 0 8 ohmios 2 x 60 W Potencia de pulsación1 kHz 4 Ohm 2 x 150 W Respuesta ...

Page 43: ...43 RUS 1 2 3 4 5 6 ...

Page 44: ...44 RUS 10 cm 10 cm 10 cm ...

Page 45: ...45 RUS 1 4 2 3 5 6 7 8 9 10 11 12 14 15 13 16 ...

Page 46: ...46 RUS 1 2 3 4 5 6 7 8 9 10 11 12 13 14 15 16 17 18 19 20 21 ...

Page 47: ...47 RUS 1 2 3 7 8 9 6 4 5 12 10 11 ɫɩɪɚɜɚ ɫɥɟɜɚ 30 30 Sensor ...

Page 48: ...48 RUS Display Title No Play time SACD ...

Page 49: ...49 RUS FM ɋɬɚɧɰɢɹ ɧɚɫɬɪɨɟɧɚ ȼɨ ɜɪɟɦɹ ɩɪɢɟɦɚ RDS ɋɬɟɪɟɨɩɪɢɟɦ FM Stereo ɇɨɦɟɪ ɫɬɚɧɰɢɢ ɑɚɫɬɨɬɚ ɫɬɚɧɰɢɢ FM mono FM ɋɬɚɧɰɢɹ ɧɚɫɬɪɨɟɧɚ ȼɨ ɜɪɟɦɹ ɩɪɢɟɦɚ RDS ɇɨɦɟɪ ɫɬɚɧɰɢɢ ɑɚɫɬɨɬɚ ɫɬɚɧɰɢɢ 90 min Sleep mode ...

Page 50: ...50 RUS ...

Page 51: ...e factory please insure that the component is packed in original factory packing in good condition the quality control card has been filled out and enclosed with the component your enclose your receipt as proof of purchase 5 Excluded from the warranty are Illuminates Valves Batteries Wear parts Shipping damages either readily apparent or concealed claims for such damages must be lodged immediately...

Page 52: ...Magnat Audio Produkte GmbH Lise Meitner Str 9 D 50259 Pulheim Germany Tel 49 0 2234 807 0 Fax 49 0 2234 807 399 Internet http www magnat de ...

Reviews: