5
Navigation Buttons:
Press the NAVIGATION buttons to select the desired items or to rotate the picture
during picture playback.
Enter Button:
Press this button to confirm selection.
Stop:
Press the STOP button to stop playback. Press PLAY/ PAUSE to resume playback.
F.BWD/ Previous:
Pressing this button once during playback will skip a file or picture backwards.
Pressing and holding this button during normal playback of video or audio files will speed up the cycle with
each press as: 2X, 4X, 8X, 16X, 32X, Normal
Press PLAY to resume normal playback.
F.FWD/ Next:
Press this button once during playback to skip a file or picture ahead. Press and holding this
button during normal playback of video or audio files will speed up the cycle with each press as:
2X, 4X, 8X, 16X, 32X, Normal
Press PLAY to resume normal playback.
Mute:
Pressing the MUTE button, the audio output of the main unit will shut off. Pressing this button again
or the VOLUME buttons will resume the audio output.
Volume “+” & volume “-”:
Press the volume “+” button to increase the volume level, and press the
volume “-” button to decrease the volume level.
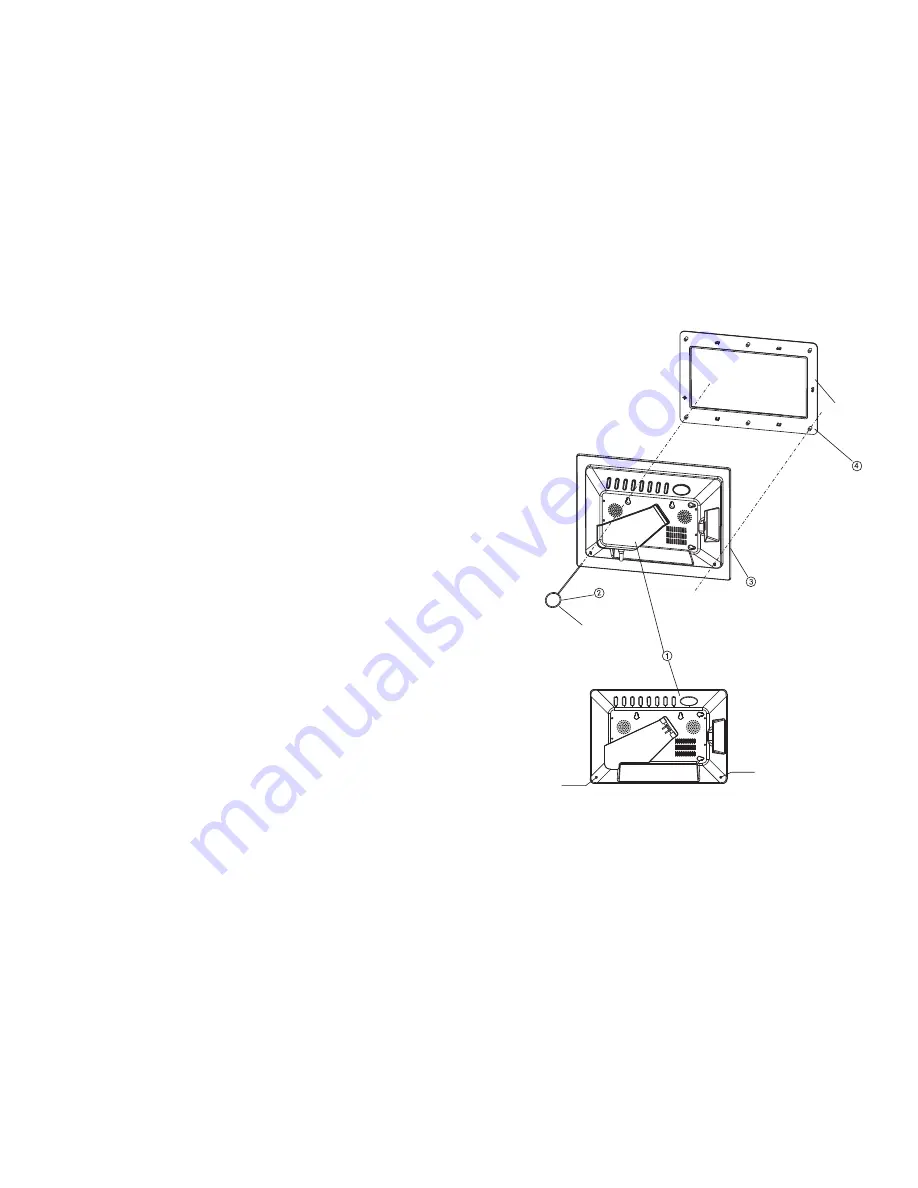
Interchangeable Faceplate
Faceplate
Pin
Please follow the above illustrations for proper assembly or disassembly of the face plates.
Assembly panel:
To install the faceplate, locate the faceplate to the photo frame by aligning them point to
point as displayed above in the illustration. Clasp the panel slightly to assembly it into place.
Disassembly:
To remove the faceplate, insert the provided metal tool (or other pointed metal object) into
each of two holes (optional) to release. Then lift the faceplate from the screen. If optional holes are
unavailable, then lift the faceplate from the screen directly.
Hole (optional)
Insert
Hole (optional)
6
Cleaning the Digital Photo Frame
1. Please make sure that you have turned off and unplugged the digital photo frame from the AC outlet
before cleaning it.
2. Don't put any liquid on the screen or the cabinet directly.
Cleaning the screen
1. Gently wipe the screen with a soft, lint-free cloth to remove dust and other particles that can scratch the
screen.
2. To clean the tough areas, use a soft, lint-free cloth with a few drops of water to remove stubborn dirt.
3. Never apply any pressure to the surface of the screen.
Cleaning the cabinet
1. Use a soft, dry cloth to clean the cabinet.
2. To clean the tough areas, use a soft, lint-free cloth with a few drops of water to remove stubborn dirt.


