background image

31

Settings

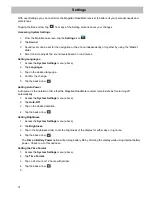
With user Settings you can customize the Magellan RoadMate receiver to better suit your personal needs and 

preferences.

Tapping the Back arrow Tap 

 from any of the Setting screens saves your changes. 

Accessing System Settings

1. From the 

Main Menu

 screen, tap the 

Settings

 icon

.  

2. Tap 

Sound

.

3. Sound levels can be set for the navigation or the phone independently or together by using the “Master” 

slider.

4. Smart Volume adjusts the sound levels based on road noises.

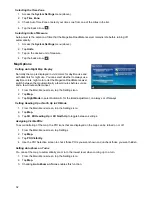
Setting Languages

1. Access the 

System Settings

 menu (above).

2. Tap 

Languages

.

3. Tap on the desired language.
4. Confirm the change.

5. Tap the back arrow 

.

Setting Auto Power

Auto power is the duration of time that the Magellan RoadMate receiver remains idle before turning off 

automatically.

1. Access the 

System Settings

 menu (above).

2. Tap 

Auto-Off.

3. Tap on the desired duration.

4. Tap the back arrow 

.

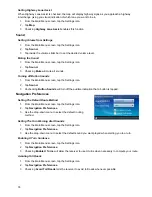
Setting Brightness

1. Access the 

System Settings

 menu (above).

2. Tap 

Brightness.

3. Tap in the brightness slider to set the brightness of the display for either day or night use.

4. Tap the back arrow 

.

The 

Dim on Battery Power

 option will prolong battery life by dimming the display while using internal battery 

power.  Check to turn this option on.

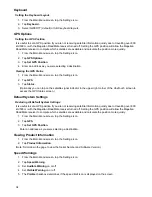
Setting the Time Format

1. Access the 

System Settings

 menu (above).

2. Tap 

Time Format.

3. Tap on 24 Hours or 12 hours with am/pm.

4. Tap the back arrow 

.

5.

Summary of Contents for RoadMate RV9145T

Page 1: ...Magellan RoadMate RV9145T User Manual Designed exclusively for RVs...

Page 2: ...tions special events traffic congestion It is your responsibility to disregard any unsafe hazardous or illegal route suggestions Keep the Magellan RoadMate receiver safe from extreme temperature condi...

Page 3: ...This device may not cause harmful interference and 2 this device must accept any interference received including interference that may cause undesired operation FCC Caution Any changes or modification...

Page 4: ...formation 2011 MiTAC International Corporation The Magellan logo Magellan RoadMate and Quickspell are registered trademarks of MiTAC International Corporation SmartDetour and OneTouch are trademarks o...

Page 5: ...meet your needs using the Settings menu The user interface for the Magellan RoadMate receiver is easy and simple to follow once you understand the basics You may never need to refer to this manual but...

Page 6: ...D card slot A micro SD card is optional and is used for possible updates C USB connector D AV Input Audio and video input to connect to portable DVD players cameras or any device with an AV output Req...

Page 7: ...acilities Viewing the Battery Level Indicator 1 While viewing the Map screen tap on the Menu button 2 The battery level indicator is located in the upper right corner of the Menu screen just below the...

Page 8: ...ecked the Magellan RoadMate receiver will reduce the brightness when operating exclusively on battery power and you have not used the touch screen for a few seconds This prolongs the battery life betw...

Page 9: ...ngs menu This menu can be used to access functions used to customize the Magellan RoadMate receiver to your personal needs Current Location Displays information about your position including the stree...

Page 10: ...City Search The Magellan RoadMate receiver utilizes a feature known as Smart City Search Smart City Search attempts to predict the city you are looking for This prediction is based upon two factors y...

Page 11: ...Magellan RoadMate receiver uses to make entering cities and streets easier is a feature known as QuickSpell In the example to the right CE has been entered for a street name in Chicago IL The Magella...

Page 12: ...s in the up position Place the base of the car cradle firmly over the area where it will be placed Push the lever at the base of the swivel mount all the way down until it snaps in place Carefully let...

Page 13: ...Power Switch Slide the power switch to the left turn the receiver on Slide the power switch to the center position to turn the receiver off Slide the power switch to the right to reset Power Reset can...

Page 14: ...Zoom In E Access Main Menu F Access Highway POIs displayed only while on a highway G Access volume controls H Access OneTouch Menu OneTouch Menu gives you instant access to your saved search criteria...

Page 15: ...ger or a stylus across the map 2 The map screen changes to Pan mode 3 When finished tap and the map returns to your current position Routing to a Panned Position 1 Pan the map until the location you w...

Page 16: ...ing a Name is required before saving the Address Book entry 6 If you have selected to save this point to the OneTouch menu you need to select a button for the entry Maneuver List Itinerary This screen...

Page 17: ...e Map screen The volume can also be adjusted from Settings Sound Changing the Volume from the Map Screen 1 Tap the speaker icon Additional controls appear 2 Tap on the Mute button to mute the volume o...

Page 18: ...the first few characters of any significant word in the street name and tap the or continue entering characters until the list of streets is displayed Tap on the street name from the list 4 Enter Stre...

Page 19: ...selected location the estimated time of arrival ETA the distance to travel and the routing method e g Fastest Time 6 optional Tap Options if you want to change the routing method 7 Tap the large GO bu...

Page 20: ...t of categories you have created for your address book If the category you want isn t there you can create one by tapping the Add button at the bottom of the screen 6 When the details for this address...

Page 21: ...tap the 5 If you have selected to save this to the OneTouch menu you asked to select a the OneTouch button you want it assigned too Creating a New Entry in Your Address Book from a POI 1 From the Mai...

Page 22: ...ing the OneTouch menu Changing the Address or Search of a OneTouch Icon 1 Tap the button in the top right corner of the Map screen The OneTouch menu appears 2 Tap the Edit button 3 Tap on the OneTouch...

Page 23: ...te if you are already on a route you will be asked if you want to Replace Destination this cancels the previous route and replaces it with a new route to this destination Go There Now this inserts the...

Page 24: ...he selected location the estimated time of arrival ETA the distance to travel and the routing method e g Fastest Time 8 optional Tap Options if you want to change the routing method You can select fro...

Page 25: ...n it appears 2 The list of the next freeway exits and their distance from your current position appear 3 Small symbols represent the following service POIs near the exits Restaurants Gas Stations Car...

Page 26: ...want to store your home address using the GPS location 4 Using the keyboard enter the desired address city street and number Changing the Home Address These instructions only apply if a home address...

Page 27: ...ted with it Routing Method Regardless of which route type has been created the Magellan RoadMate needs to know how the route is to be calculated Routes can be calculated by the following methods Faste...

Page 28: ...routes is displayed 4 optional You can check the Maneuver List of an alternate route if you tap the button on the right 5 Tap the desired alternate route SmartDetour on Freeways When you slow down un...

Page 29: ...he new destination with the previous destination as the last via point to reach 7 The Multiple Destination List is displayed 8 Tap on one of the addresses to move it up or down in the list 9 Tap Optim...

Page 30: ...27 10 optional Tap Options if you want to change the routing method or the vehicle type 11 Tap the large GO button on the right to return to the Map screen and start navigating...

Page 31: ...the Vehicle Profile screen 2 Tap the Height button 3 Enter your vehicle height in inches Set Vehicle Width 1 Access the Vehicle Profile screen 2 Tap the Width button 3 Enter your vehicle width in inch...

Page 32: ...23 Set Hazmat Type 1 Access the Vehicle Profile screen 2 Tap the Hazmat Type button 3 Select from available choices if applicable...

Page 33: ...ge 4 Confirm the change 5 Tap the back arrow Setting Auto Power Auto power is the duration of time that the Magellan RoadMate receiver remains idle before turning off automatically 1 Access the System...

Page 34: ...matically a few minutes before sunrise and a few minutes after sunset 1 From the Main Menu screen tap the Settings icon 2 Tap Map 3 Tap Night Mode to select Automatic for the timed adjustment on alway...

Page 35: ...nchecking Button Sounds will turn off the audible indication that a button is tapped Navigation Preferences Setting The Default Route Method 1 From the Main Menu screen tap the Settings icon 2 Tap Nav...

Page 36: ...in the upper right corner of the OneTouch screen to access the GPS Status screen Default System Settings Restoring All Default System Settings It is useful to set a GPS position if you are not receivi...

Page 37: ...the number of miles above the speed limit you want the warnings to be alerted Regions 1 From the Main Menu screen tap the Settings icon 2 Tap Region 3 Select an available map that is installed in your...

Reviews: