background image

IMPORTANT SAFETY WARNINGS

3

Federal Communication Commission Interference Statement

This equipment has been tested and found to comply with the limits for a Class B digital device, pursuant to Part 15 of the 
FCC Rules.  These limits are designed to provide reasonable protection against harmful interference in a residential 
installation.  This equipment generates, uses and can radiate radio frequency energy and, if not installed and used in 
accordance with the instructions, may cause harmful interference to radio communications.  However, there is no guarantee 
that interference will not occur in a particular installation.  If this equipment does cause harmful interference to radio or 
television reception, which can be determined by turning the equipment off and on, the user is encouraged to try to correct 
the interference by one of the following measures:

-Reorient or relocate the receiving antenna.

-Increase the separation between the equipment and receiver.

-Connect the equipment into an outlet on a circuit different from that to which the receiver is connected.

-Consult the dealer or an experienced radio/TV technician for help.

This device complies with Part 15 of the FCC Rules. Operation is subject to the following two conditions: (1) This device 
may not cause harmful interference, and (2) this device must accept any interference received, including interference that 
may cause undesired operation.

FCC Caution: Any changes or modifications not expressly approved by the party responsible for compliance could void the 
user's authority to operate this equipment.

IMPORTANT NOTE:

FCC Radiation Exposure Statement:

This equipment complies with FCC radiation exposure limits set forth for an uncontrolled environment. End users must 
follow the specific operating instructions for satisfying RF exposure compliance.

This transmitter must not be co-located or operating in conjunction with any other antenna or transmitter.

In order to maintain compliance with FCC regulations, shielded cables must be used with this equipment. Operation with 
non-approved equipment or unshielded cables is likely to result in interference to radio and TV reception. The user is 
cautioned that changes and modifications made to the equipment without the approval of manufacturer could void the user's 
authority to operate this equipment.

The Magellan Maestro must be installed and operated at a distance no closer then 8 inches (20 cm) from the user.

This Class B digital apparatus meets all requirements of the Canadian Interference-Causing Equipment Regulations.

Cet appareil numerique de la classe B respecte toutes les exigences du Reglement sur le materiel brouilleur du Canada.

Summary of Contents for 980915 - TrafficKit - NavTraffic Receiver

Page 1: ...Magellan Navigation Inc 960 Overland Court San Dimas CA 91773 Magellan Maestro 4050 User Manual...

Page 2: ...conditions special events traffic congestion It is your responsibility to disregard any unsafe hazardous or illegal route suggestions Keep the Magellan Maestro safe from extreme temperature condition...

Page 3: ...apter while it is inside a carrying case Connect the adapter to a proper power source The voltage and grounding requirements are found on the product case and or packaging Do not use the adapter if th...

Page 4: ...nditions 1 This device may not cause harmful interference and 2 this device must accept any interference received including interference that may cause undesired operation FCC Caution Any changes or m...

Page 5: ...rating instructions for satisfying RF exposure compliance This transmitter must not be co located or operating in conjunction with any other antenna or transmitter 2007 Magellan Navigation Inc All rig...

Page 6: ...4 Connecting Power 4 Security 4 Fundamentals 5 Powering on the Magellan Maestro 5 Turning the Magellan Maestro On 5 Turning the Magellan Maestro Off 5 Selecting Auto Power Shutdown Time 5 Volume 5 Cha...

Page 7: ...e Address 17 Creating a Home Address 17 Creating a Route to the Home Address 17 Changing the Home Address 17 Accessing the Home Address from the Address Book 18 Enter Address 19 Entering an Address 19...

Page 8: ...es and Subcategories 27 Creating a Route to a POI by Category 27 Creating a Route to a POI by Name 28 Enhanced POIs 28 Loading a POI File 28 Selecting Categories for Display on the Map 29 Setting Alar...

Page 9: ...3 AAA TourBook 44 Overview 44 AAA TourBook 44 Accessing the AAA TourBook 44 AAA TourBook Information 45 Getting AAA TourBook Information 45 Routing To the Selected POI 45 Show Your Card Save 46 Gettin...

Page 10: ...roduction 58 Accessing the Bluetooth Main Menu 58 Pair Mode 58 Pairing a Phone to the Magellan Maestro 58 Establish Connection 59 Establishing a Bluetooth Connection 59 Place a call 59 Placing a Call...

Page 11: ...m the Address Book Global 67 Setting the Map in 3D or 2D Mode 67 Setting the Map Display to Heading Up or North Up 68 Setting Split Screen TrueView Options 68 Setting Auto Night Map Display 68 Setting...

Page 12: ...access to information about your location to assist in getting AAA services to your location A trip planner to create a trip with multiple destinations Handy for business people who need routing info...

Page 13: ...ide Views Back View 4 3 Display A A Microphone E F A SD MMC card slot B Power on off C USB connector D Reset E Headphone Jack 3 5mm mini jack F Power input from cigarette lighter adapter or AC power a...

Page 14: ...h surface on the dash board will need to be selected Do not attach the adhesive disk to the windshield Make sure that the Magellan Maestro or any cabling will not be disturbed in the event that the ai...

Page 15: ...sen the adjustment locking knobs and position the Magellan Maestro for optimum viewing Once set tighten the locking knobs Never attempt to adjust the mount while driving Connecting Power Plug the end...

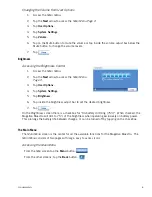
Page 16: ...hasn t changed and B the touchscreen hasn t been pressed 1 Access the Main Menu 2 Tap the Next arrow to access the Main Menu Page 2 3 Tap User Options 4 Tap System Settings 5 Tap Power 6 Select Auto...

Page 17: ...stem Settings 5 Tap Brightness 6 Tap inside the brightness adjust bar to set the desired brightness 7 Tap On the Brightness screen there is a checkbox for On battery dimming 75 When checked the Magell...

Page 18: ...ist of available categories The AAA TourBook is also accessed from the Search Points of Interest menu Additionally POIs that have been created and installed using the POI Manager software found on the...

Page 19: ...used to access functions used to customize the Magellan Maestro to your personal needs Home If you have created a Home address press the Home button for quick access for routing to your home If a Home...

Page 20: ...as QuickSpell makes entering data quick and easy Keypad Overview Special Keys Alphabetic Keypad Numeric Keypad Symbols Keypad Spacebar Backspace Accept Cancel Selecting From List After tapping OK to a...

Page 21: ...Entering Data If you are having trouble getting the results you expected here are a few useful tips Make sure that you have spelled the name correctly If you are unsure of the spelling just enter a f...

Page 22: ...where you can save your position into your Address Book C Zoom out D POI icon Sample shown here is for a gas station Tap on the POI icon to create a route to that POI Note If there are multiple POIs...

Page 23: ...o display the Maneuver List screen G Distance to next maneuver Tap to repeat the last voice command H Main Menu button Tap to go to the Main Menu screen Note that the Main Menu screen is different whe...

Page 24: ...for a position and the red arrow points to your current location 3 To exit panning tap and the map is returned to your current position Saving a Position While Panning 1 Pan the map until the icon cro...

Page 25: ...tion screen displays approximate address information the next and previous cross streets as well as your latitude longitude To the right is a compass point in your direction of travel calculated eleva...

Page 26: ...lude one of the maneuvers is described in this chapter Accessing the Maneuver List 1 Tap the maneuver icon in the lower left corner of the Map screen This icon is displayed only while on an active rou...

Page 27: ...ap screen tap the GPS Signal Strength icon in the upper right corner Tap on the back arrow to return to the Map screen Zoom Levels There are 23 zoom levels in the Magellan Maestro ranging from 100 fee...

Page 28: ...o be used as your HOME address 4 When the Address screen is displayed edit the information and top SAVE to continue 5 The HOME address is saved in your address book and you are returned to the Main Me...

Page 29: ...the Main Menu screen Accessing the Home Address from the Address Book 1 From the Main Menu tap the Enter Address icon 2 Tap the my addresses icon 3 Tap Address Book 4 Tap List All 5 The list of addre...

Page 30: ...e to a New Address 1 From the Main Menu tap the Enter Address icon 2 Select the method to enter the city Enter City Enter Zip Code or Previous City Enter City Use the keypad with QuickSpell to enter t...

Page 31: ...s displayed You can use street prefixes N E W S etc if desired Samples the city Pasadena California However typing in NOR can give some unexpected results if you are trying to type in the word NORTH A...

Page 32: ...to keep as future destinations as well as access addresses that you have gone to recently that may not be in your address book The address book can hold up to 200 addresses 50 of those being marked as...

Page 33: ...Route to route to this destination or the Back arrow to return to the list of previous destinations Deleting a Previous Destination 1 From the Main Menu tap the Enter Address icon 2 Tap on the my add...

Page 34: ...dit Address Book screen to modify the name information or phone numbers The street address cannot be changed 4 Tap Save when done Deleting an Address in Your Address Book 1 Access the address record f...

Page 35: ...m deletion Tap Yes Creating a New Entry This is used to create a new address and save it in your address book You can create an entry by selecting it on the map entering the address selecting an addre...

Page 36: ...t of POI categories 6 If a subcategory list is displayed select ALL Subcategories or one from the list 7 Select search criteria Near Current Position Displays POIs in the category selected nearest to...

Page 37: ...from the list of streets 8 Edit the name information and phone numbers for the POI selected Tap the Favorites checkbox if you want this saved as a favorite address 9 Tap Save Intersection Creating a R...

Page 38: ...categories and tap on the desired category name 4 If a subcategory is displayed use the the scroll bars to view the subcategories and tap on the desired subcategory name Select ALL SUBCATEGORIES if y...

Page 39: ...l show all POIs that meet the name criteria regardless of category In the sample shown here there are home improvement centers Lowe s and parks Lowell Brandt Park Use the Prev and Next buttons to step...

Page 40: ...ry name to select or deselect the category Checked means this category will have its icon displayed on the map Tap Mark All to check all categories or Clear All to uncheck all categories 7 Tap Save wh...

Page 41: ...ts of Interest icon 2 Select Enhanced 3 Select My POI 4 Select Change My POI FIle 5 Select Set Alarms 6 Select the category from the category list whose alarm parameters are to be changed 7 Set the de...

Page 42: ...ry containing the POI you want to route to from the category list 6 Select Nearest near your current position or Spell POI Name requires entering the POI name 7 Select the POI to be routed to from the...

Page 43: ...ata field There is also a bell that will alert you where the maneuver is to be performed This tone can be changed in User Options Tone Options Split Screen As a maneuver is approached the Magellan Mae...

Page 44: ...n Maestro Points of Interest A route to a POI found in the AAA TourBook AAA TourBook A trip a route with multiple destinations Trip Planner A route to your home address Home Address Route Method Regar...

Page 45: ...to repair or hotel for the exit required 4 A list of POIs in the category selected that are near the exit chosen will be displayed 5 Tap on the POI in the list that you want routing directions to 6 Se...

Page 46: ...mation to get you to your original destination using the routing method you selected when creating the route However if you want to change the routing method while on or off the route you will need to...

Page 47: ...e back of the Magellan Maestro Write this number down as you will need it later S N 2 Locate the subscription coupon that is included in the Magellan TrafficKit At the bottom of the coupon is a Subscr...

Page 48: ...eposition the Magellan Maestro or use an external FM antenna not supplied Traffic Cradle Connections All of the connections to the traffic cradle are optional with the exception of power Left Side Alt...

Page 49: ...A message received by the TrafficKit module that contains the description of a Traffic event Traffic Event An event liable to disturb the flow of traffic The list of possible Traffic events that can b...

Page 50: ...roll down the list and select Traffic Options 3 Select Incident Options 4 In the displayed list check all categories of Traffic alerts incidents you want processed and deselect events that are of no i...

Page 51: ...Save to confirm your choice and then Save again to return to your guidance screen Traveling with the Re routing Mode On The following will occur whenever a Traffic event that affects your route is rec...

Page 52: ...te Reminder at 20 mi Same as above but the distance from the event is only 20 miles Reminder at 10 mi Same as above but the distance from the event is only10 miles 6 Select Save to validate your choic...

Page 53: ...n the lower right corner of the map screen Viewing Traffic Details While viewing the Map screen and traveling on a route tap on the Traffic Alert icon when it is displayed A Traffic Event List is disp...

Page 54: ...es the 5 best frequencies stored in its memory These frequencies are classified in order of signal strength The module then tests if Traffic data is available on the first station If the first station...

Page 55: ...ns for the following AAA Approved Diamond Rated accommodations and restaurants and AAA recommended destinations attactions and events Businesses that participate in the AAA Show Your Card Save program...

Page 56: ...h an arrow indicating the direction of the POI the distance as the crow flies to the POI the address AAA s rating for the highlighted POI and the phone number 6 Tap on the POI in the list to get more...

Page 57: ...arrow indicating the direction of the POI the distance as the crow flies to the POI the address SAVE icon indicating that this is a Show Your Card Save business and the phone number 6 Tap on the POI i...

Page 58: ...ng the direction of the automotive facility the distance as the crow flies to the automotive facility the address and the phone number 5 Tap on a automotive facility in the list to get more informatio...

Page 59: ...h an arrow indicating the direction of the branch office the distance as the crow flies to the AAA branch office the address and the phone number 5 Tap on the AAA branch office in the list to get more...

Page 60: ...ing and Show Your Card Save icon if applicable for the highlighted campground and the phone number 5 Tap on the campground in the list to get more information The tabs along the top spotlight the info...

Page 61: ...Access the Roadside Assistance screen 2 Tap on 3 Use the keyboard to enter your AAA membership number Tap when done AAA National Roadside Assistance Toll Free Phone Number AAA Enrollment Phone Number...

Page 62: ...in a name for this trip 4 Tap OK 5 Begin by adding the first destination in the trip Tap Add 6 Select the method to be used to find or create the destination icon Enter Address Address Book POIs or I...

Page 63: ...though 9 until the trip is complete with all desired destinations 12 Tap Save Starting a Trip 1 From page 2 of the Main Menu tap the Trip Planner icon 2 Select Guide Me from the Trip Planner Menu 3 Se...

Page 64: ...Calculate Route button Editing a Trip 1 From page 2 of the Main Menu tap the Trip Planner icon 2 Select Edit from the Trip Planner Menu 3 Select the trip to be edited from the stored trips list 4 Tap...

Page 65: ...From page 2 of the Main Menu tap the Trip Planner icon 2 Select Delete Rename from the Trip Planner Menu 3 Tap Rename 4 Select the trip to be renamed from the stored trips list 5 Use the keypad to ed...

Page 66: ...lable only while on a freeway Also when you create a route to a POI near an exit the original route will be canceled if you are travelling on a route You will need to reset the original route when you...

Page 67: ...oice recognition software by speaking the attention word Magellan Upon waking up the voice recognition software the Say a Command screen is displayed This is a list of available commands that can be u...

Page 68: ...Wind noise and talk radio stations can confuse the voice recognition software so turn off the radio and roll up your windows Avoid speaking too soon The most common speech recognition problem people...

Page 69: ...for you to pair your mobile phone To pair a new phone or if the automatic pairing at first use was cancelled you must pair the phone with the Magellan Maestro before the Bluetooth function can be used...

Page 70: ...face shall show up with a status message xx connected partial function supported only Establishing a Bluetooth Connection 1 Access the Bluetooth Main Menu 2 Tap the Search for Devices icon 3 The Searc...

Page 71: ...ill be initiated Placing a Call Using Call History The Call History window displays a list of Incoming Outgoing Missed calls 1 Access the Bluetooth Main Menu 2 Tap the Call History icon 3 Select the t...

Page 72: ...sfer the call to your mobile phone Tap to turn off the microphone in the Magellan Maestro Tap to hang up the call Incoming call Answering an Incoming Call 1 When there is an incoming call the Incoming...

Page 73: ...t be selected for your area 1 From page 2 of the Main Menu tap User Options 2 Tap Region 3 Select an available region from the list Accessing System Settings Commonly used settings are found in the Sy...

Page 74: ...1 From page 2 of the Main Menu tap User Options 2 Tap System Settings 3 Tap Brightness 4 Tap along the adjustment bar to increase or decrease the display brightness 5 Tap On battery dimming 75 to set...

Page 75: ...ions 2 Tap System Settings 3 Tap Language 4 Select English US Fran ais or Espa ol 5 Confirm language Tap Yes 6 Tap Save Setting Time Zone 1 From page 2 of the Main Menu tap User Options 2 Tap System S...

Page 76: ...ilometers Meters 5 Tap Save Displaying Contact Us Information 1 From page 2 of the Main Menu tap User Options 2 Tap System Settings 3 Tap 4 Tap Contact Us 5 Tap Back arrow Displaying Product Informati...

Page 77: ...that you were driving and the distance of the trip This information can be saved to a file for easy access when the information is needed 1 From page 2 of the Main Menu tap User Options 2 Tap Trip Com...

Page 78: ...obal The chapter on addresses discusses how to delete individual addresses from the address book Address Book Options provides a way of globally deleting addresses from the address book 1 From page 2...

Page 79: ...n set it to on or off Checked is on and the TrueView image will be displayed 4 Tap Split TrueView to set the TrueView display to split or single view Checked sets split screen on 5 Tap Save to record...

Page 80: ...er detour routing when it computes you are stuck in slow or stopped traffic situations 4 Tap Save to record the changes and exit Using the Simulator When turned on the simulator will offer the option...

Page 81: ...gation Instruction 3 Tap Announce street name to check or uncheck When checked street names will be announced using text to speech Tap Announce exit ramp name to check or uncheck When checked exit ram...

Page 82: ...been backed up it can be restored at any time Please note that when you restore from backed up data address book and other data will be replaced with the data The Magellan Maestro cannot append backed...

Page 83: ...ptions 72 6 Operation successful Tap OK 7 Tap Back arrow to exit Viewing Map Information 1 From page 2 of the Main Menu tap User Options 2 Tap Map Information 3 Tap Back arrow to exit Map Information...

Page 84: ...Portuguese Food Brewpub Russian Food British Isles Food Sandwich Cajun Caribbean Food Scandinavian Food Californian Food Seafood Canadian Food South American Food Chinese Food Southeast Asian Food Con...

Page 85: ...ming Rental Record CD Video Men s Apparel Airports Bank ATMs Convention Center Education Entertainment Cinema Performing Arts Golf Golf Course Golf Practice Range Grocery Store Grocery Store Convenien...

Page 86: ...Sports Activities Race Track Sports Complex Recreation Center Park Recreation Area Sporting Instructional Health Club Tourist Attraction Amusement Park Historical Monument Museum Tourist Attraction T...

Reviews: