
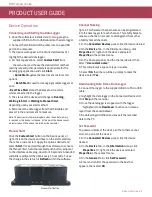

Manual Start Button
Product User Guide | 3
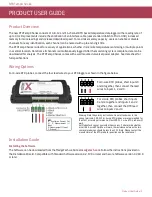
RTDTempX Series
PRODUCT USER GUIDE
Manual Start
Connecting and Starting the Data Logger
Set Password
Channel Naming
Downloading Data from a Data Logger
Click the
Custom Start
button on the Device panel, or
right-click on the device and hover on the start selection,
then chose custom start. Apply the options desired and
select
Start
. Once armed through the software, to activate
the Manual Start, hold the recessed push button, adjacent
to the interface cable plug, down for 10 seconds. Green LED
will blink rapidly and then blink every 15 seconds. To see
the change in the status, hit
Refresh
within the software.
1. Once the software is installed and running, plug the
supplied USB A to Micro USB cable into the data logger.
2. Connect the USB A end of the cable into an open USB
port on the computer.
3. The device will appear in the Connected Devices list.
Highlight the desired data logger.
4. For most applications, select
Custom Start
from
the menu bar and choose the desired start method,
reading rate and other parameters appropriate for the
data logging application and click
Start
.
•
Quick Start
applies the most recent custom start
options
•
Batch Start
is used for managing multiple loggers at
once
•
Real Time Start
stores the dataset as it records
while connected to the logger
5. The status of the device will change to
Running
,
Waiting to Start
or
Waiting to Manual Start
,
depending upon your start method.
6. Disconnect the data logger from the USB cable and
place it in the environment to measure.
To password protect the device so that others cannot
start, stop or reset the device:
1. In the
Connected Devices
panel, click the device
desired.
2. On the
Device
Tab, in the
Information
Group, click
Properties
. Or, right-click the device and select
Properties
in the context menu.
3. On the
General
Tab, click
Set Password
.
4. Enter and confirm the password in the box that
appears, then select
OK
.
Up to a 10-character channel name can be programmed
into the data logger for each channel. This ability helps to
rename a channel in a report to distinguish it from other
similarly named channels.
1. In the
Connected Devices
panel, click the device desired.
2. On the
Device
Tab, in the Information Group, click
Properties
. Or, right-click the device and select
Properties
in the context menu.
3. In the Channels panel, find the channel desired, then
select “
Use custom name
.”
4. This will prompt a space to type in a name.
5. Select
OK
, then there will be a prompt to reset the
device, select
Yes
.
1. Connect the logger to the supplied USB A to Micro USB
cable.
2. Highlight the data logger in the Connected Devices list.
Click
Stop
on the menu bar.
3. Once the data logger is stopped, with the logger
highlighted, click
Download
. You then can create a
report from the saved Dataset.
4. Downloading will offload and save all the recorded
data to the PC.
Device Operation
Note: The device will stop recording data when the end of memory
is reached or the device is stopped. At this point the device cannot
be restarted until it has been re-armed by the computer.


