PM400 Multi-Gas Personal Monitor
REV – 2.0
[34-2900-0206-2 ]
10
|
P a g e
4
Charging, Powering Up and Powering Down
4.1
Charging the Device
The PM
400
ships with a power supply that plugs into a standard wall socket and with all common international
interfaces. The other end connects to the device.
To Charge the Device:
1.
Ensure that the power supply is equipped with the interface that matches your wall’s power outlet. You can
change these by pushing the button at the rear of the power supply and clicking the correct one into place.
2.
Locate the charging socket at the bottom-rear of the device.
3.
Align the guides of the adapter to the plastic slot on the device and push until the top of the adapter is
completely inserted.
4.
Plug the other end into a standard wall socket. The battery meter appears on the right side of the display
and repeatedly cycles upward to the top and the LEDs will flash continuously.
NOTE:
If your device is set to Stealth Mode, the LEDs will not flash during charging.
5.
The device is fully charged when the battery stops cycling.
4.2
Power On the Monitor
To power on the monitor:
1.
Press and hold the [Function] key. A three second count-up displays.
NOTE:
Release the [Function] key at any time during the count-up to prevent it from powering up.
2.
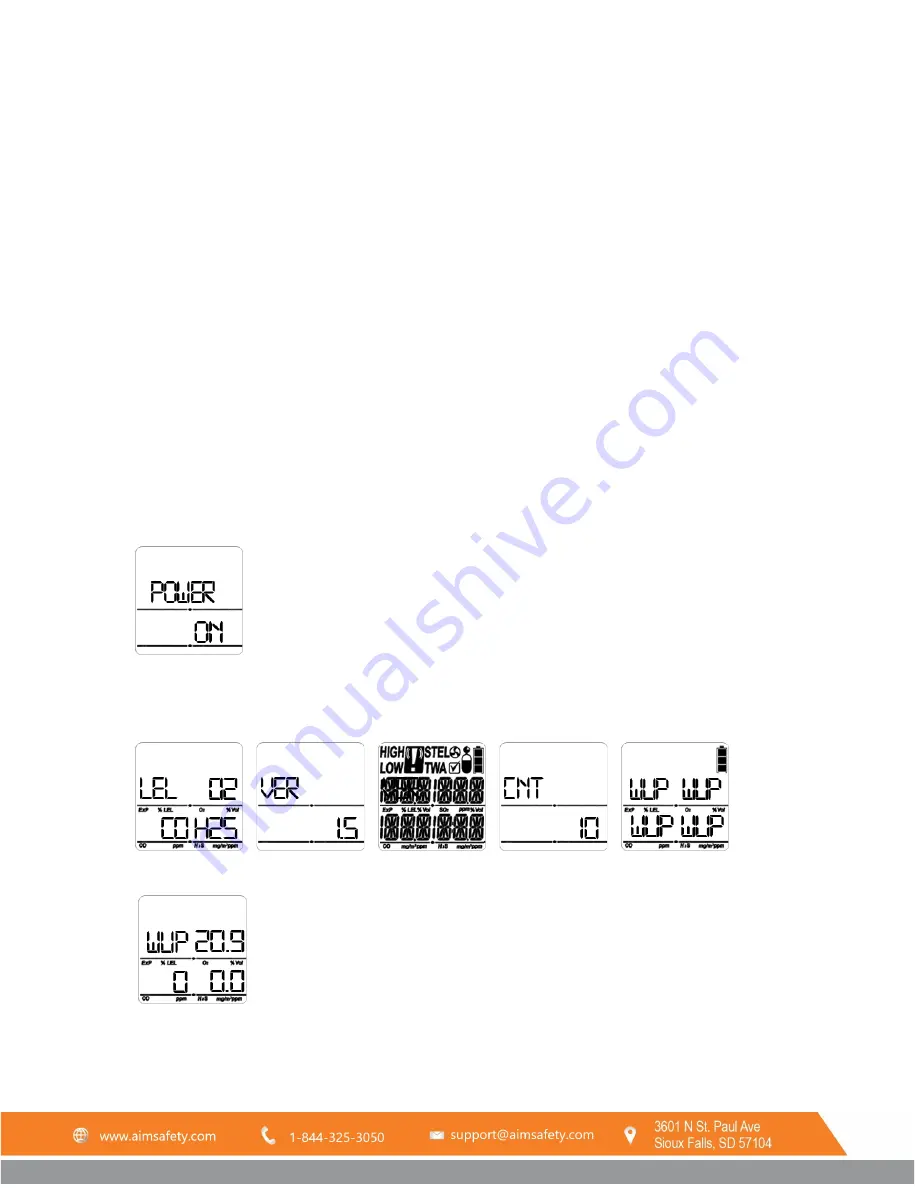
Release the [Function] key when Power On displays.
The display cycles through gas types: LEL, 0
2
, CO, H
2
S, firmware version: VER #.#, display tests, and alarm
tests, followed by a ten-second count-up, followed by Warming Up notifications (WUP) for each sensor.
NOTE:
The IR LEL sensor takes approximately an extra 90 seconds to warm up, during which time, the unit
continues to display WUP in the upper-left (LEL) quadrant of the display (see below).


