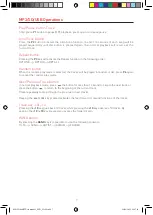
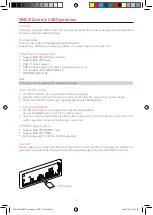
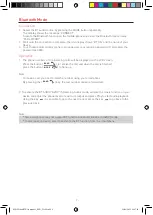
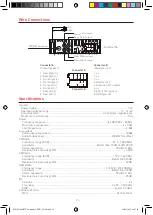
background image

- 3 - 

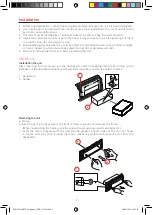
Installation

Detachable control panel  (D.C.P.)

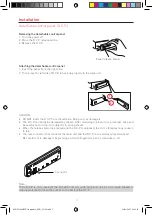
Removing the detachable control panel

1. Turn the power off

2. Press the D.C.P release button

3. Remove the D.C.P

Panel release button

Attaching the detachable control panel

1. Insert the panel from the right side.

2. Then press the left side of D.C.R to hook up properly to the radio unit

CAUTION

•   DO NOT insert the D.C.P from the left side. Doing so may damage it.

•   The D.C.P can easily be damaged by shocks. After removing it, place it in a protective case and 

be careful not to drop it or subject it to strong shocks.

•   When the release button is pressed and the D.C.P is unlocked, the car’s vibrations may cause it 

to fall. 

•   The rear connector that connects the main unit and the D.C.P is an extremely important part.

  Be careful not to damage it by pressing on it with fingernails, pens, screwdrivers, etc.

Note:

If the D.C.P is dirty, wipe off the dirt with soft, dry cloth only. And use a cotton swab soaked in 

isopropyl alcohol to clean the socket on the back of the D.C.P.

1

2

Connector

M-DL31000BT User manual_ENG_Ver2.0.indd   3

M-DL31000BT User manual_ENG_Ver2.0.indd   3

26/09/2022   09:26:58

26/09/2022   09:26:58

Summary of Contents for M-DL3100BT

Page 1: ...USER MANUAL M DL3100BT RADIO RADIO RECEIVER RECEIVER M DL31000BT User manual_ENG_Ver2 0 indd 1 M DL31000BT User manual_ENG_Ver2 0 indd 1 26 09 2022 09 26 57 26 09 2022 09 26 57...

Page 2: ...may result in scratching or decoloration to the monitor 3 If any abnormal behavior of the unit is found please refer to trouble shooting guide of this manual If no relevant information is found pleas...

Page 3: ...sure to remove the front panel before installing the unit Installation DIN Mount Installation the unit After inserting the half sleeve into the dashboard select theappropriate tab according to the th...

Page 4: ...e it in a protective case and be careful not to drop it or subject it to strong shocks When the release button is pressed and the D C P is unlocked the car s vibrations may cause it to fall The rear c...

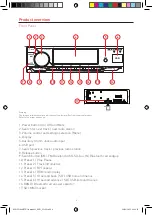
Page 5: ...on Menu 4 Display 5 Auxiliary 3 5mm Jack audio input 6 USB port 7 Search previous track previous radio station 8 Release button 9 Switch button AM FM Bluetooth USB SD Aux IN Bluetooth call endgup 10 P...

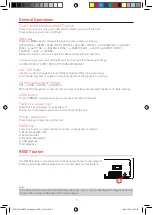
Page 6: ...zer turned off the tone level will be controlled with the Bass Treble setting LOUD button This LOUDNESS control allows you to increase the level of the bass Telephone answer key Press this key to answ...

Page 7: ...be stored and recalled by pressing the M1 M6 buttons TO STORE A STATION 1 Select a band if necessary 2 Select a station by tuning with the M DL3100BT USB 1 2 3 4 5 6 AUX MUTE 2 3 4 5 6 10 INT RPT RDM...

Page 8: ...5 6 AUX MUTE 2 3 4 5 6 10 INT RPT RDM 10 MODE BAND the button for less than 1 second to skip to the next track or press the button M DL3100BT 1 2 3 MUTE 2 3 INT RP MODE to return to the beginning of t...

Page 9: ...icro SD Card into the slot in the correct direction until a CLIC sound is heard 3 Select the SD PLAY function by repeatedly pressing the MODE button To stop SD playback 1 The SD drive device is unplug...

Page 10: ...5 6 AUX MUTE 2 3 4 5 6 10 INT RPT RDM 10 MODE B to hang up Note To make a call you need to dial the number using your smartphone By pressing the USB 4 5 6 AUX 4 5 6 10 RDM 10 BAND key the last number...

Page 11: ...t output Front Right output Rear Right output MIC SWC FM AM antenna DAB antenna 1 2 3 4 5 6 7 8 4 5 7 8 15A Front Left output Rear Left output Front Right output Rear Right output MIC SWC FM AM antenn...

Page 12: ...This means that this product must be handled to the local collecting points or given back to retailer when you buy a new product in a ratio of one to one or one to zero if the external dimension is l...

Page 13: ...w w w m a c r o m i t M DL31000BT User manual_ENG_Ver2 0 indd 12 M DL31000BT User manual_ENG_Ver2 0 indd 12 26 09 2022 09 27 02 26 09 2022 09 27 02...

Reviews: