background image


For safe removal of 

your drive and to 

assure that no data 

is lost, always 

follow the unplug 

procedure. If not, an 

error message will 

show up. 

Installation on a PC 


WinME, Win2000 or WinXP with a USB connection

  Turn on your Computer and start Windows 

  Connect the Freshman Mini 

  Let Windows search and install the driver automatically 

  Open “My Computer” to see your external hard drive ** 


Win98/SE with a USB connection

  Turn on your Computer and start Windows 

  Insert the driver CD into your CD-ROM 

  Connect the Freshman Mini 

  Follow the onscreen instructions and install the drivers 

  Open “My Computer” to see your external hard drive ** 


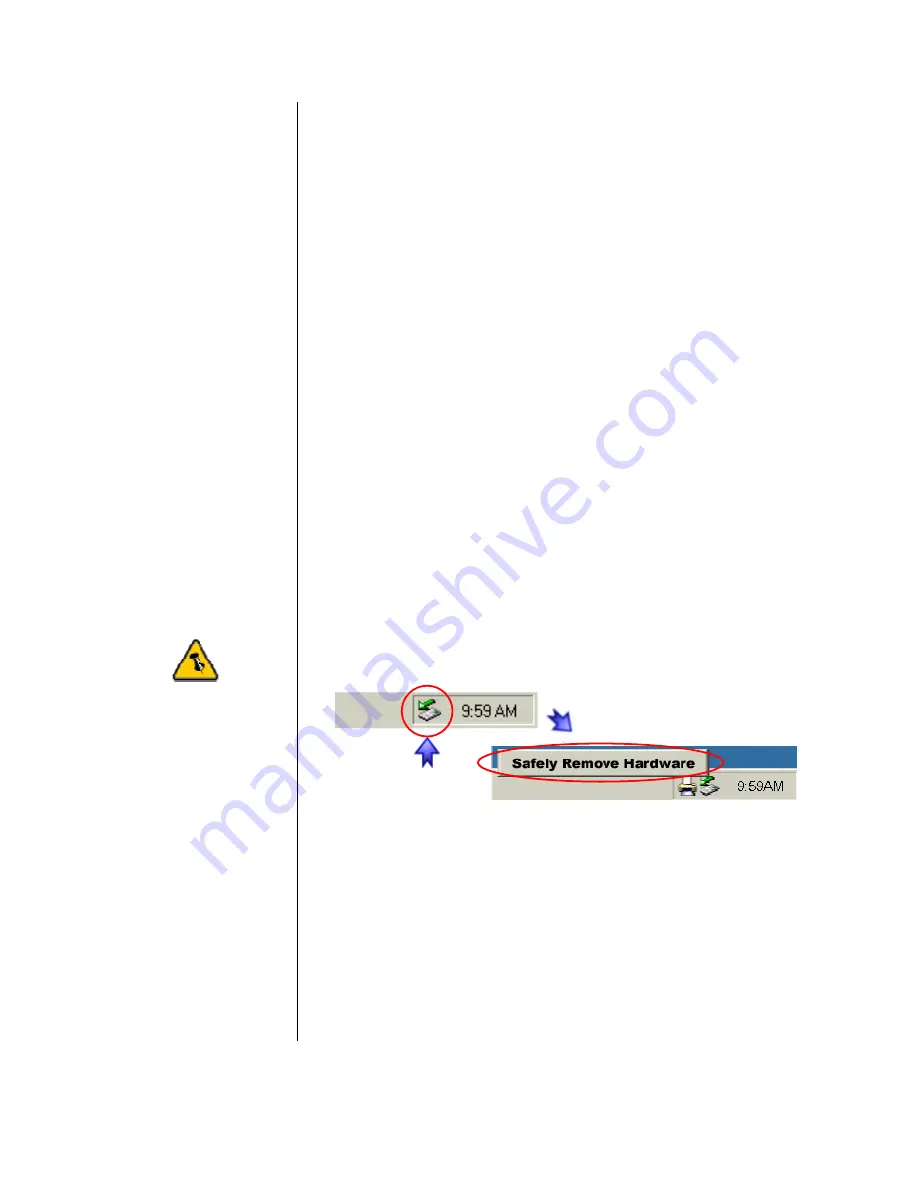
Unplug Procedure

  Click on the taskbar icon for external hardware 

  Choose your external hard drive and confirm to remove it 


** For factory new drives and formatting, see “Partitioning & 

Formatting” 

Copyright © 2000-2004 by Macpower & Tytech Technology Co., LTD. - www.macpower.com.tw      

- 6 - 

Summary of Contents for Freshman Mini

Page 1: ...Copyright 2000 2004 by Macpower Tytech Technology Co LTD www macpower com tw User Manual Installation Guide External Storage Enclosure for 1 8 Hitachi HDD Freshman Mini...

Page 2: ...ET UP 5 CONNECTION TO YOUR COMPUTER 5 INSTALLATION ON A PC 6 WINME WIN2000 OR WINXP WITH USB 6 WIN98 SE WITH USB 6 UNPLUG PROCEDURE 6 INSTALLATION ON A MACINTOSH 7 MAC OS 9 OR MAC OS X WITH USB 1 1 7...

Page 3: ...OS The Freshman Mini The Freshman Mini USB 2 0 aluminum enclosure is made for the latest Hitachi 1 8 Parallel ATA Hard Drive Slim compact and simple to use the ideal storage solution for your daily d...

Page 4: ...AM USB 1 1 equipped PC Win98SE WinME Win2000 WinXP USB 2 0 equipped PC Win98SE WinME Win2000 WinXP Mac Requirements Minimum Apple G3 processor 64MB RAM USB 1 1 equipped Mac Mac OS 9 1 9 2 10 1 5 10 2...

Page 5: ...vendor carefully before doing so as this might void your warranty Chapter 2 Installing the HDD Preparing the Enclosure Remove the 2 screws for the rear panel not mounted if factory new and pull out t...

Page 6: ...s Hard Drive Assembly Protect the hard drive using the anti shock rubber sleeve then connect the hard drive and slide it back into the enclosure Fasten the two 2 screws for the rear panel as seen on t...

Page 7: ...red update your Operating System or BIOS Do not cover the Enclosure and leave enough room around it for the drive to cool down Do not expose the product to water or humid conditions Always check for v...

Page 8: ...r to see your external hard drive Win98 SE with a USB connection Turn on your Computer and start Windows Insert the driver CD into your CD ROM Connect the Freshman Mini Follow the onscreen instruction...

Page 9: ...n Mini No driver installation required The external drive will mount and show up on your desktop Mac OS 10 2 or 10 3 with a USB 2 0 connection Turn on your computer and start Mac OS Connect the Freshm...

Page 10: ...to format the drive using FAT32 Partitioning Formatting Be aware that this will destroy all your existing data on the drive so make sure you have a backup This step is usually only required the first...

Page 11: ...are correct the drivers are installed and the USB cable is connected correctly PC running Win2000 or WinXP Disk Management Program Right click on My Computer and choose Manage Select Disk Management R...

Page 12: ...e correct there are no extension conflicts and the USB cable is connected correctly Mac OS Mac OS9 2 and earlier does not support creating partitions on an external drive To do that you would need to...

Page 13: ...te and reliable Macpower Tytech Technology Co LTD assumes no responsibility for any errors contained in this manual Macpower Tytech Technology Co LTD reserves the right to make changes in the specific...

Reviews: