background image

F3 in that the engine will ultimately shut down, but in the case of  Extended Shut Down 
you will hear the crew talking back and forth about how the engine ran, time schedules, etc.

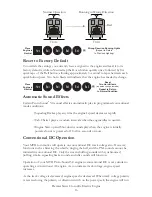
F19 – Train Marker

This function will enable or disable the engine showing whether it is pulling a train or not. 
Please refer to page 12 for a visual description of  how the train lights will behave by 
toggling F19 on/off. Enabling F19 will indicate there is no train being pulled by the 
locomotive and disabling F19 will indicate there is a train being pulled by the locomotive.

F20 – Wrong Direction Running Lights

This function will set the train's operating lighting to be one of  two different ways. 
Either the headlight and ditch lights on (default) or, Wrong Direction (red light above 
headlight on, ditch lights on, and no headlight lit). Please refer to page 18 for a visual 
description of  how the train lights will behave by toggling F20 on/off. 

NOTE

 – F19 and F20 will not operate if  you have F0 disabled.

F21 – One Shot Doppler


You can set your MTH PS3.0-equipped engine to simulate the actual Doppler Effect 
sound a real engine makes as it passes you. To do this, press the F21 button once 
(enable F21) and then listen as the engine makes that pitch shift that mimics the 
Doppler Effect perfectly. Press the F21 button again (disable F21) to shut off  the 
Doppler Effect. With a little practice in timing and speed you can make this happen 
right in front of  you.

F22 – Coupler Slack

When an engine hooks up and pulls a train it has to take up the coupler slack. You can 
play this sound by pressing F22 twice (toggling on then off). This feature works two 
ways – While the engine is sitting still, press F22 twice to enable it. Then, when you 
move the engine, it will play the Coupler Slack sound. 

The second way is to simply force the sound while the engine is moving. To do this, 
simply press F22 twice (toggling it on then off). The sound will play.

F23 – Coupler Close

To play the Coupler Close sound press the F23 button twice (toggling it on then off). 
You can play this sound as you're coupling cars together to add realism.

F24 – Single Whistle/Horn Blast


To play a Single Horn Blast press the F24 button twice (toggling in on then off). This 
plays a single, short horn blast.

F26 – Brake Sounds

Pressing the F26 button (enable F26) will disable the Brake Sounds for your engine. The 
Brake Sounds occur when you reduce the speed of  your engine rapidly. To enable the 
Brake Sounds press the F26 button (disable F26). Brake Sounds are On by default.

F27 – Cab Chatter

Cab Chatter occurs when the engine is sitting at idle. There are various times when the 
crew will talk to each other when the engine is sitting at idle. Pressing the F27 button 
(enable F27) will disable the Cab Chatter. Pressing the F27 button again (disable F27) 
will enable Cab Chatter. Cab Chatter is On by default.

F28 – Feature Reset

Resets Features to defaults.

Premier Swiss Crocodile Electric Engine

23

Summary of Contents for Premier Swiss 6/8 Type II Crocodile Electric Engine

Page 1: ... O 42 curves and the Scale wheel version operates on 31 radius curves It is also compatible with most standard AC transformers and DC power packs See page 49 and 50 for a complete list of compatible transformers power packs and wiringinstructions PLEASE READ BEFORE USE AND SAVE Premier Swiss 6 8 Type II Crocodile Electric Engine OPERATOR S MANUAL 3 PFA Passenger Freight Announcements ...

Page 2: ...ic Operation 5 Command Mode Manual Operation 5 Softkey Operation for Operating Pantograph Engines 5 Coupler Systems 7 PS 3 0 Enhancements 8 Conventional AC DC Start up Shut down 8 DCS DCC Switch 8 Programming Track for DCC operation 8 Loading Engine Firmware 9 LED Lighting 9 Modes of Operation 9 Conventional AC Operation 9 Proto Sound 3 0 Conventional AC Operating Instructions 11 Activating Proto ...

Page 3: ... You will need Adobe Acrobat Reader to view the manual Order online www mthtrains com e mail parts mth railking com Fax 410 423 0009 Phone 410 381 2500 Mail 7020 Columbia Gateway Drive Columbia MD 21046 1532 You can obtain replacement parts and replacement instructions from the M T H Parts Department Lubrication You should lubricate the engine to prevent it from squeaking Use light household oil a...

Page 4: ...p of the contact slide should be removed This can accomplished by running the engine while using the pickup rollers with the pantographs raised or by using a track cleaning pad Pantograph Track Position Switch Figure 4 Pantograph Track Position Switch Conventional Mode When power is applied in conventional mode the pantographs will go through an orientation check This will make sure that the rear ...

Page 5: ...ws requires Remote code version 3 10 or higher MOP Menu Operating Pantograph When pressed it brings up auto manual pantograph operating screen MAN This selects Manual mode for operating the pantographs See the F and R Commands below AUTO This selects auto mode for operating the pantographs See Command Mode Automatic Operation at the top of this page F Commands the front pantograph up If it s alrea...

Page 6: ...mmand mode If you are using the pantographs for picking up power from an operating overhead centenary system in lieu of track power through the center rail pickup rollers be sure that at least one of the pantographs is in contact with the cantenary at all times If both pantographs lose contact with the overhead cantenary the engine will lose power and not operate until one of the pantographs remak...

Page 7: ...roto Coupler If your model came equipped with the Lenz style coupler DO NOT install an MTH Proto Coupler without updating the DSP code Like wise if your model came equipped with an MTH Proto Coupler DO NOT install the Lenz style coupler without updating the DSP code Damage may occur to the coupler or the PS 3 0 board If you desire to change the type of electrically operated coupler on your locomot...

Page 8: ...e to play the full shut down sounds Also the capacitors allow you to operate your engine in conventional mode just like you would any other conventionally controlled engine Finally because there are no batteries you will notice there is no external charge jack on the engine DCS DCC Switch Your MTH PS3 0 equipped engine has a DCS DCC selector switch located on the underside of the tender in steam e...

Page 9: ...nsity halogen lamp on the latest modern diesels LED s allow for various correct colors Also they require less power and do not emit as much heat as incandescent bulbs Modes of Operation There are 4 options for operating your MTH Proto Sound 3 0 equipped engine Conventional AC Conventional DC DCS MTH Digital Command System DCC When the locomotive is placed on the track and power is applied to the t...

Page 10: ...e is another interruption in track power The next interruption in track power will move the sequence to the reverse state The engine will now move in the reverse direction If the power interruption was accomplished by using the direction button and the throttle position was not changed the engine will run in the reverse direction at the same speed that it was traveling in the forward position Subs...

Page 11: ...e Bell button To turn the bell off press and release the Bell button again The bell will continue to ring from the time you turn it on until you press and release the button again to turn it off Horn Whistle To sound the whistle firmly press the Horn Whistle button The whistle will sound for as long as you continue to depress the button It will stop when you release the button Direction Your train...

Page 12: ...stles 1 Bell 2 Horn Whistles 1 Bell 3 Horn Whistles 1 Bell 4 Horn Whistles 1 Horn Whistle 2 Bells from Neutral only 1 Horn Whistle 3 Bells 1 Horn Whistle 4 Bells 1 Horn Whistle 5 Bells from Neutral only Manual Volume Control To adjust the volume of all sounds made by this engine turn the master volume control clockwise to increase the volume and counterclockwise to reduce the volume Turning the ma...

Page 13: ... Direction button to trigger the sounds Proto Sound 3 0 has disabled operator control over the Horn and Bell buttons until the full PFA sequence is complete After waiting about 30 seconds for that sequence to run press the Direction button again to trigger the second sequence of PFA After about 30 seconds press the Direction button again to trigger the third PFA sequence Again after allowing about...

Page 14: ... use PFA even if you are double heading with another engine If the second engine is not equipped with Proto Sound 3 0 you must remember not to leave the throttle at a high voltage level once you have stopped the engine to run the PFA Otherwise the engine without PFA will begin vibrating on the track as its motors strain to move the train since they cannot be automatically disabled during the PFA c...

Page 15: ...ver couple this engine to another engine that is not equipped with speed control to avoid damaging the motors in either engine Each time you shut down the engine completely it will automatically turn speed control on Horn Place Engine into Neutral Bell Bell Speed Control Two Horn Blasts indicates change is made Repeat to Return to Normal Condition Locking Locomotive Into A Direction You can lock y...

Page 16: ... is made Repeat to Return to Normal Condition Horn Place Engine in Neutral Bell Bell Bell Bell Bell Conventional DC Operation Your MTH locomotive will operate on conventional DC track voltage also However functions such as blowing the whistle ringing the bell and the PSA sounds cannot be initiated in conventional DC Only the steam chuffing sounds with synchronized puffing smoke squealing brake sou...

Page 17: ...y other models You are now able to by selecting two different softkeys on the DCS Remote change how the engine s lights respond Please refer to your DCS Manual for definitions and further explanation on how softkeys are utilized in your PS3 0 equipped engine Below is a lighting diagram in the opposite direction The electronics in your MTH Proto Sound 3 0 locomotive are designed to slowly change di...

Page 18: ...r Premier Swiss Crocodile Electric Engine 18 Engine without Train Just the engine running Rear Red The second lighting feature of your Swiss Crocodile Electric Engine is for wrong direction running indication To toggle this indicator press the LBE softkey on the DCS remote To activate this indicator press the LBE softkey on the DCS remote so it displays Beacon off Your engine will now look like th...

Page 19: ... to get started running quickly Please refer to the Advanced DCC Operation section of the manual if you want to dig into the full capability of DCC Each engine type may have a slightly different F Function list This depends upon whether it s steam diesel or electric and whether it has smoke or not Please refer to the table of Default CV Values for your particular engine s F Functions A note about ...

Page 20: ...there is a minimum wait time of about 10 seconds before it will advance So here is how a typical PFA sequence operates 1 Press the F4 button twice toggle F4 on then off to start the PFA sequence on the engine You ll hear Now arriving 2 Press the F4 button twice toggle F4 on then off again to stop the engine at the station It is recommended to do it this way rather than bring the engine to a stop w...

Page 21: ...ce toggling on then off will fire your Rear Coupler Forward Reverse Signal Just like a real engine you can announce the direction of intended movement using your DCC handheld and F9 and F10 F9 Forward Signal Pressing F9 twice toggling on then off will sound the Forward Signal This is two whistle horn blasts F10 Reverse Signal Pressing F10 twice toggling on then off will sound the Reverse Signal Th...

Page 22: ...raph if you have F12 enabled Toggling F13 OFF will lower the rear pantograph Irrespective of the pantograph s positions in manual mode if you re enable Auto mode toggle F12 OFF the pantographs will automatically realign themselves to the correct orientation based upon the engine s current direction of travel Additional F Functions F15 F16 Idle Sequence Pressing F15 or F16 twice toggling on then of...

Page 23: ...e practice in timing and speed you can make this happen right in front of you F22 Coupler Slack When an engine hooks up and pulls a train it has to take up the coupler slack You can play this sound by pressing F22 twice toggling on then off This feature works two ways While the engine is sitting still press F22 twice to enable it Then when you move the engine it will play the Coupler Slack sound T...

Page 24: ...gnal Grade Crossing Auto Panto On Off Front Panto Up Down Rear Panto Up Down Idle Sequence 2 Idle Sequence 1 Extended Start Up Extended Shut Down Train Marker Wrong Direction Running Lights On Off One Shot Doppler Coupler Slack Coupler Close Single Horn Blast Engine Sounds Brake Sounds On Off Cab Chatter On Off Feature Reset Refer to page 29 30 for CV Data and Function ID Description Function Prem...

Page 25: ...t DCC address The default Short address is always 3 The default Long address will be 3333 To change your engine s Short Address using PoM 1 Call up the engine s current address on your DCC handheld 2 Enter Programming on the Main on your DCC handheld 3 Enter the new address you want Remember you can only use address 1 127 for Short Addressing 4 Once you hit Enter the engine will give you a two whi...

Page 26: ...ctory Resets Clears everything takes engine to just like it was when you got it brand new l Send a decimal 08 to CV 8 to reset everything entirely back to factory default l Send a decimal 192 to reset everything except user speed tables Feature Resets There are a couple of Feature Resets that you can use l Press F28 twice toggling on then off This resets the smoke volume and lights back to their d...

Page 27: ...anufacturer s engines with an address of 55 are on the rails MTH engines will listen for commands coming to engine address 55 when the 55 55 55 reset is enabled even though they are not programmed as address 55 l Enter PoM mode on your DCC handheld and write a value of 55 to CV55 Again even though your MTH engine is NOT on address 55 it will still listen for this reset command l Call up address 3 ...

Page 28: ...1 F8 for the active consist Defines active functions for FL and F9 F12 for the active consist bit 0 1 will tell an engine that you want it s FL control to operate under the consist address bit1 0 bit2 1 will configure the FL control for a reversed engine in a consist Consist Acceleration Rate Consist Deceleration Adjustment Speed Table Select Decoder Configuration MTH PWM Mode Configuration MTH Ac...

Page 29: ...1 Default Value 117 118 119 120 121 122 123 124 125 126 127 128 129 130 131 132 133 134 135 136 137 138 139 140 141 142 143 144 145 146 147 148 149 150 151 152 153 154 155 156 157 158 159 160 161 162 163 164 165 166 167 168 169 170 CV Description Function Horn High Byte Function Horn Low Byte Function Start Up Shut Down High Byte Function Start Up Shut Down Low Byte Function PFA High Byte Function...

Page 30: ...ber you d use on your DCC handheld It is used internally in the engine SOUNDS Bell Brake Sounds Cab Chatter Clickety Clack Coupler Close Coupler Slack Drift Chuff Engine Sounds Forward Signal Grade Crossing Signal Horn Idle Sequence 1 Idle Sequence 2 Idle Sequence 3 Idle Sequence 4 Labor Chuff Master Volume Short Horn One Shot Doppler Reverse Signal SCRIPTS Extended Shut Down Extended Start Up PFA...

Page 31: ...to write at CV170 So looking at the Function ID table above you can see that PFA is a value of 23 4 Using your DCC system enter a value of 23 for CV170 and hit Enter You have just re assigned the PFA sound to F28 on your DCC controller The engine will give you a two horn blast indication Note You ve also left an empty location where PFA used to be F4 5 Now you can fill that location with whichever...

Page 32: ...nds to See diagram below for example Custom Speed tables Below is a table that shows the value to write to CV25 to achieve the desired speed curve For example if you would like to use speed curve 18 then 1 Write a value of 1 to CV52 to enable PWM Mode 2 Write a value of 1 to bit 4 of CV29 3 Write a value of 18 to CV25 Your engine will now use the speed curve 18 below 4 If you want to create your o...

Page 33: ...ing more 2 Call up the Front engine on your DCC handheld address 1 in this example 3 Select CV22 and write a value of 1 This tells the engine that it s a forward facing engine and that you want F0 to control the FL function at the consist address The engine will give you two horn blasts to announce that it received the CV change 4 Ensure F0 is deactivated at the Front engine s address Most systems...

Page 34: ...ntrol is integral For example if you wanted to flip the Rear engine around and make it face forward in the consist all you d have to do is go into the Rear engine s address address 3 in the example and clear bit 7 of CV19 In other words just write the consist s address to CV19 The FL control will automatically understand what you ve done so there is no need to go in and change CV22 Below is a tabl...

Page 35: ...ut Down F3 and Front Coupler F7 you will want to write a value of 71 to CV21 This is setting bits 0 1 2 and 6 ON a CV21 s bits are shown in the table below the decimal value is shown in parenthesis Bit Decimal Value 7 128 6 64 5 32 4 16 3 8 2 4 1 2 0 1 F Function F8 F7 F6 F5 F4 F3 F2 F1 Premier Swiss Crocodile Electric Engine 35 ...

Page 36: ...ng Track outputs from DCC systems Because each DCC system manufacturer s output capabilities on the Programming Track differ it is recommended that you use a DCC Programming Track Booster to perform functions on the programming track Simply put try to program or read back the address of an MTH engine on a programming track If you can read write the address then you won t need a Programming Track B...

Page 37: ...at already has a value assigned that you do not want to alter but need to make additions to it for example CV29 you would simply add the additional bits you enabled to the existing value to obtain the new CV value For example if you had a consist address CV19 set to 5 and you wanted to alter this to show an engine reversed in the consist you would need to set bit 7 decimal value 128 for the engine...

Page 38: ... mount screws as seen in Figure 9 and lifting the cab from the chassis 2 Once the cab is removed remove the trucks by unscrewing the black Phillips motor mount screw located on the underside of the drive trucks see Fig 9 3 Once the motor mount screw has been removed pull the motor away from the truck block and lightly coat the motor worm gear and bronze drive gear in the truck block with grease Ro...

Page 39: ...nd traction and prematurely wear out the neoprene traction tires Wheels and tires can be cleaned using denatured not rubbing alcohol applied with a cotton swab To clean the track use RailKing Track Cleaning Fluid or denatured not rubbing alcohol and a clean rag Unplug the transformer and wipe the rails of the track turning the rag frequently to ensure that you are using clean cloth on the rails Th...

Page 40: ...he wheel You may find it useful to use two small flathead screwdrivers to stretch the tire over the wheel 6 If you twist the tire while stretching it over the wheel you will need to remove and reinstall the tire Otherwise your engine will wobble while operating 7 Make sure the tire is fully seated inside the groove Use a razor blade to trim away any excess tire that will not seat inside the groove...

Page 41: ...er the engine Rotate throttle clockwise to increase track power Check that you have the Panto Track switch in the correct position for your operating environment Coupler Solution When I try to fire the coupler PFA starts The Proto Coupler won t let the engine uncouple on the fly The coupler does not fire or stay coupled You are waiting too long between Horn button presses See the timing instructio...

Page 42: ... engine doesn t go into reverse When the PFA enters its last sequence the bell automatically comes on When PFA is enabled pressing the whistle and bell has no effect I push the direction button but the next sound clip in the sequence does not play or the engine does not come out of PFA after fourth press of the direction button So that PFA effects can be as realistic as possible Proto Sound 3 0 di...

Page 43: ...ssenger car Slide the engine a couple of feet in either direction you may have a bad track section Have you got that section electrically isolated with a toggle switch or other device Check that you have the Panto Track switch in the correct position for your operating environment Check the volume pot on your tender Full CW Max volume Check to see if a screw or some other material hasn t lodged it...

Page 44: ... back to its out of the box defaults Lights Solution Motion Solution When I apply power to the track my engine starts up lights and sound but it won t move My engine hesitates at slow speeds Lower the track voltage then raise it again The engine should start moving If you apply greater than 9VDC quickly the engine will just sit there Lowering it below 9VDC then raising it will get the engine movin...

Page 45: ...the correct position for your operating environment Start up Solution Sound Solution I have no sound on my engine but my lights are on and it moves just fine When I run Doppler I can hear the Doppler shift but then the engine sounds fade out and I can t get them back There s a crackling sound from my engine You may have it turned off Repeatedly press F6 to cycle through the volume levels there are...

Page 46: ... bit It should clear up shortly after lubricating and running This is normal dial up the speed on your DCC controller to make your engine move PFA Solution I hit F4 to start the PFA but the engine just keeps ringing its bell that s all it ll do Why does my engine run away all by itself after the PFA is over Bring the engine speed to 0 You will now hear the station arrival sounds pretty cool huh Pr...

Page 47: ...e doesn t do anything No lights no sound no nothing I get an error when I hit Start Up DCS is polarity sensitive when powered by a DC power supply This is normal You have to hit the Start Up button Check to see if that section of track has power Use a voltmeter or a lit passenger car not your tongue Slide the engine a couple of feet in either direction you may have a bad track section Have you got...

Page 48: ...Be a little patient and let it run for a bit It should clear up shortly after lubricating and running This is normal dial up the speed on your DCS Remote to make your engine move PFA Solution When I enter PFA all that happens is the bell rings What do I do Why does my engine run away all by itself after the PFA is over Press the DIR button Your engine will stop and begins the arrival sequence Pres...

Page 49: ...ard Lionel 1063 Lionel LW Powermaster U A U A U A 8 17v 8 18v 8 18v 60 Watt 75 Watt 135VA Standard Standard Electronic All Trol Left Terminal Right Terminal 0 24v 300 Watt Electronic Dallee Hostler Left Terminal Right Terminal Electronic Lionel LW A U 8 18v 75 Watt Standard Lionel KW A or B U 6 20v 190 Watt Standard Lionel MW Outside Track Terminal Inside Track Terminal 5 16v 50V A Electronic Lion...

Page 50: ...mbo 50101 18VDC on Supply 0 18VDC at Controller 240 Watt Electronic MRC 6200 0 18 5v 60 Watt Electronic Not Recommended For 70 3001 1 J3a Not recommended for 70 3001 1 J3a RECOMMENDED DC TRANSFORMERS Notes On Use Use 22 volts maximum track voltage when operating a MTH locomotive equipped with Proto Sound Loco Sound or Proto Sound 2 0 Crest CRE 55460 Power Supply w CRE 55401 Controller 0 24v 180 Wa...

Page 51: ...Proto Sound 3 0 engines but does not turn off the input power to the TIU One Touch Global Mute UnMute Single button mutes or unmutes all DCS controlled locomotives sounds Proto Dispatch Operation Public Address like feature allows users to speak through locomotive speaker during operation Proto Cast Allows users to play audio recordings through locomotive speaker during operation Proto Doppler Sou...

Page 52: ...e problem with a service technician when contacting the Service Center for your Return Authorization Please make sure you have followed the instructions carefully before returning any merchandise for service Authorized M T H Service Centers are independently owned and operated and are not agents or representatives of M T H Electric Trains M T H assumes no responsibility financial or otherwise for ...

Page 53: ...dius von 31 788 mm Des weiteren ist sie kompatibel mit den meisten Wechselstromtransformatoren und Gleichstromfahrreglern Ein vollständige Liste kompatibler Transformatoren Stromversorgungen sowie Verdrahtungsanweisungen finden Sie auf den Seiten51 52und53 Premier Elektrolokomotive Schweizer Krokodil Baureihe Ce 6 8 II 3 PFA Passagier Fracht Ankündigungen BITTE LESEN SIE DIESE ANLEITUNG VOR INBETR...

Page 54: ...ieb 4 Befehlsmodus Automatikbetrieb 5 DCS Befehlsmodus Manueller Betrieb 5 Softkey Funktionen zur Betätigung der Pantographen 5 Kupplungssysteme 7 PS 3 0 Erweiterungen 8 Konventionelles Aufstarten Abschalten analoger Wechsel bzw Gleichstrom 8 DCS DCC Schalter 8 Programmiergleis für DCC Betrieb 9 Lok Firmware laden 9 LED Beleuchtung 9 Betriebsarten 9 Konventioneller Wechselstrombetrieb 9 Proto Soun...

Page 55: ...ramm Adobe Acrobat Reader benötigt Ersatzteile und Anweisungen zum Aus Einbau sind über den M T H Ersatzteildienst zu beziehen Online Bestellung www mthtrains com E Mail parts mth railking com Fax 001 410 423 0009 Telefon 001 410 381 2500 Briefpost 7020 Columbia Gateway Drive Columbia MD 21046 1532 Schmierung Die Lokomotive ist zu schmieren um Verschleiß und Quietschgeräusche zu vermeiden Die in A...

Page 56: ...u kann die Lokomotive mit Stromversorgung über die Stromabnehmerrollen und mit angehobenen Pantographen betrieben werden alternativ können die Gleitschuhe mit einem Reinigungskissen gereinigt werden Wahlschalter Oberleitung Schiene Abb 4 Wahlschalter Oberleitung Schiene Analogbetrieb Liegt im Analogbetrieb Spannung an wird die Lage der Pantographen in Bezug auf die Fahrtrichtung geprüft Dadurch wi...

Page 57: ...DCS Fernbedienung gespeichert wird erfordert DCS Firmware Ausgabe 3 10 oder höher MOP Menü zur Betätigung der Pantographen Nach Drücken dieser Taste erscheint die Pantographen Betriebmaske AUTO MANUAL Automatikbetrieb manueller Betrieb MAN Damit wird die manuelle Betätigung der Pantographen gewählt Siehe auch die weiter unten aufgeführten Befehle F und R AUTO Damit wird der Automatikbetrieb der Pa...

Page 58: ...r der Automatikbetrieb der Pantographen zur Verfügung Werden die Pantographen für die Stromaufnahme aus der Oberleitung verwendet ist sicherzustellen dass dauernd mindestens ein Pantograph in Kontakt mit der Oberleitung ist Hat keiner der Pantographen Kontakt mit der Oberleitung verliert die Lokomotive ihre Stromversorgung und ist außer Betrieb stromlos bis einer der Pantographen den Kontakt mit d...

Page 59: ...rscheidet sich vom Befehlscode der MTH Proto Kupplung Ist das vorliegende Modell mit einer Kupplung System Lenz ausgestattet darf NICHT auf eine MTH Proto Kupplung umgerüstet werden ohne den DSP Befehlscode zu aktualisieren Sinngemäß darf eine mit MTH Proto Kupplung ausgerüstete Lokomotive NICHT auf Kupplungen System Lenz umgerüstet werden ohne den DSP Befehlscode zu aktualisieren Dies könnte die ...

Page 60: ...nwerfer erloschen sind spielt die Lokomotive ihre Aufstart Geräuschsequenz ab gleichzeitig werden alle Beleuchtungen eingeschaltet Die Ladung der Kondensatoren reicht aus um die Abschalt Geräuschsequenz vollständig abzuspielen Des weiteren ermöglichen es die Kondensatoren Ihre Lokomotive in konventioneller Betriebsart wie jede andere konventionell gesteuerte Lokomotive einzusetzen Da keine Batteri...

Page 61: ...rekte Beleuchtung Ihrer Lokomotive wiederzugeben vom warmen orangefarbigen Licht alter Laternen der Dampflokomotive bis zum intensiven weißen Halogenlampenlicht der modernen Diesellokomotiven Leuchtdioden ermöglichen es den jeweils zutreffenden Farbton zu wählen Des weiteren verbrauchen sie weniger Energie und strahlen nicht soviel Wärme ab wie Glühbirnen Betriebsarten Für Ihre mit MTH Proto Sound...

Page 62: ...Die Lokomotive verbleibt im Schaltzyklus Neutral bis eine weitere Unterbrechung der Gleisspannung erfolgt Bei der nächsten Unterbrechung der Gleisspannung schaltet die Lokomotive auf den Schaltzyklus Rückwärts Die Lokomotive fährt nun rückwärts Wurde die Unterbrechung der Gleisspannung mit dem Fahrtrichtungsschalter erzeugt und die Stellung des Fahrreglers nicht verändert fährt die Lokomotive mit ...

Page 63: ...d lassen diese wieder los Zum Ausschalten der Glocke betätigen Sie die Glocken Drucktaste erneut lassen diese wieder los Die Glocke läutet nach der ersten Betätigung der Drucktaste kontinuierlich bis diese erneut gedrückt wird Signalhorn Pfeife Zur Betätigung des Signalhorns drücken Sie die Signalhorn Pfeife Drucktaste fest Das Signalhorn ertönt solange Sie die Drucktaste gedrückt halten Das Signa...

Page 64: ...e der Lokomotive ist Leerfahrt Das bedeutet die Lokomotive zieht keine Wagen In diesem Fall ist die Beleuchtung der Lokomotive wie folgt Beleuchtung der Lokomotive umstellen auf Zugverband Glocken Drucktaste ein Mal kurz antippen anschließend Signalhorn Pfeife Drucktaste ein Mal kurz antippen Lokomotive auf Leerfahrt Heck Premier Elektrolokomotive Schweizer Krokodil 12 Rot Einsatz Anzeige Zug Leer...

Page 65: ...ontrolle über Signalhorn Pfeife Drucktaste gesperrt bis die ganze PFA Sequenz beendet ist Nach einer Wartefrist von ca 30 Sekunden für den Durchlauf der ersten Sequenz betätigen Sie den Fahrtrichtungsschalter erneut um die zweite PFA Sequenz abzurufen Nach weiteren 30 Sekunden betätigen Sie den Fahrtrichtungsschalter erneut um die dritte PFA Sequenz abzurufen Nach weiteren 30 Sekunden für den Durc...

Page 66: ... Sequenzen kurzzeitig Die PFA Sequenzen funktionieren nicht nur in Vorwärtsfahrt Nach dem Durchlauf der vollen Sequenz fährt der Zug vom Haltepunkt in der ursprünglichen Fahrtrichtung weiter Sie können die PFA Sequenzen auch in Doppeltraktion im Verbund mit einer weiteren Lokomotive einsetzen Falls die zweite Lokomotive nicht mit Proto Sound 3 0 ausgestattet ist darf der Fahrregler nach dem Anhalt...

Page 67: ...nalhornstöße bestätigt Wiederholen Sie die Drucktasten Sequenz 1 Mal Signalhorn 2 Mal Glocke um in die andere Betriebsart umzuschalten Wenn die Lokomotive mit einer anderen Lokomotive gekoppelt werden soll welche nicht über automatische Geschwindigkeitsregelung verfügt empfehlen wir die Geschwindigkeitsregelung beim Aufstarten auszuschalten Damit können die Elektromotoren beider Lokomotiven vor Üb...

Page 68: ...ten wird durch zwei Signalhornstöße bestätigt Die Lokomotive ändert die Fahrtrichtung nicht einschließlich Neutral bis Sie die Sequenz 1 Mal Signalhorn 3 Mal Glocke wiederholen und die Lokomotive wieder in die normale Betriebsart umschalten Die Verriegelung hält auch an wenn die Lokomotive für längere Zeit ohne Stromversorgung verbleibt Lokomotive in einer Fahrtrichtung verriegeln Beleuchtung Fahr...

Page 69: ...eglers umgepolt fährt die Lokomotive in der entgegengesetzten Fahrtrichtung Die Elektronik in Ihrer MTH Proto Sound 3 0 Lokomotive ist so ausgelegt dass die Fahrtrichtungsänderung allmählich erfolgt ohne dass die Stellung Fahrreglers verändert werden muss Schalten Sie lediglich den Polaritätsschalter Ihres Gleichstromfahrreglers um die Lokomotive wird allmählich bis zum Stillstand abbremsen und da...

Page 70: ...welches mit dem DCS System geliefert wird oder auf der MTH Website www mthtrains com Mit DCS können Sie eine ganze Flotte von MTH PS3 0 Lokomotiven auf den Gleisen positionieren diese bleiben ausgeschaltet bis Sie den Befehl zum Aufstarten geben Die neue Elektrolokomotive Schweizer Krokodil bietet zwei neue Beleuchtungsfunktionen die an keinem andern Modell implementiert sind Über zwei Softkeys pr...

Page 71: ...Um auf Normalbetrieb umzuschalten betätigen Sie erneut den Softkey LBE der DCS Fernbedienung so dass im Display Beacon On Drehlicht ein angezeigt wird Das Beleuchtungsmuster der Lokomotive entspricht jetzt der Abbildung unten links Das Beleuchtungsmuster der Lokomotive sieht jetzt so aus Lokomotive auf dem Gegengleis Rot Fahren auf dem Gegengleis Normalbetrieb DCC Digitalsteuerung DCC ist ein weit...

Page 72: ...rieb kennen sollten Eine Beschreibung der DCC finden Sie im Kapitel Erweiterter DCC Betrieb dieser Anleitung Die einzelnen Lokomotiven besitzen unterscheiedliche Funktionslisten Je nach dem ob es sich um eine Dampf Diesel oder Elektrolokomotive handelt und ob sie mit einem Rauchentwickler ausgestattet ist Die Ihre Lokomotive zutreffende Belegung der F Tasten finden Sie in der Tabelle Voreingestell...

Page 73: ...chalten um die Lokomotive im Bahnhof anzuhalten Es empfiehlt sich das Anhalten auf diese Art und Weise zu bewerkstelligen anstatt den Zug mittels Fahrregler anzuhalten da die Funktion PFA nach dem Abrufen der letzten Sequenz Taste F4 die automatische Abfahrt Anfahren der Lokomotive ermöglicht Die Klangeffekte schalten von Lokomotivgeräuschen auf Bahnhofgeräusche um welche sämtliche Geräuschkulisse...

Page 74: ...asten F9 und F10 Ihrer DCC Bedieneinheit können Sie die Richtung der bevorstehenden Abfahrt vorbildgerecht ankündigen F9 Signal Abfahrt vorwärts Zweimaliges Betätigen der Taste F9 aktiviert das Signal Abfahrt vorwärts Zwei kurze Signalhornstöße bzw Pfiffe ertönen F10 Signal Abfahrt rückwärts Zweimaliges Betätigen der Taste F10 aktiviert das Signal Abfahrt rückwärts Drei kurze Signalhornstöße bzw P...

Page 75: ...aphen an sofern auch Funktion F12 freigeschaltet ist Sperren der Funktion F14 OFF senkt den hinteren Pantographen ab Wird durch Sperren der Funktion F12 OFF der Automatikbetrieb aktiviert erfolgt die Betätigung der Pantographen automatisch entsprechend der aktuellen Fahrtrichtung der Lokomotive ungeachtet der Stellung welche die Pantographen bei der manuellen Betätigung innehatten Zusätzliche F Fu...

Page 76: ...en Zug wird zuerst das Kupplungsspiel eliminiert Dieses typische Geräusch können Sie durch zweimaliges Betätigen der Taste F22 abrufen Diese Funktion wirkt auf zwei Arten Betätigen Sie die Taste F22 zweimal bei stillstehender Lokomotive so schalten Sie die Funktion frei Beim jedem Anfahren der Lokomotive ertönt dann das Geräusch der sich streckenden Kupplungen Mit der zweiten Methode wird das Gerä...

Page 77: ...Pantographen ein aus Anheben absenken des vorderen Pantographen Anheben absenken des hinteren Pantographen Leerlaufsequenz 2 Leerlaufsequenz 1 Erweiterte Aufstartsequenz Erweiterte Abschaltsequenz Markierlichter Beleuchtung Fahren auf dem Gegengleis ein aus Dopplereffekt Kupplungsspiel Kupplung schließen Kurzer Signalhornstoß Lokomotiv Geräusche Bremsgeräusche Führerhausdialoge Funktionsrückstellu...

Page 78: ...en und einer kurzen DCC Adresse programmiert Die kurze Adresse ist immer auf 3 gesetzt die lange Adresse lautet 3333 Kurze Adresse der Lokomotive mittels Hauptgleisprogrammierung ändern 1 Rufen Sie die Lokomotive auf der DCC Bedieneinheit mit der aktuellen Adresse auf 2 Geben Sie auf der DCC Bedieneinheit Hauptgleisprogrammierung ein 3 Geben Sie die gewünschte neue Adresse ein beachten Sie dass fü...

Page 79: ...ringen dazu dienen entweder Funktionen rückstellen oder Einstellungen rückstellen Zum Rückstellen Ihrer mit MTH PS3 0 ausgerüsteten Lokomotive stehen mehrere Methoden zur Verfügung Einstellungen auf Werkeinstellung rückstellen löscht alles stellt die ursprünglichen werkseitigen Einstellungen wieder her Auslieferzustand l Senden Sie eine dezimale 08 zu CV 8 um alles auf die werkseitige Grundeinstel...

Page 80: ...er CV 17 und CV 18 lange Adresse auf den gewünschten Wert geändert werden Startet die Lokomotive unter Adresse 55 nicht auf ist die Methode Rückstellung 55 55 55 anzuwenden Dazu sind die folgenden Anweisungen zu befolgen Stellen Sie sicher dass das DCC System eingeschaltet ist und an den Schienen Spannung anliegt Rufen Sie die Lokomotivadresse 55 auf ANMERKUNG die Adresse der Lokomotive wird NICHT...

Page 81: ...sten Blick verwirrend erscheinen der wesentliche Punkt den es zu beachten gilt ist die Tatsache dass die Adresse der Lokomotive NICHT auf 55 gesetzt wird sondern lediglich die Lokomotivadresse 55 auf der DCC Bedieneinheit aufgerufen wird um den Wert 55 an die Konfigurationsvariable CV 55 zu senden Es sei an dieser Stelle noch einmal darauf hingewiesen dass MTH Lokomotiven auf Befehle der Rückstell...

Page 82: ...chter und F9 F12 für die aktuelle Mehrfachtraktion Bit 0 auf 1 gesetzt weist die Lokomotive an dass ihre Frontlicht Funktion unter der Mehrfachtraktions Adresse aufgerufen werden soll Bit 1 0 Bit 2 1 konfiguriert die Frontlicht Funktion für eine rückwärts angekoppelte Lokomotive einer Mehrfachtraktion Mehrfachtraktions Beschleunigungsrate Mehrfachtraktions Verzögerungsrate Geschwindigkeitstabelle ...

Page 83: ... Beschleunigungsrate MTH Verzögerungsrate MTH Mehrfachtraktions Beschleunigungsrate MTH Mehrfachtraktions Verzögerungsrate Spannungsabgleich Vorwärtsfahrt Alternierende Beschleunigungskurve Stufe 1 Alternierende Beschleunigungskurve Stufe 2 Alternierende Beschleunigungskurve Stufe 3 Alternierende Beschleunigungskurve Stufe 4 Alternierende Beschleunigungskurve Stufe 5 Alternierende Beschleunigungsk...

Page 84: ...te Funktion Leerlaufsequenz 2 höherwertiges Byte Funktion Leerlaufsequenz 2 niederwertiges Byte Funktion Leerlaufsequenz 1 höherwertiges Byte Funktion Leerlaufsequenz 1 niederwertiges Byte Funktion Erweiterte Aufstartsequenz höherwertiges Byte Funktion Erweiterte Aufstartsequenz niederwertiges Byte Funktion Erweiterte Abschaltsequenz höherwertiges Byte Funktion Erweiterte Abschaltsequenz niederwer...

Page 85: ...der Lokomotive interne Verwendung 1 2 3 4 5 6 7 8 9 10 11 12 13 14 15 16 17 18 19 20 21 22 23 24 25 26 27 28 29 30 31 32 33 34 35 36 37 38 39 40 41 KLANGEFFEKTE Glocke Bremsgeräusche Führerhausdialoge Klick Klack Geräusche der Räder Schienenstöße Kupplung schließen Kupplungsspiel Leichter Dampfschlag Lokomotiv Geräusche Signal Abfahrt vorwärts Signal vor Bahnübergang Signalhorn Leerlaufsequenz 1 L...

Page 86: ...ystem speichern Sie nun in CV 170 den Wert 23 und drücken die EINGABE Taste Jetzt haben die Funktion PFA auf Ihrem DCC Steuermodul unter F28 abgelegt Die Lokomotive quittiert mit zwei Signalhornstößen Pfiffen Hinweis Der ursprüngliche Speicherort von PFA F4 ist jetzt leer 5 Diesen Speicherort können Sie jetzt mit jeder beliebiger CV belegen In diesem Beispiel speichern wir die Funktion Funktionsrü...

Page 87: ...en ist CV 21 und CV 22 bestimmen auf welche F Funktionen die Mehrfachtraktion reagiert Beispiele finden Sie im unten aufgeführten Diagramm Normale Fahrtrichtung Vorwärts Lokomotive 2 Front Lokomotive 2 Mitte Lokomotive 3 Rückseite F R F R F R CV 25 Beschleunigungskurven Beschleunigungsschritte Bewegungsarbeitszyklusskalierung 3 Schreiben Sie den Wert 18 in CV 25 Ihre Lokomotive verwendet nun die u...

Page 88: ...ntlicht Funktion mit F0 ansteuern wollen Die Lokomotive quittiert die CV Änderung mit zwei Signalhornstößen Pfiffen 4 Stellen Sie sicher dass F0 unter der Adresse der Front Lokomotive deaktiviert ist Die meisten Systeme verfügen über ein Glühbirnen Symbol um den Status von F0 anzuzeigen Stellen Sie sicher dass dieses Symbol nicht leuchtet 5 Rufen Sie auf Ihrer DCC Bedieneinheit die hintere Lokomot...

Page 89: ...eise müssen sie F5 mehrmals ein ausschalten um die Beleuchtung mit der DCC Befehlsstation zu synchronisieren Dies ist von Ihrem DCC System abhängig 11 Rufen Sie die Mehrfachtraktions Adresse auf in diesem Beispiel Adresse 4 12 Drücken Sie die Taste F0 um sicherzustellen dass die Frontlichter aktiviert sind Die meisten Systeme verfügen über ein Glühbirnen Symbol um den Status von F0 anzuzeigen Stel...

Page 90: ...en Wert 4 Bit 2 auf 1 gesetzt 3 Rufen Sie die hintere Lokomotive auf in diesem Beispiel Adresse 3 4 Die hintere Lokomotive soll auf Funktionen Aufstarten Abschalten F3 und die hintere Kupplung F8 reagieren folglich schreiben Sie den Wert 132 in CV 21 Ihre Lokomotiven sind jetzt dem oben aufgeführten Beispiel entsprechend konfiguriert Beachten Sie dass in CV 21 kein F0 gespeichert ist Begründung Di...

Page 91: ...DCC Bitwert Dekoder Im oben aufgeführten Beispiel addieren Sie lediglich die Werte in der Zeile Dezimalwert 128 64 0 16 8 0 0 1 217 Folglich würden Sie den Wert 217 in die zu ändernde CV schreiben Der oben aufgeführte Wert bezieht sich auf sämtliche CV Möchten Sie einer bestimmten CV Ergänzungen hinzufügen ohne den dort schon abgespeicherten Wert zu verändern z B CV 29 so fügen Sie einfach dem vor...

Page 92: ...Fahrgestelle entfernen dazu ist die schwarze Befestigungsschraube Kreuzschlitz des Motors auf der Unterseite Fahrgestells zu entfernen siehe Abb 9 3 Sind die Befestigungsschrauben entfernt den Motor vom Antriebsblock abziehen und auf das Schneckenrad des Motors sowie das Bronze Antriebsrad im Antriebsblock einen dünnen Fettfilm auftragen Drehen Sie das Schwungrad von Hand so ist der Motor leichter...

Page 93: ... Stecken Sie den Transformator aus und wischen die Schienen sauber Wenden Sie den Lappen oft so dass möglichst die sauberen Stellen des Lappens mit der Schiene in Kontakt kommen Danach beobachten Sie die Verschmutzung der Schienen und wiederholen Sie die Reinigung wann immer sich Schmutz auf den Schienen angesammelt hat Dadurch stellen Sie eine guten elektrischen Kontakt sicher und verlängern die ...

Page 94: ...treifen gegebenenfalls mit zwei kleinen Schraubendrehern dehnen um das Aufziehen zu erleichtern 6 Hat sich der Haftreifen beim Aufziehen verdreht ist er zu entfernen und neu aufzuziehen Andernfalls taumelt die Lokomotive beim Fahren 7 Sicherstellen dass der Haftreifen korrekt und vollständig in der Treibradnut sitzt Eventuell vorstehende Kanten des Haftreifens mit einer Rasierklinge trimmen 8 Der ...

Page 95: ...n nur in Neutralstellung und in zufälligen Intervallen abgespielt Aufstarten Signalhorn Glocke Behebung Behebung Behebung Nur die Scheinwerfer schalten ein sonst nichts Beim ersten Einschalten der Stromversorgung fährt die Lokomotive nicht an Die Lokomotive fährt nach dem Betätigen des Fahrtrichtungsschalters nicht an Kupplung Behebung Führerhausdialoge Behebung Die Lokomotive verhält sich normal ...

Page 96: ...6 maßstäbliche km h betragen Entspricht in der konventionellen Betriebsart einer Gleisspannung von ungefähr 10 Volt oder weniger PFA Behebung Befindet sich die Lokomotive im PFA Modus schaltet sie nicht auf Fahrtrichtung rückwärts um Wird die letzte PFA Sequenz abgerufen erklingt automatisch die Glocke Ist die PFA Funktion aktiviert hat die Pfeifen bzw Glocken Drucktaste keine Wirkung Bei Betätigu...

Page 97: ...llieren Die Lokomotive einige Dezimeter in beliebiger Richtung verschieben möglicherweise steht sie auf einem schlechten Gleissegment Ist der fragliche Gleisabschnitt durch einen Schalter oder eine andere Komponente elektrisch getrennt Prüfen Sie ob sich der Stromaufnahme Wählschalter Pantograph Mittelschiene in der für die Betriebsart korrekten Stellung befindet Volumenregler Potentiometer auf de...

Page 98: ...ren lassen abwarten Das Ruckeln sollte sich nach dem Schmieren und Einlaufen legen Eines der Lichter brennt nicht Keines der Lichter brennt Die Beleuchtung Fahren auf dem Gegengleis bzw Zug Leerfahrt ist nicht korrekt Sehr wahrscheinlich wurde die Lokomotive in DCC oder DCS betrieben und dort das betreffende Licht ausgeschaltet Lokomotive in der entsprechenden Betriebsart DCS DCC aufstarten und di...

Page 99: ...elschiene in der für die Betriebsart korrekten Stellung befindet Die Lokomotive läuft einwandfrei die Beleuchtung ist eingeschaltet aber sie erzeugt keine Geräusche Aus der Lokomotive erklingt ein knisterndes Geräusch Beim Abspielen der Doppler Funktion ist der Dopplereffekt zu hören aber dann blenden die Lokomotiv Geräusche aus und können nicht wieder zurückgeholt werden Klangeffekte sind möglich...

Page 100: ...uen Lokomotiven benötigen auch nach dem Schmieren eine Einlaufphase Die Lokomotive einige Zeit fahren lassen abwarten Das Ruckeln sollte sich nach dem Schmieren und Einlaufen legen PFA Wird PFA mit Taste F4 läutet lediglich die Glocke der Lokomotive Warum fährt die Lokomotive nach Beenden der PFA Sequenzen selbständig an Fahrgeschwindigkeit auf 0 senken anhalten Die Lokomotive spielt die Bhf Einfa...

Page 101: ...pler Drucktaste erneut zu betätigen Die Lokomotiv Geräusche kehren dann wieder zur normalen Lautstärke zurück der Lokomotive Wird Spannung an die Lokomotive angelegt passiert gar nichts Keine Lichter keine Geräusch nichts Betätigen der START UP Taste generiert eine Fehlermeldung Mit Stromversorgung durch Gleichstrom ist DCS polaritätsabhängig Dies ist normal Zuerst die Taste START UP Aufstarten n ...

Page 102: ...n Es ist möglich dass Lokomotiven bei der ersten Inbetriebnahme ruckeln wenn sie nicht vorher geschmiert wurden Schmieranweisungen befolgen Lokomotive erneut in Betrieb nehmen Manche neuen Lokomotiven benötigen auch nach dem Schmieren eine Einlaufphase Die Lokomotive einige Zeit fahren lassen abwarten Das Ruckeln sollte sich nach dem Schmieren und Einlaufen legen Beim Umschalten auf PFA läutet led...

Page 103: ... 10 A 5 A 2 2 A 5 A 2 A 2 A 2 A 2 2 A 3 5 A 2 2 A 2 2 A 2 A Lenz LGB PIKO Massoth ROCO Märklin ESU Uhlenbrock Viessmann ZIMO Fleischmann Tams Digital Systeme Die grau markierten Geräte bieten in der Grundausstattung nur ca 50 VA Leistung LZV 100 MZS II III Power Box Dimax Multi Maus Central Station 2 ESU ECoS Intellibox II Commander MX 10 neu Twin Center Master Control DCC DCC DCC DCC DCC DCC MM D...

Page 104: ...v 90 Watt Standard Lionel 1053 U A 8 17v 60 Watt Standard Lionel 1063 U A 8 17v 60 Watt Standard All Trol Linke Klemme Rechte Klemme 0 24v 300 Watt Elektronisch Dallee Hostler Linke Klemme Rechte Klemme Elektronisch Lionel LW A U 8 18v 75 Watt Standard Lionel KW A oder B U 6 20v 190 Watt Standard Lionel MW Außenschienen Klemme Innenschienen Klemme 5 16v 50V A Elektronisch Lionel RS 1 Rote Klemme 0...

Page 105: ...0 24v 300 Watt 300 Watt 300 Watt 300 Watt Elektronisch Elektronisch Elektronisch Elektronisch LGB Jumbo 50101 0 24v 240 Watt Elektronisch MRC 6200 0 18 5v 60 Watt Elektronisch Not Recommended For 70 3001 1 J3a EMPFOHLENE DC TRANSFORMATOREN Anmerkungen über Gebrauch Use 22 volts maximum track voltage when operating a MTH locomotive equipped with Proto Sound Loco Sound or Proto Sound 2 0 NURFÜR ANAL...

Page 106: ...n einschließlich Klangeffekte Beleuchtung und Raucherzeugung Proto Dispatch erlaubt dem Benutzer öffentliche Durchsagen über den Lautsprecher der Lokomotive durchzugeben Proto Cast Ermöglicht das Abspielen von Audio Aufzeichnungen über den Lautsprecher der Lokomotive während des Betriebs Proto Doppler Klangeffekte Der Benutzer kann die Lokomotive für die Doppler Funktion programmieren einschließli...

Page 107: ...rantwortung weder finanzieller noch anderer Art für Objekte die an ASC NASC retourniert wurden oder die durch die im Privatbesitz befindlichen autorisierten Kundendienstzentren durchgeführten Reparaturen Für Hilfe können Sie sich jederzeit an den M T H Kundendienst wenden per E Mail an service mthrailking com oder per Telefon an 1 410 381 2580 Beschränkte 1 Jahr Garantie Sämtliche M T H Produkte d...

Reviews: