


5
X-Session Pro User Guide
Installation
5
X
-Session Pro is a class-compliant device. This means Windows XP and Mac OS X computers
will automatically recognize and install X-Session Pro once the controller is connected to
the computer—you are not required to install any drivers or perform any installation procedures.
Once the X-Session Pro drivers are installed, you may need to configure your DJ software to
accept MIDI signals from the controller. This is usually done through your software’s control panel.
Refer to your program’s user guide to learn how to do this.
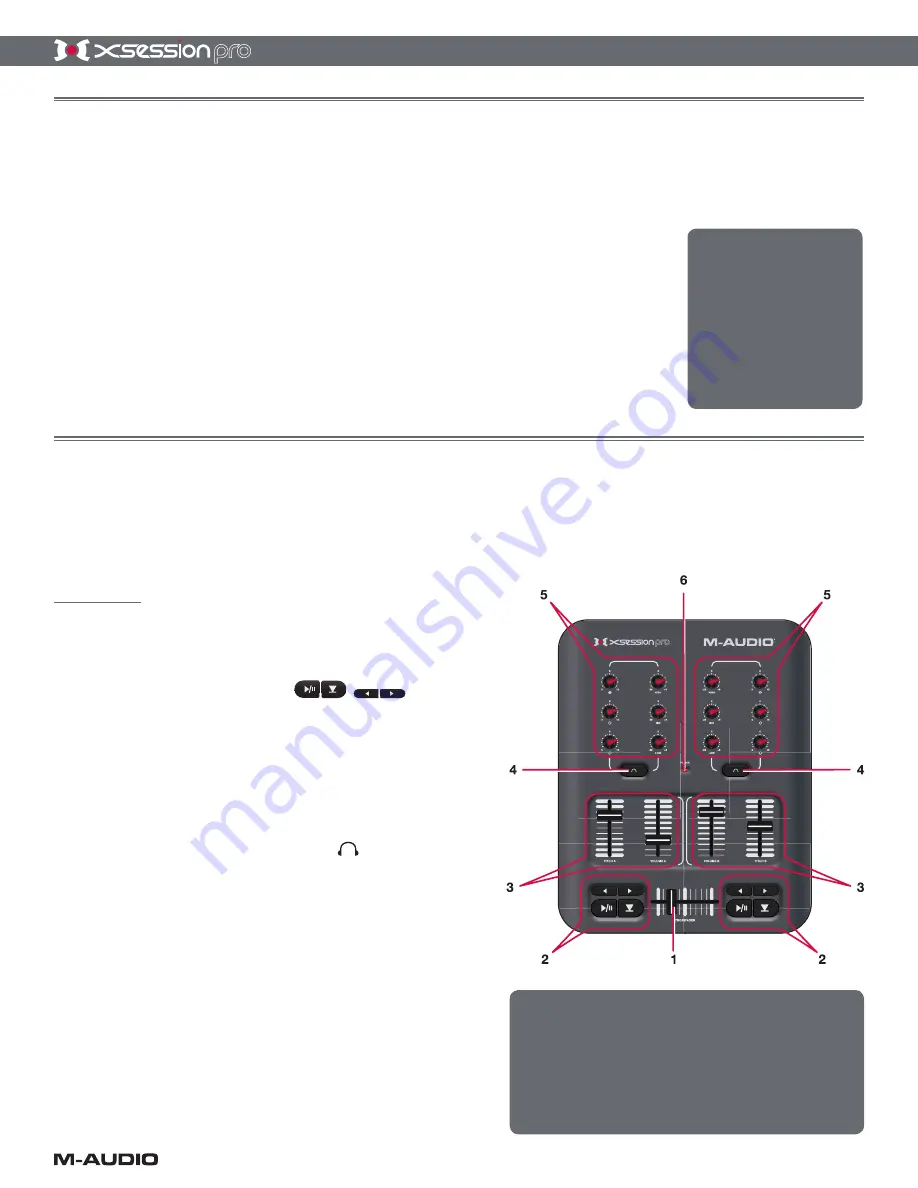
Controls and Connectors
6
Top Panel
1.
Crossfader
– This slider can be assigned to control
the crossfader in your DJ software. Use this control
to transition between songs.
2.
Transport Controls
– These
buttons can be used to start, pause, cue, rewind,
and fast forward music on each deck of your music
software.
3.
Vertical Sliders (Pitch, Volume)
– These
vertical sliders can be mapped to the pitch and volume
of each deck in your software.
4.
Headphone Cue Buttons
– If your audio
hardware and DJ software support “cue” monitoring,
assign these buttons to select which deck you’d like to
hear in your headphones.
5.
User Knobs (1, 2, 3, High, Mid, Low)
– These
knobs can be mapped to various effect and EQ settings
within your software.
6.
Power Indicator LED (Power)
– This red LED
illuminates when X-Session Pro is receiving power
and is turned on using the Power switch (8).
Advanced Windows XP users
who require multi-client
support (i.e., using the
controller with more than one
application at the same time)
will need to install the special
X-Session Pro multi-client
drivers. Please refer to the
X-Session Pro Quick Start
Guide for
installation instructions.
While X-Session Pro may look like a traditional DJ mixer,
keep in mind that all of the buttons, knobs, and faders are
actually sending out MIDI data. This means that you can
use X-Session Pro to control more than just DJ applications.
For example, the buttons, sliders, and knobs can be used to
control a virtual instrument or a DAW sequencer. Refer to
your software’s user guide to learn how to map X-Session Pro’s
controls to various functions within the application.
Summary of Contents for X-Session Pro
Page 1: ...User Guide...


