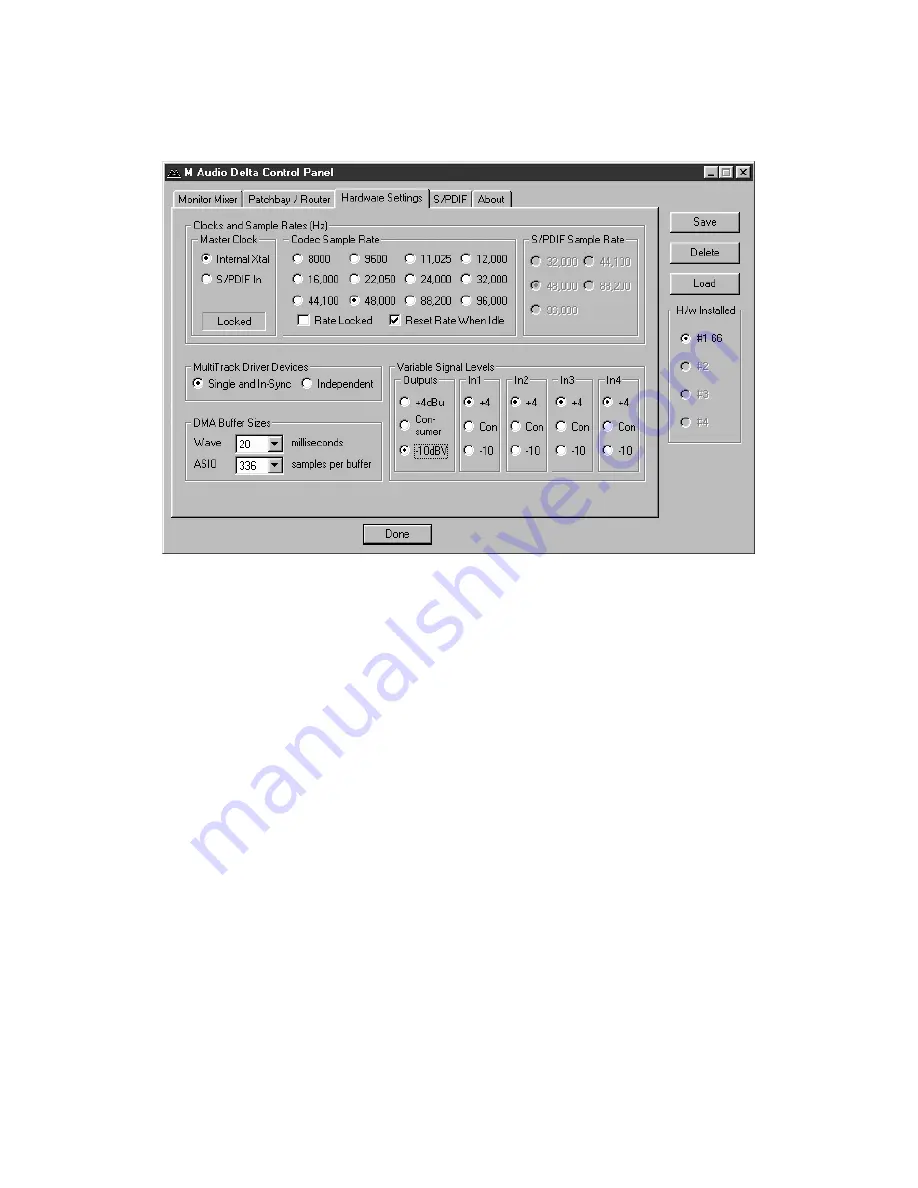
software into which you will be recording. We’ll start with the Delta Control Panel’s
“Hardware Settings” page, then the “Patchbay/Router” page, and finally the
“Monitor Mixer” page. We’re not using S/PDIF in this example so we’ll ignore the
S/PDIF page.
5. Click on the Delta Control Panel on your Windows taskbar to maximize it.
Click on the ‘Hardware Settings’ tab.
6. Select ‘Internal Xtal’ as the master clock source. This allows the Delta 66 to
derive its sample rates from its internal clock oscillator. ‘Internal Xtal’ is the
default setting for the Delta Control Panel, so selecting it may not be necessary
(it may already be selected).
7. Under “CODEC Sample Rate,” verify that the “Rate Locked” checkbox is not
activated. This will allow your application software to set the Delta 66 sample
rate as it pleases.
8. Since this example will include the use of the monitor mixer, we will activate
the “Reset Rate When Idle” feature. This will make sure the monitor mixer is
running at a decent sample rate while the system is idle — this prevents the
mixer sample rate from being set too low and therefore lowering its frequency
response. Select a sample rate in the “CODEC Sample Rate” group to use as
this idle sample rate. Choose a 44,100 Hz or higher setting for best results, and
select the same sample rate you will be using in your application if possible.
We’ve chosen 48,000 Hz for this example.
Now click on the Delta Control Panel’s “Patchbay/Router” tab. In the first column
of the Patchbay/Router page, click the radio button “Monitor Mixer” to connect the
monitor mixer’s stereo output directly to Delta analog outputs OUT1 and OUT2.
Now, everything that we hear at outputs 1 & 2 will reflect our settings in the Monitor
Mixer page.
28


