background image

MM23772, Rev. F 

109


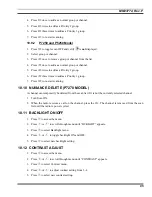
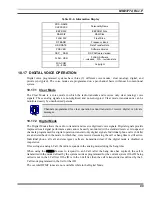
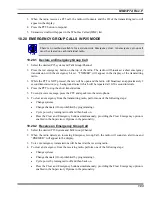
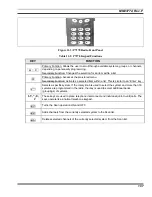
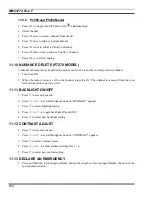
ICON  DESCRIPTION 


Steady

 (

rotates clockwise)

 – Scan mode enabled. 

If icon is not visible

 – Scan is disabled.


Steady

 – Channel Guard enabled. 

If icon is not visible

 – Channel Guard is disabled.


T99 Mode enabled. 

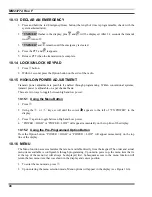
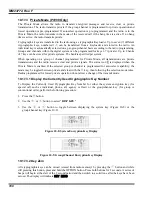
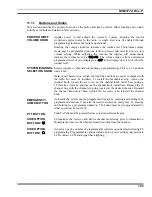
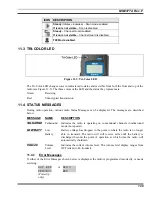
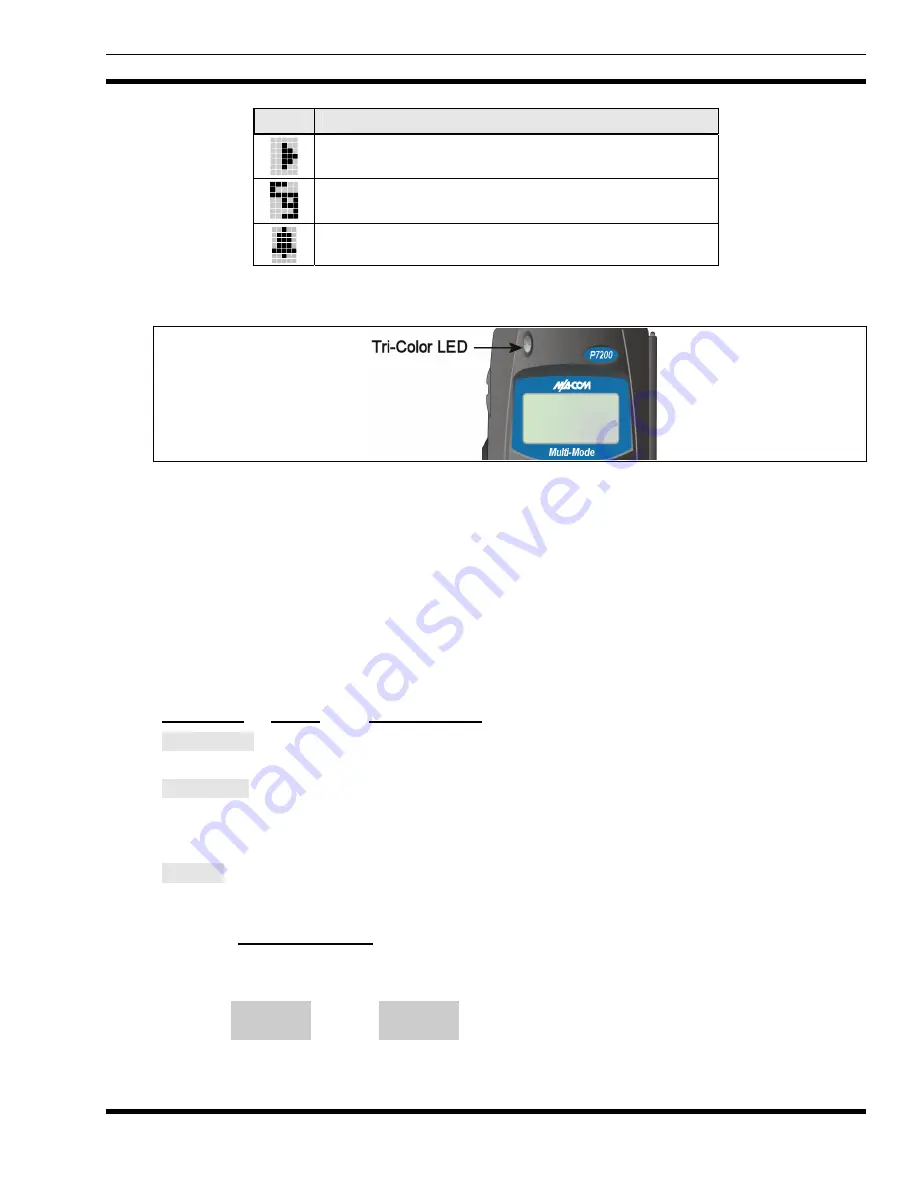
11.3  TRI-COLOR LED 


Figure 11-5: Tri-Color LED 

The Tri-Color LED changes color to indicate radio status and is visible from both the front and top of the 
radio (see Figure 11-5). The three colors of the LED and the status they represent are:  

Green:  

Receiving 

Red:  

Unencrypted 

transmission 

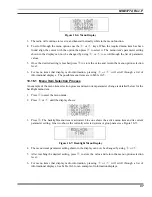
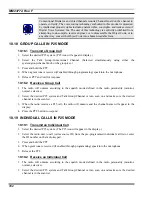
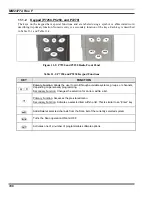
11.4  STATUS MESSAGES 

During radio operation, various radio Status Messages can be displayed. The messages are described 
below.  

MESSAGE NAME DESCRIPTION 

TALKARND


Talkaround 

Indicates the radio is operating on conventional channels in talkaround 
mode (no repeater).  

LOW BATT 

Low 
Battery 

Battery voltage has dropped to the point to where the radio is no longer 
able to transmit. The radio will still receive calls until the battery is 
discharged beyond the point of operation at which time the radio will 
automatically shutdown.  

VOL=40 

Volume 
Level 

Indicates the current volume level. The volume level display ranges from 
OFF (silent) to 40 (loudest).  

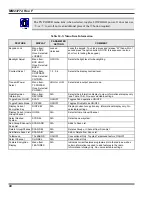
11.4.1 

Error Messages 

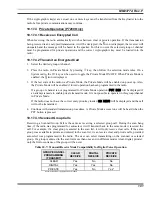
If either of the Error Messages shown below is displayed, the radio is programmed incorrectly or needs 
servicing.  

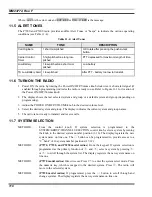
DSP  ERR 

ERR=XXXX 

(PowerUp 
only)


or 

DIG V  

x


ERR    

x


Summary of Contents for P5100 Series

Page 1: ...Operator s Manual MM23772 Rev F Jul 08 M A COM P7200 and P5200 Series Portable Radios ...

Page 2: ...rights copyrights and trade secrets of Digital Voice Systems Inc The user of this technology is explicitly prohibited from attempting to decompile reverse engineer or disassemble the Object Code or in any other way convert the Object Code into human readable form Repairs to this equipment should be made only by an authorized service technician or facility designated by the supplier Any repairs alt...

Page 3: ... CHARGING BATTERY PACKS 16 4 2 1 Charging Guidelines 16 4 3 BATTERY PACK USAGE 16 4 3 1 Usage Guidelines 16 4 4 CHANGE THE BATTERY PACK 17 4 4 1 Remove the Battery Pack 17 4 4 2 Attach the Battery Pack 17 4 5 BATTERY DISPOSAL 18 5 INTRODUCTION 19 5 1 WATER RESISTANCE P7200 ONLY 21 5 2 UNIVERSAL DEVICE CONNECTOR UDC 21 6 OPTIONS AND ACCESSORIES 22 7 CHANGE OPERATING MODE 24 7 1 CHANGE FROM OTP MODE...

Page 4: ...0 8 19 CHANGE OPERATING MODE 40 8 20 RECEIVE AND TRANSMIT VOICE CALLS 40 8 20 1 Receive a Voice Call 40 8 20 2 Transmit a Voice Call 41 8 21 ADJUST AUDIO TREBLE LEVEL 41 8 22 TALK GROUP LOCK OUT 41 8 22 1 Lock Out a Talk Group 42 8 22 2 Unlock a Talk Group 42 8 23 SCANNING 42 8 23 1 Select Scan Modes 42 8 23 2 Change Active Scan Mode 43 8 23 3 Scan Priority 44 8 24 MAKE SELECTIVE CALLS 44 8 24 1 M...

Page 5: ...2 CONTROLS 57 9 2 1 Buttons and Knobs 58 9 2 2 Keypad P7250 P5250 and P7270 59 9 3 DISPLAY 61 9 4 RADIO STATUS ICONS 62 9 5 TRI COLOR LED 63 9 6 STATUS MESSAGES 63 9 7 ERROR MESSAGES 64 9 8 ALERT TONES 64 9 9 SYSTEM SELECTION 65 9 10 GROUP CHANNEL SELECTION 65 9 11 MODIFY SCAN LIST 66 9 11 1 P7270 Model 66 9 11 2 P7250 and P5250 Models 66 9 12 NUISANCE DELETE P7270 MODEL 67 9 13 BACKLIGHT ON OFF 6...

Page 6: ...Interconnect Call 80 9 24 3 Dual Tone Multi Frequency Overdial Conventional Mode 81 9 25 PROGRAMMABLE ENTRIES 82 9 25 1 Pre Store Individual and Telephone Interconnect Calls from the Keypad 82 9 26 STATUS MESSAGE OPERATION 82 9 26 1 Status Operation 82 9 26 2 Message Operation 83 9 27 DYNAMIC REGROUP OPERATION 83 9 27 1 Emergency Operation 83 9 28 MACRO KEY OPERATION 83 9 29 PORTABLE DATA 84 9 29 ...

Page 7: ... Only 101 10 18 GROUP CALLS IN P25 MODE 102 10 18 1 Transmit a Group Call 102 10 18 2 Receive a Group Call 102 10 19 INDIVIDUAL CALLS IN P25 MODE 102 10 19 1 Transmit an Individual Call 102 10 19 2 Receive an Individual Call 102 10 20 EMERGENCY GROUP CALLS IN P25 MODE 103 10 20 1 Declare an Emergency Group Call 103 10 20 2 Receive an Emergency Group Call 103 11 CONVENTIONAL OPERATION 104 11 1 CONT...

Page 8: ...8 4 Personality Structure Example 30 Figure 9 1 Top and Side View 57 Figure 9 2 P7250 and P5250 Radio Front Panel 59 Figure 9 3 P7270 Radio Front Panel 60 Figure 9 4 Radio Display 61 Figure 9 5 Tri Color LED 63 Figure 9 6 Menu Display 68 Figure 9 7 Backlight Menu Display 69 Figure 9 8 System Encryption Key Display 72 Figure 9 9 Group Channel Encryption Key Display 72 Figure 9 10 Calls Received Lis...

Page 9: ... Alerts 49 Table 8 11 Band Definitions 56 Table 9 1 P7250 and P5250 Keypad Functions 59 Table 9 2 P7270 Keypad Functions 60 Table 9 3 Display Descriptions 62 Table 9 4 Alert Tones 64 Table 9 5 Menu Item Information 69 Table 9 6 Information Display 70 Table 9 7 Transmit Receive Mode Compatibility for Digital Voice Operation 73 Table 10 1 P7250 and P5250 Keypad Functions 88 Table 10 2 P7270 Keypad F...

Page 10: ...the like which if not correctly performed or adhered to could result in personal injury Do not proceed beyond a WARNING symbol until the conditions identified are fully understood or met CAUTION The CAUTION symbol calls attention to an operating procedure practice or the like which if not performed correctly or adhered to could result in damage to the equipment or severely degrade the equipment pe...

Page 11: ...Standards Institute C95 3 1992 IEEE Recommended Practice for the Measurement of Potentially Hazardous Electromagnetic Fields RF and Microwave 2 1 RF EXPOSURE GUIDELINES CAUTION To ensure that exposure to RF electromagnetic energy is within the FCC allowable limits for occupational use always adhere to the following guidelines DO NOT operate the radio without a proper antenna attached as this may d...

Page 12: ...es TESTED DISTANCES worst case scenario RADIO FREQUENCY Body Face 700 800 MHz 1 1 cm 2 5 cm The information in this section provides the information needed to make the user aware of RF exposure and what to do to assure that this radio operates within the FCC RF exposure limits of this radio 2 2 ELECTROMAGNETIC INTERFERENCE COMPATIBILITY During transmissions this M A COM radio generates RF energy t...

Page 13: ...to the microphone at a normal voice level Keep the antenna in a vertical position when receiving or transmitting a message Do not hold the antenna when receiving a message and especially do not hold when transmitting a message Do NOT hold onto the antenna when the radio is powered on 3 1 1 Antenna Care and Replacement Do not use the portable radio with a damaged or missing antenna A minor burn may...

Page 14: ... being used OSHA Standard 1926 900 3 1 5 Potentially Explosive Atmospheres Areas with potentially explosive atmospheres are often but not always clearly marked These may be fuelling areas such as gas stations fuel or chemical transfer or storage facilities and areas where the air contains chemicals or particles such as grain dust or metal powders Sparks in such areas could cause an explosion or fi...

Page 15: ...onditioning requires fully charging and fully discharging the battery three 3 times using a battery analyzer conditioner charger M A COM recommends either the Cadex C7400 or the Intelligent Technologies Co BC3506QP 5 iTECH iQfive battery conditioners purchased directly from M A COM These units condition a battery pack by automatically charging and discharging cycling the battery CAUTION Failure to...

Page 16: ...he radio low battery warning before re charging If any faults are encountered while charging the battery pack consult the charger s manual to determine the cause and possible corrective action 4 3 BATTERY PACK USAGE Both nickel based and Lithium Ion batteries vary in capacity and life NiCd batteries have a longer life cycle than NiMH batteries whereas NiMH batteries have a larger capacity However ...

Page 17: ...ety and best operation 1 Press the latch at the bottom of the battery pack 2 Lift the battery pack from the bottom 3 Remove the battery pack from the radio Figure 4 1 Removing the Battery Pack 4 4 2 Attach the Battery Pack Make sure the power to the radio is turned OFF 1 Align the tab on the top of the battery pack with the slot at the top of the battery cavity 2 Push the battery pack down to atta...

Page 18: ...eable battery The battery is recyclable At the end of its useful life under various state and local laws it may be illegal to dispose of this battery into the municipal waste stream Check with your local solid waste officials for details in your area for recycling options or proper disposal Canadian and U S users may call Toll Free 1 800 8 BATTERY for information and or procedures for returning re...

Page 19: ...g for wide area applications High quality voice coding and robust audio components assure speech clarity In the trunked modes the user selects a communications operating system i e OpenSky EDACS ProVoice or P25 and group While communicating in a trunked mode channel selection is transparent to the user and is controlled via digital communication with the system controller e g base station in an Op...

Page 20: ...MM23772 Rev F 20 Figure 5 1 P7230 Select Model Radio Figure 5 2 P7250 and P5250 Scan Models ...

Page 21: ...EVICE CONNECTOR UDC The Universal Device Connector UDC provides connections for external accessories such as a headset or a speaker microphone and for programming cables The UDC is located on the right side of the radio opposite the PTT Button The UDC facilitates programming and testing the radio The UDC pins perform different functions depending on the accessory attached to the UDC refer to the a...

Page 22: ...ON PART NUMBER ANTENNAS Flexible Gain Antenna 700 800 MHz KRE 101 1506 1 Whip Antenna 700 800MHz KRE 101 1506 2 BATTERIES IMMERSION RATED 7 5 V Nickel Cadmium NiCd Battery BKB 191 210 33 7 5 V Nickel Metal Hydride NiMH Battery BKB 191 210 34 7 5 V NiCd Battery BKB 191 210 35 7 5 V NiMH Battery BKB 191 210 36 7 5 V Lithium Ion Li Ion Battery BT 010942 001 7 5 V Li Ion Battery BT 010942 002 BATTERIE...

Page 23: ...rap KRY 101 1656 1 Nylon Case Orange with Belt Loop KRY 101 1649 1 Swivel Mount Clip KRY 101 1608 3 Speaker Mic Industrial OT V2 10121 Speaker Mic Industrial PLUS OT V2 10122 Earpiece Kit IS for use with Speaker Mic Antenna Version OT V1 10234 Ultra Lite Headset with Inline PTT OT V4 10314 Lightweight Headset with Single Speaker OT V4 10315 Over the Head Headset OT V4 10316 Behind the Head Headset...

Page 24: ...gh the menu until App Mode is displayed 2 Use or to choose an available mode Press and or to confirm Y N 3 Press the button to confirm Or With a P7270 model radio press 1 to transition to P25 EDACS Conventional 7 2 CHANGE TO OTP MODE 1 Use or to scroll through available systems until OpenSky is displayed and wait 2 The radio transitions to OTP mode ...

Page 25: ...twork This takes a few seconds If coverage is available the radio will display the active talk group and is ready to use 8 1 2 Volume Control Turn the Power ON OFF Volume knob clockwise to increase the volume and counter clockwise to decrease the volume 8 2 CONTROLS The P7200 and P5200 portable radios feature two rotary control knobs and an emergency button located on the top of the radio Figure 8...

Page 26: ...h is the loudest level VOICE GROUP SELECTION KNOB Used to select voice groups when operating within an OpenSky system This is a 16 position rotary knob A mechanical stop which can limit the number of positions accessed is shipped with the radio but must be installed To install the mechanical stop remove the channel knob loosen the set screw on the channel knob metal base using a 1 27mm hex wrench ...

Page 27: ...enu items see Table 8 4 P5250 P7250 Currently undefined P5250 P7250 Currently undefined P5250 P7250 Currently undefined P7270 Only The alpha numeric keys are used to place telephone interconnect and individual unit to unit calls The keys operate like a normal telephone keypad Also used to enter passwords for logging into the OpenSky network if not pre configured for automatic registration at power...

Page 28: ...teady Stealth mode is enabled all tones and display backlight is disabled voice is still heard Appears in the 4th position in OpenSky mode Steady Indicates the radio is transmitting or receiving an encrypted voice call Appears in the 6th position Displayed in position 8 on the 3rd line of the display when Scan Mode is Normal or Fixed and is not be displayed when the Scan Mode is None VTAC Connecti...

Page 29: ...assword If encryption is enabled P7200 only and authorized on the radio the user will be prompted to Pls Login with the 1 login command a User ID and password 1 Press 1 Login command 2 Enter the full 10 digit User ID 3 Press the key 4 Enter the password If the radio is configured for alpha numeric passwords and the password has consecutive duplicate numbers MES33 for example enter between the cons...

Page 30: ... s memory and at user log in When changes are made to the personality the radio is automatically re provisioned Each personality can contain up to sixteen 16 profiles and each profile can contain up to sixteen 16 talk groups 8 8 1 Profiles As stated above each profile can contain up to sixteen 16 talk groups A profile also defines the radio s emergency behavior All transmissions are made on the se...

Page 31: ...ssages will scroll across the top line of the display 8 9 2 Display s Second Line The second line will displays information such as active menu log in prompt emergency status and dwell display messages as described in the following section 8 9 3 Dwell Display When not engaged in menu selection the first two lines of the display default to the user defined display known as the dwell display The top...

Page 32: ...o short beeps and one short tone Only played once to indicate a selective alert has been received Emergency Tone 3 long tones Indicates an emergency was declared Client Connect Tone 2 short beeps Indicates the portable is connected to the V TAC in XCOV or XCOV TG Client Disconnect Tone 2 short beeps lower pitch than Client Connect Tone Indicates the portable has disconnected from the V TAC Emergen...

Page 33: ...choose an available mode OTP OCF or ECP Press and confirm Y N with or and again GPS Fix GPS GPS latitude and longitude position of currently tuned to base station GPS Site or V TAC GPS scrolls across top line of the display GPS Aged indicates VTAC coordinates haven t been updated for more that 2 minutes User ID User ID User s identification name scrolls across top line of the display if programmed...

Page 34: ...hrough all messages Alert Destination Alert Dest Use or to choose a speed dial number Press to go to the Alert Msg menu Use or to scroll through canned messages Press to send message and return to dwell display Speed Dial Speed Dial Use or to choose a speed dial number and press PTT to place call Profile Selection ProfileMenu Use or to choose an available profile Press to return to dwell display T...

Page 35: ...ey sequence number EPKSN UNK MES Unknown mobile end system MES If condition persists in strong signal conditions contact your system administrator NOAUT05 MDIS failed mutual authentication If condition persists in strong signal conditions contact your system administrator BADMDIS MDIS failed mutual authentication If condition persists in strong signal conditions contact your system administrator M...

Page 36: ...mutual authentication If condition persists in strong signal conditions contact your system administrator PLS LOGIN If enabled and authorized for encryption P7200 only the radio requires the user to enter a User ID and password Login with keypad BAD PWD An invalid password has been entered Verify the password and re enter OVER_TEMP The radio may be too hot The radio will cease transmitting if it e...

Page 37: ...mode 7 Initiate Selective Alert command 7 Target ID Choose Message See Section 8 25 for additional information 8 Radio to Radio Call command 8 Selective call number PTT to dial 9 Public Switched Telephone Network PSTN Call command 9 telephone number PTT to dial 32 Begin Manual Encryption command 32 Pre determined Encryption Key 1 16 digit encryption key for 128 bit encryption 17 32 digit encryptio...

Page 38: ...al VTAC attachment When attaching to a VTAC the radio s programming determines whether to attach to the VTAC in XCOV or XCOV TG mode If the user does a manual attach to a VTAC with the 6 1 or 2 command sequence the radio is understood to be attached and this quick button will detach the radio from the VTAC If the user does a manual detach from a VTAC with the 60 command sequence the radio is under...

Page 39: ...H MODE For some users it is important to be able to turn off the radio s display lights and side tones but not the radio traffic For example in covert operations lights and sounds could inadvertently expose an otherwise unobservable radio user For this purpose the radio has a Stealth feature that disables the radio display light indicator light and audible side tones When stealth mode is on the ra...

Page 40: ...ycle through the menu until Side Menu is displayed 2 Press or to change to the desired level Off Low Medium and High To turn side tones completely off use the Off setting 8 19 CHANGE OPERATING MODE P72720 Model Radios Only Press 1 to transition from OTP to ECP If ECP is not loaded in the radio No App will be displayed P7250 and P72720 Model Radios 1 Press the or buttons to cycle through the menu u...

Page 41: ...rough the menu until Treble Menu is displayed 2 Press or to increase or decrease level There are four levels available low medium medium high and high 3 Press or wait a few seconds to return to the dwell display 8 22 TALK GROUP LOCK OUT There are two ways to focus voice communications by suppressing calls from talk groups in the active profile No Scan By changing the Scanning Mode to No Scan only ...

Page 42: ...t talk group 8 22 2 Unlock a Talk Group 1 Use the or buttons to scroll through the menu choices until LockOutMenu appears in the display 2 Use the or keys to scroll through the list of talk groups if any until the user group you want to unlock appears in the display 3 Use the key to unlock the displayed talk group Changing the active profile removes any lockouts you have made Turning off the radio...

Page 43: ...e UAS In this mode P1 and P2 groups CANNOT be locked out The scanning mode choice remains in effect until it is changed Even if the radio is turned off the current scanning mode selection is saved for the next use 8 23 2 Change Active Scan Mode P7250 and P7270 Model Radios 1 Press the or buttons until ScnModeMenu appears in the display 2 Use the or keys to scroll through the list of modes until yo...

Page 44: ...elected profile The scanning priority settings are reset to the default values when the radio is turned off 8 24 MAKE SELECTIVE CALLS Selective calling is the capability for two voice radio units to obtain and use an independent talk path for a private call A properly equipped radio can initiate a selective call to any radio in the system that is also programmed for selective calls In the OpenSky ...

Page 45: ...elective Call STATUS MESSAGE DEFINITION Busy Peer is involved in another selective PSTN call Disconnect Selective PSTN call was terminated for unknown reason Network Err Selective PSTN call cannot continue because of an unspecified network error Reject Peer or this user declined request to establish selective PSTN call Unavailable Peer cannot be reached for selective PSTN call Calling Calling peer...

Page 46: ...ll When a Selective Call is being received the radio is ringing you can reject the call by pressing the or button The call will be rejected and Reject appears on the callers display 8 24 5 Terminate a Selective Call Terminate a Selective Call call must be active by pressing the or button HANGUP will appear in the display followed by the active talk group 8 25 SELECTIVE ALERTS Selective alert messa...

Page 47: ...g Unknown status received from VNIC Unreachable Alert destination cannot be reached 8 25 2 Send a Message The sending process has three steps First select the destination radio s User ID then select the alert message and finally send the message 8 25 2 1 Select a Destination Using the Keypad P7270 Only 1 Using the keypad enter 7 At the AlertDst prompt enter the full User ID of the unit to send the...

Page 48: ...ce information To display a Selective Alert Message 1 Using the or button scroll through the menu items until Alerts Rcvd appears The oldest message is displayed and scrolls across the top line of the display 2 The message includes the time the User ID and alias of the sender along with the message 3 To view the next message press the or button to go forward or backwards 8 25 4 Delete a Selective ...

Page 49: ...mitting If the selected talk group is in the emergency state an asterisk displays next to the talk group name No emergency audio voice transmission hot mic capability available per programming by system administrator In addition to the Emergency Alert signal the microphone goes hot for a predetermined length of time to allow for emergency audio voice transmission The radio declaring the emergency ...

Page 50: ... the selected talk group of the receiving radio When receiving voice in an active emergency the flashing EMERGENCY is inhibited so that the alias of the sender can be seen With No Scan only the emergency tone is heard not the initial open mic transmission To dismiss or ignore the emergency refer to Section 8 27 3 8 27 3 Dismiss an Emergency The Dismissing an Emergency function allows you to ignore...

Page 51: ... require no manual handling and are never sent in the clear over any network interface or airlink 8 28 1 1 Using Automatic Encryption 1 Locate the talk group that has been encrypted at the system administrator level 2 Pls Login appears in the display unless the keypad was used to log in 3 Login normally by entering your User ID and Password If a user is engaged in a call on a talk group encrypted ...

Page 52: ...eir edited personalities During re registration subscriber equipment will default to the emergency profile selected by the administrator 8 30 GPS COORDINATES The radio s current latitude and longitude coordinates may be displayed using the GPS menu The following procedure assumes a GPS antenna is connected to the radio and it is receiving adequate signals from GPS satellites 1 Press or until the G...

Page 53: ...ese commands determine which Extended Coverage mode the V TAC and radios normally use and determine the access method that must be employed by a portable radio to connect to the V TAC After commands of this type are sent to the V TAC and portable radios each must be rebooted powered off and then back on before the change takes effect A radio can manually override this command determined default mo...

Page 54: ...ortable radio keypad functions are disabled when the radio is connected to the V TAC via the XCOV TG mode log off manual log in alerts selective calls PSTN calls and speed dial calls The following portable radio menus are disabled when the radio is connected to the V TAC via the XCOV TG mode alert destination alert message alert received priority talk group and scan mode The user cannot change tal...

Page 55: ...ed Enter SOI Mode P7250 and P7270 Manually Entering the Channel 1 Press or until the Client Mode menu appears 2 Press or until SOI is displayed 3 Press to confirm mode selection 4 Press or until Manual Select Chan is displayed and press 5 Press or to edit the right most digit and press to advance to the next digit Repeat until the desired channel is entered 6 The radio then prompts the user to edi...

Page 56: ... 957 5 700 MHz Band 3 Band 5 1 477 6 700 MHz Band 4 Band 6 481 957 7 900 MHz Band 7 1 399 8 800 MHz Rebanded Band 8 1 830 9 400 MHz T band WB Band 9 1 6718 Independent Separation Between TX and RX 10 400 MHz T band NB Band 10 1 6718 Independent Separation Between TX and RX 11 400 MHz T band Temp NYPD only Band 11 1 120 14 700 MHz reband WB Band 14 1 957 15 700 MHz reband NB Band 15 1 959 ...

Page 57: ...n the trunked environment CC SCAN will be displayed if communication with the system s control channel cannot be established This may occur if for example the radio is out of range of the trunking site It may be necessary to move to another location or select another trunking system to re establish the control channel link for trunked mode operations CC SCAN is displayed on the group line until a ...

Page 58: ...hanical stop remove the channel knob loosen the set screw on the channel knob metal base using a 1 27mm hex wrench and remove the channel knob metal base Replace the 16 channel ring with the channel stop ring located at the desired channel Reinstall the channel knob metal base tighten the set screw and reinstall the channel knob EMERGENCY HOME BUTTON Automatically selects the pre programmed Group ...

Page 59: ...0 Keypad Functions KEY FUNCTION Primary Function Allows the user to scroll through available systems groups or channels depending on personality programming Secondary Function Changes the selection for an item within a list Primary Function Accesses the pre stored menu Secondary Function Activates a selected item within the menu This is similar to an Enter key Adds Deletes selected groups or chann...

Page 60: ...ional banks groupings of systems 1 9 0 These keys are used to place telephone interconnect and individual unit to unit calls The keys operate like a normal telephone keypad Selects a specific group Turns the Scan operation ON and OFF Enables or disables Private Mode for the system group channel displayed Adds groups or channels from the currently selected system to the Scan list Status Access to t...

Page 61: ...rily display system and group names Line 1 also displays radio status messages The 3rd line is used primarily to display radio status icons All three lines are used to display menu options when in the menu mode If programmed the display backlighting will illuminate upon power up or when radio controls are operated Figure 9 4 Radio Display ...

Page 62: ...elephone Steady during all radio transmissions Steady transmit at low power If icon is not visible transmit at high power Steady battery charge indicator Flashing Low battery indicator Steady Indicates the current channel is set up as an analog channel Steady trunked system in Failsoft mode Steady group or channel in scan lis t Steady priority 2 group or channel Steady priority 1 group or channel ...

Page 63: ...enied Indicates the radio or talkgroup is not authorized to operate on the selected system and or talkgroup CC SCAN Control Channel Scan Indicates the control channel is lost and the radio has entered the Control Channel Scan mode to search for the control channel usually out of range indication WA SCAN Wide Area Scan Indicates the radio has entered the Wide Area Scan mode to search for a new syst...

Page 64: ...owerUp only or DIG V x ERR x Where xxxx is the error code and DSP ERR or DIG V ERR is the message 9 8 ALERT TONES The P7200 and P5200 radio provides audible Alert Tones or beeps to indicate the various operating conditions see Table 9 4 Table 9 4 Alert Tones NAME TONE DESCRIPTION Call Originate 1 short mid pitched OK to talk after pressing the push to talk button Call Queued 1 high pitched Call qu...
Page 65: ...system name on line one If system selection is programmed to the SYSTEM GROUP CHANNEL knob direct access to systems will not be available Pressing or will scroll through different sets of 16 systems each banks if more than 16 systems are programmed into the radio The systems within each bank are then selectable via the SYSTEM GROUP CHANNEL knob as described previously in METHOD 1 Method 3 Example ...

Page 66: ... programmed for channels press the button to change the channel The display registers the new channel 9 11 MODIFY SCAN LIST 9 11 1 P7270 Model 1 Press to toggle scan OFF and verify is not displayed 2 Select group or channel 3 Press once to remove group or channel from list 4 Press once to add as a normal group or channel 5 Press twice to add as a Priority 2 group 6 Press three times to add as a Pr...

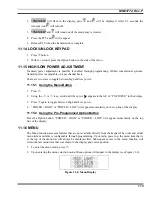
Page 67: ...14 CONTRAST ADJUST 1 Press to access the menu 2 Press or to scroll through menu until CONTRAST appears 3 Press to select Contrast menu 4 Press or to adjust contrast setting from 1 4 5 Press to select new contrast setting 9 15 DECLARE AN EMERGENCY 1 Press and hold the red Emergency Home button the length of time is programmable check with the system administrator 2 TXEMER will flash in the display ...

Page 68: ...rom the keypad The order and actual menu items available is configurable through programming Upon radio power up the menu item that is at the top of the menu list will always be displayed first Subsequent access to the menu function will return the last menu item that was shown in the display and cursor position 1 To enter the menu mode press 2 Upon entering the menu selection mode Menu options wi...

Page 69: ... menu option selection level For menu items that display radio information pressing or will scroll through a list of informational displays An example of information displays is shown in Table 9 6 The TX POWER menu item when selected toggles LOW HIGH power It does not use or to scroll nor is an additional press of the button required Table 9 5 Menu Item Information FEATURE DISPLAY PARAMETER SETTIN...

Page 70: ...A Deletes Group or Channel from Scan List Add Delete Scan List SCAN A D N A Add or Delete from Scan List Select Telephone Numbers From Phone List PHN CALL N A Trunked Only Data Operation NO DATA ON OFF Trunked Only Toggles Data Operation ON OFF Select Individual Call from IC List IND CALL N A Trunked Only Select Group GRP SEL N A Trunked Only Feature Encryption Display Menu Item FEATURES N A Indic...

Page 71: ...em mode as programmed for the current system if the ID being called is not in the I Call list If the ID is in the I Call list then the call is transmitted as defined by the I Call mode programmed in the list for that ID The overdial DTMF tones are not available while in the Digital Mode 9 19 3 Private Mode P7200 Only The Private Mode allows the radio to transmit encrypted messages and receive clea...

Page 72: ...hile still pressing this button press and hold the button Press both buttons for 2 seconds A series of beeps will begin at the start of the 2 second period and then switch to a solid tone after the keys have been zeroed The display will indicate KEY ZERO If the cryptographic key s are zeroed one or more keys must be transferred from the Keyloader into the radio before private communications may co...

Page 73: ... group call During the scan hang time if the radio was programmed for autoselect it will transmit back in the same mode it received the call For example if a clear group is entered in the scan list it will only receive clear calls If the same group was available in private and entered in the scan list it can receive clear and private calls provided autoselect was programmed in the radio The user c...

Page 74: ...the key a second time to set the group to Priority 2 A is displayed on line three 5 Press a third time to set the group to Priority 1 A is displayed on line three The priority level section sequence only advances the group to the next high priority level and stops at priority level 1 To select a lower priority level the group must be deleted from the scan list and then added back to the scan list ...

Page 75: ...grammed into the radio A new Priority 1 group cannot be selected FIXD LST A fixed scan list has been pre programmed into the radio It is not possible to change the list without reprogramming the radio To quickly view multiple group scan status press either or the key Then slowly but consistently rotate the group knob Each group status will appear on the display 9 20 3 Delete Groups from a Scan Lis...

Page 76: ...be programmed for Wide Area System Scan operation for roaming across mobile systems Upon the loss of the currently selected system s control channel radios can be programmed to automatically scan the control channels of other systems If a new control channel is found the radio will switch to the new system and sound an alert tone 9 21 2 Priority System Scan The radio can also be programmed for Pri...

Page 77: ... suitable control channel is found 9 22 EMERGENCY OPERATION The radio s ability to declare an emergency clear an emergency remain locked on an emergency system and group and the emergency audio and display freeze can each be enabled or disabled through programming When an emergency is declared scanning will stop and restarts only after the emergency has been cleared 9 22 1 Receive an Emergency Cal...

Page 78: ...ng the PTT to the call prior to the programmed call back time out the call will automatically be directed to the originating unit If a response is not made before the call back time out the radio will return to normal receive display and WHC will appear on the first line of the LCD To respond after the call back time out press the key The radio s display will show the callers ID on the first line ...

Page 79: ...he list of stored phone numbers using the or key until the desired number is displayed Press 3 Press the PTT button when the radio is clear to transmit turns ON turns OFF and the channel access tone sounds Line one shows the called individual s name or LID The message INDV displays on line two 9 23 2 2 Direct Dial Individual Calls System Model Only The following procedure describes how to initiate...

Page 80: ... to the user s radio it un mutes on the assigned working channel and displays The first line displays PHONE The second line displays INDV Proceed with the call Press PTT to talk release PTT to listen 9 24 2 Send a Telephone Interconnect Call 9 24 2 1 Pre Stored Number Use the following procedures to initiate and complete a Telephone Interconnect call 1 System Model To select a previously stored ph...

Page 81: ...urns the radio to the normal receive mode and the number remains displayed until the special call is cleared or the time out expires or another group or system is selected 3 To terminate the call momentarily press the button 9 24 3 Dual Tone Multi Frequency Overdial Conventional Mode Once the radio has established a connection to the public telephone system it may be necessary to over dial more di...

Page 82: ...l calls lists when programming the radio The first ten entry locations of these lists can be changed by the radio operator The keypad is used when adding changing and storing numbers in these entry locations Use the following procedure to store a number in one of the first ten entries of a special call list 1 Press or to enter the individual call list or the phone call list is displayed 2 Scroll t...

Page 83: ...t to be added to a radio via the system manager The radio must be pre programmed to respond to regrouping Dynamic regrouping will not be activated in a radio until the system manager sends an activation message Each radio that receives and acknowledges the regrouping instructions is successfully regrouped Pressing and holding the button for 2 5 seconds toggles the user into and out of the dynamic ...

Page 84: ...n the data disabled state DATA ON Appears for two seconds on top line of display when the radio is toggled to the data enabled state 9 29 2 DATA OFF Operation The radio can be placed in the data disabled state by any of the following methods When the data state is disabled DATA OFF appears on the top line of the display Declaring an emergency not to be used unless an actual emergency condition exi...

Page 85: ...s entered A new emergency assignment has been received An emergency is declared or cleared An individual or phone call is received An Agency Fleet or System All Call is received or is pressed to toggle Scan ON or OFF 9 29 6 Data Lockout Mode During the voice call scan hang time pre programmed the radio will not receive data calls 9 30 PAGE P25 TRUNKED ONLY Page sends a PING message to a radio and ...

Page 86: ... Adjust the Power ON OFF Volume knob to the desired volume level Select the desired system and group The display indicates the current system and group names The radio is now ready to transmit and receive calls 10 2 CONTROLS The radio features two rotary control knobs and an emergency button mounted on the top of the radio Figure 10 1 Push To Talk and option buttons are mounted on the side Figure ...

Page 87: ...st be installed To install the mechanical stop remove the channel knob loosen the set screw on the channel knob metal base using a 1 27mm hex wrench and remove the channel knob metal base Replace the 16 channel ring with the channel stop ring located at the desired channel Reinstall the channel knob metal base tighten the set screw and reinstall the channel knob EMERGENCY HOME BUTTON Automatically...

Page 88: ...P5250 Keypad Functions KEY FUNCTION Primary Function Allows the user to scroll through available systems groups or channels depending on personality programming Secondary Function Changes the selection for an item within a list Primary Function Accesses the pre stored menu Secondary Function Activates a selected item within a list This is similar to an Enter key Adds Deletes selected groups or cha...

Page 89: ...If the rotary knob is used to select the system and more than 16 systems are programmed in the radio the key is used to select additional banks groupings of systems 1 9 0 These keys are used to place telephone interconnect and individual unit to unit calls The keys operate like a normal telephone keypad Selects a specific group Turns the Scan operation ON and OFF Enables or disables Private Mode f...

Page 90: ...marily to display system and group names Line 1 also displays radio status messages The 3rd line is used primarily to display radio status icons All three lines are used to display menu options when in the menu mode If programmed the display backlighting will illuminate upon power up or when radio controls are operated Figure 10 4 Radio Display ...

Page 91: ...t low power If icon is not visible transmit at high power Steady Battery charge indicator Flashing Low battery indicator Steady Indicates the current channel is set up as an analog channel Steady Group or channel in scan list Steady Priority 2 group or channel Steady Priority 1 group or channel Steady rotates clockwise Scan mode enabled If icon is not visible Scan is disabled P7200 Only Steady Tra...

Page 92: ...repeater LOW BATT Low Battery Battery voltage has dropped to the point to where the radio is no longer able to transmit The radio still receives calls until the battery is discharged beyond the point of operation at which time the radio automatically shuts down RXEMER Receive Emergency Indicates an emergency call is being received This message flashes on line two TXEMER Transmit Emergency Indicate...

Page 93: ...nsmit 10 7 SYSTEM SELECTION METHOD 1 From the control knob If system selection is programmed to the SYSTEM GROUP CHANNEL SELECTION control knob select a system by turning the knob to the desired system number position 1 16 The display registers the new system name on line one The button can be programmed to provide access to a 2nd bank of 16 system number positions 17 32 METHOD 2 P7270 P7250 and P...

Page 94: ... name on line two If the knob is moved to a position greater than the number of programmed groups the highest programmed group will remain selected The button can be programmed to provide access to a 2nd bank of 16 group number positions 17 32 METHOD 2 P7270 P7250 and P5250 model radios only From keypad If group selection is programmed as the primary function of and select a group by pressing or t...

Page 95: ...0 10 NUISANCE DELETE P7270 MODEL A channel can temporarily be deleted from the scan list if it is not the currently selected channel 1 Turn Scan ON 2 When the radio receives a call on the channel press the The channel is removed from the scan list until the radio is power cycled 10 11 BACKLIGHT ON OFF 1 Press to access the menu 2 Press or to scroll through menu until BCKLGHT appears 3 Press to sel...

Page 96: ...ower 10 15 1 Using the Menu Button 1 Press 2 Using the or keys scroll until the cursor appears to the left of TX POWER in the display 3 Press again to toggle between High and Low power 4 POWER HIGH or POWER LOW will appear momentarily on the top line of the display 10 15 2 Using the Pre Programmed Option Button Press the Option button POWER HIGH or POWER LOW will appear momentarily on the top line...

Page 97: ...ible menu items are in Table 10 5 10 16 1 Menu Item Selection Process An example of the menu item selection process and menu item parameter change is detailed below for the backlight menu item 1 Press to enter the menu mode 2 Press or until the display shows 3 Press The backlight menu item is activated Line one shows the active menu item and its current parameter setting Line two shows the current...

Page 98: ...information display to view Informational display only see Table 10 6 No user selectable settings Toggle Scan On Off SCAN ON OFF Toggles Scan operation ON OFF Toggle Private Mode PRIVATE ON OFF Toggles Private Mode ON OFF Display Current Encryption Key DISP KEY N A Displays current encryption key Informational display only No selectable settings Display Current Home Group Channel HOME N A Selects ...

Page 99: ...or private messages 10 17 2 Digital Mode The Digital Mode allows the radio to transmit and receive digitized voice signals Digital signals provide improved weak signal performance and cannot be easily monitored with a standard receiver Groups and channels programmed for digital operation transmit only digital signals Individual phone calls I Calls are answered back in the mode in which they were r...

Page 100: ...eceives clear and private signals The status icon is displayed when the Private Mode is enabled If the selected group or channel is programmed for auto select capability the mode may be toggled between private and clear with the key then following the selection mode rules Radios programmed for forced private operation do not allow a change of the transmit mode 10 17 3 1 Display the Currently Used ...

Page 101: ... Private Mode operation PVT DIS will be displayed if an attempt is made to enable private transmit mode It is not possible to operate on this group channel in Private Mode If the radio does not have the correct encryption key loaded NO KEY will be displayed and the call will not be transmitted 4 Continue with standard transmission procedures A Private Mode access tone will be heard when the PTT bu...

Page 102: ... response 10 18 2 Receive a Group Call 1 The radio will unmute according to the squelch mode defined in the radio personality monitor normal selective 2 Select the desired P25 system and Talk Group Channel or turn scan on and make sure the desired channel is in the scan list 3 When the radio receives a P25 call the radio will unmute and the channel name will appear in the display 4 Press the PTT b...

Page 103: ...the PTT to stop the short transmissions 5 To send a voice message press the PTT and speak into the microphone 6 To clear an emergency from the transmitting radio perform one of the following steps Change systems Change channels if not prohibited by programming Cycle power by turning radio off and then back on Press the Clear and Emergency buttons simultaneously providing the Clear Emergency option...

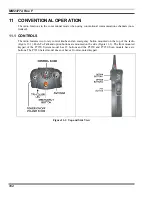
Page 104: ...atures two rotary control knobs and an emergency button mounted on the top of the radio Figure 11 1 Push To Talk and option buttons are mounted on the side Figure 11 1 The front mounted keypad of the P7270 System model has 15 buttons and the P5250 and P7250 Scan models have six buttons The P7230 Select model does not have a front mounted keypad Figure 11 1 Top and Side View ...

Page 105: ...mit the positions accessed is shipped with the radio but must be installed To install the mechanical stop remove the channel knob loosen the set screw on the channel knob metal base using a 1 27mm hex wrench and remove the channel knob metal base Replace the 16 channel ring with the channel stop ring located at the desired channel Reinstall the channel knob metal base tighten the set screw and rei...

Page 106: ... and P5250 Keypad Functions KEY FUNCTION Primary Function Allows the user to scroll through available systems groups or channels depending on personality programming Secondary Function Changes the selection for an item within a list Primary Function Accesses the pre stored menu Secondary Function Activates a selected item within a list This is similar to an Enter key Adds Deletes selected channels...

Page 107: ... selected item within a list This is similar to an Enter key Selects a specific system If the rotary knob is used to select the system and more than 16 systems are programmed in the radio the key is used to select additional banks groupings of systems 1 9 0 These keys are used to place telephone interconnect and individual unit to unit calls The keys operate like a normal telephone keypad Turns th...

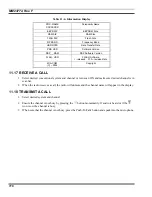
Page 108: ...cons Status Icons indicate the various operating characteristics of the radio The icons show operating modes and conditions and appear on the third line of the display see Table 11 3 The battery icon indicates approximate level only based on battery voltage Table 11 3 Display Descriptions ICON DESCRIPTION Steady Busy transmitting or receiving Steady Special call mode telephone Steady During all ra...

Page 109: ...atus Messages can be displayed The messages are described below MESSAGE NAME DESCRIPTION TALKARND Talkaround Indicates the radio is operating on conventional channels in talkaround mode no repeater LOW BATT Low Battery Battery voltage has dropped to the point to where the radio is no longer able to transmit The radio will still receive calls until the battery is discharged beyond the point of oper...

Page 110: ... the POWER ON OFF VOLUME knob to the desired volume level 4 Select the desired system and group The display indicates the current system and group names 5 The radio is now ready to transmit and receive calls 11 7 SYSTEM SELECTION METHOD 1 From the control knob If system selection is programmed to the SYSTEM GROUP CHANNEL SELECTION control knob select a system by turning the knob to the desired sys...

Page 111: ...a channel by turning the SYSTEM CHANNEL Selection knob to the desired group number position The display registers the new channel name on line two If the knob is moved to a position greater than the number of programmed channels the highest programmed channel will remain selected The button can be programmed to provide access to a 2nd bank of 16 channel number positions 17 32 METHOD 2 P7270 P7250 ...

Page 112: ...ives a call on the channel press the The channel is removed from the scan list until the radio is power cycled 11 11 BACKLIGHT ON OFF 1 Press to access the menu 2 Press or to scroll through menu until BCKLGHT appears 3 Press to select Backlight menu 4 Press or to toggle backlight ON and OFF 5 Press to select new backlight setting 11 12 CONTRAST ADJUST 1 Press to access the menu 2 Press or to scrol...

Page 113: ...he cursor appears to the left of TX POWER in the display 3 Press again to toggle between High and Low power 4 POWER HIGH or POWER LOW will appear momentarily on the top line of the display 11 15 2 Using the Pre Programmed Option Button Press the Option button POWER HIGH or POWER LOW will appear momentarily on the top line of the display 11 16 MENU The Menu function accesses features that are not a...

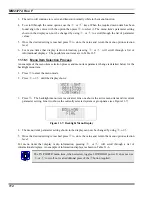
Page 114: ... the menu item selection process and menu item parameter change is detailed below for the backlight menu item 1 Press to enter the menu mode 2 Press or until the display shows 3 Press The backlight menu item is activated Line one shows the active menu item and its current parameter setting Line two shows the currently selected system or group name see Figure 11 7 Figure 11 7 Backlight Menu Display...

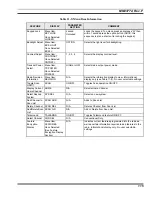
Page 115: ...REVISION N A Selects the information display to view Informational display only see Table 11 6 No user selectable settings Toggle Scan On Off SCAN ON OFF Toggles Scan operation ON OFF Display Current Home Channel HOME N A Selects Home Channel Select Desired System SYS SEL N A Selects a new system Add Channel to Scan List SCAN ADD N A Adds to Scan List Delete Channel SCAN DEL N A Deletes Channel fr...

Page 116: ...ight 11 17 RECEIVE A CALL 1 Select desired conventional system and channel or turn scan ON and make sure desired channel is in scan list 2 When the radio receives a call the radio will unmute and the channel name will appear in the display 11 18 TRANSMIT A CALL 1 Select desired system and channel 2 Ensure the channel is not busy by pressing the button momentarily If audio is heard or if the icon i...

Page 117: ...55 6712 E mail tac tycoelectronics com 12 1 IMMERSIBLE P7200 To preserve the watertight integrity of the P7200 portable radio the radio must be serviced by a service center authorized and certified by M A COM to perform the necessary tests to verify the watertight integrity Use one of the following methods to locate the nearest service center authorized to service the radios warranted under Option...

Page 118: ...k Data cable is connected Move to a better coverage area If the data cable is connected enter atspkr1 to enable internal speaker Radio will not register or does not receive provisioning data Bad logon credentials Check logon and password Radio powers off for no apparent reason Radio may be experiencing very low voltage Have the battery checked by an authorized technician Encrypted calls cannot be ...

Page 119: ...ty becomes void if 1 The battery has been subjected to any kind of misuse detrimental exposure or has been involved in an accident 2 The battery is used in equipment or service other than the radio equipment for which it is specified E The preceding paragraphs set forth the exclusive remedies for claims based upon defects in or non conformity of any battery whether the claim is in contract warrant...

Page 120: ...djustment in price Labor to perform warranty service will be provided at no charge during the warranty period only for the Equipment covered under Paragraph B 3 and B 4 To be eligible for no charge labor service must be performed at a M A COM factory by an Authorized Service Center ASC or other Servicer approved for these purposes either at its place of business during normal business hours for mo...

Page 121: ...MM23772 Rev F 121 NOTES ...

Page 122: ...Tyco Electronics Wireless Systems Segment 221 Jefferson Ridge Parkway Lynchburg Virginia 24501 Outside USA 1 434 385 2400 Toll Free 1 800 528 7711 www macom wireless com Printed in U S A ...

Reviews: