IO-390-D Series Engine Maintenance Manual
74-30
© 2020 Avco Corporation. All Rights Reserved
Page 284
March 2020
IO-390-D Series Engine Maintenance Manual
(i)
Install flat washers, lock washers & nuts on to the engine studs over the EIS’s
slotted mounting ears. Do not re-use lock washers – install NEW lock washers.
(j)
Finger tighten the nuts, do not allow the EIS to rotate.
(k)
If necessary, rotate the EIS to ensure the LED stays off.
(l)
At this point the EIS is timed (synced) to the engine.
(m)
Torque the mounting nuts, alternating between the nuts in 4 ft.-lb. (5 Nm)
increments, to 15 to 18 ft.-lbs. (20 to 24 Nm) ensuring the LED stays off.
(n)
Apply torque seal to the mounting nuts after the EIS is correctly timed.
(o)
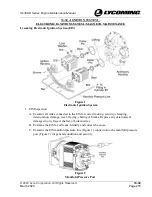
Install the ignition harness assembly on the EIS. The left EIS harness is labeled
"left" and the right EIS harness is labeled "right. Install and torque the screws
(Figure 1) to 18±2 in.-lbs. (2.0±0.2 Nm).
(p)
Connect the wires from the Power Terminal and torque the screw to 10±2 in.-lbs.
(1.1±0.2 Nm).
(q)
Connect the wires to the P-Lead Terminal, and P-Lead Shield (Ground) Terminal
(Figure 3) and torque the screws to 15±2 in.-lbs. (1.7±0.2 Nm).
(r)
Connect the manifold pressure tube to the manifold pressure port (Figures 1 and 2).
(s)
Install the spark plug in Cylinder No. 1 per the “Spark Plug Installation”
procedure in Chapter 74-20.
(t)
Re-connect the ignition leads to all spark plugs.
3.
EIS Timing Check:
A.
Turn the crankshaft counter to normal rotation 1/8 of a turn from #1-cylinder TDC.
B.
Slowly turn the crankshaft in the normal direction.
•
If the LED goes off more than 2° before or after #1-cylinder TDC, the EIS is
incorrectly timed and is not in sync with the engine. Loosen the EIS mounting nuts
and re-clock the EIS per the “Mount the EIS on the Engine” section in this chapter.
•
If the
LED goes off as #1 cylinder reaches TDC – 0°
(compression stroke) the EIS is
correctly timed (synced) to the engine and you may proceed.
NOTICE:
The LED on both the left and right EIS should go off within 1 1/2° of each other
to ensure both EIS modules are correctly timed to the engine.
Traditional Magnetos (Optional)
If traditional magnetos are installed on the engine, the remainder of this chapter provides
instruction for inspection, timing check, adjustment, and replacement.
1.
Magneto Inspection
Examine the magneto in accordance with the magneto manufacturer's instructions after every
500 hours of engine operation.
2.
Magneto-to-Engine Timing Check
A.
Disconnect the ignition leads from all spark plugs.

