background image

12 

User Manual 79 39 080c | MagniLink Zip 


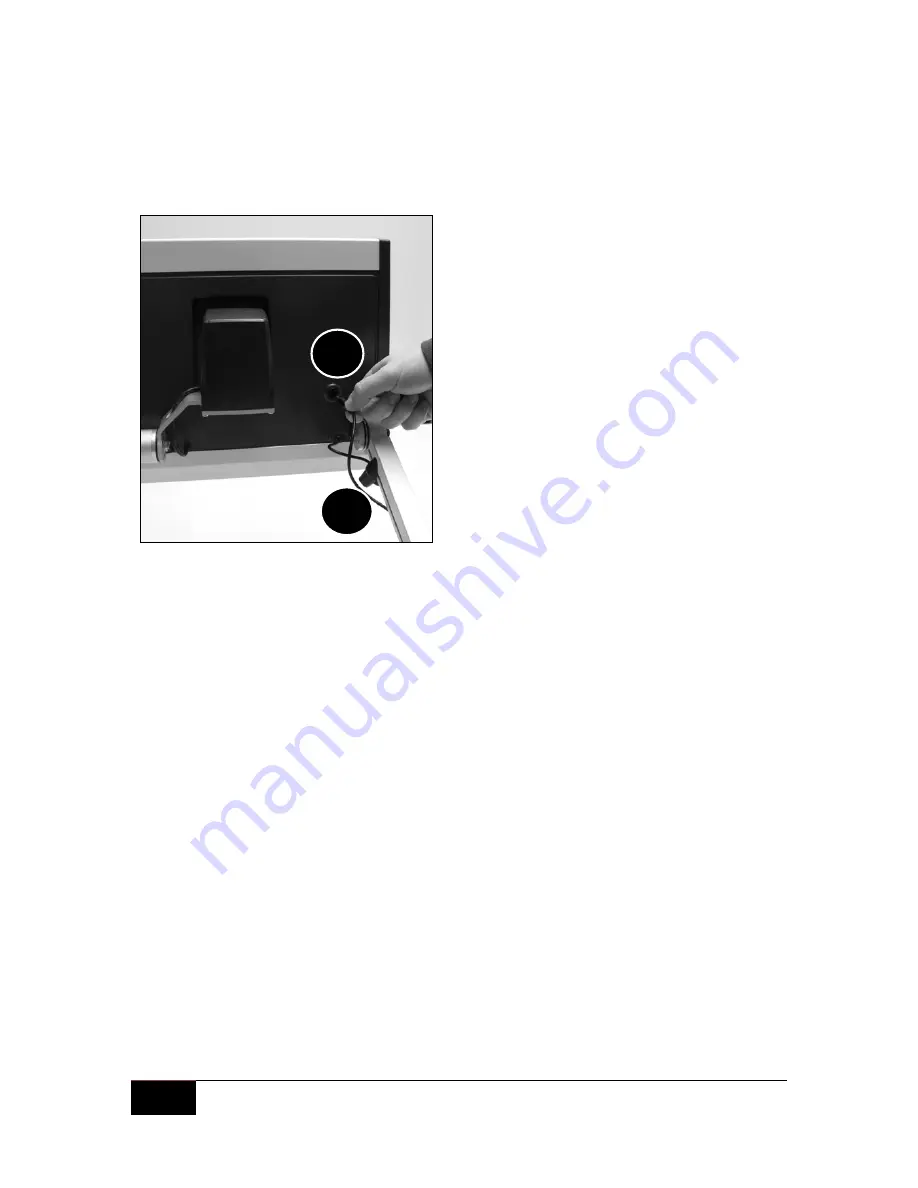
Connect the power supply to the 

connector at the back of the screen 

(I). Press the cable into the slit at the 

bottom of the arm (J). To keep the 

cable from pulling out when the 

screen is tilted, give it some length so 

it can stretch out sufficiently.  


The power supply emits heat and 

must therefore not be covered.


The unit is now ready to be used. The screen can be tilted 5 degrees 

forward and 10 degrees backwards, counting from a vertical position. 

Take both sides of the screen and tilt it forward/backward to obtain the 

desired position. 


Height adjustment (Optional) 

Height adjustment of the screen is available as an option. This upgrade 

makes it possible to lower the screen 5 cm from the original height. To 

lower the screen, press down on top of the screen with one hand (F) to 

preferred height. To raise it, use both hands and press it upwards using 

the screen support as a counterstay, or fold the unit and press the 

bottom of the screen. 

 
NB! To fold and transport the unit, place the screen in the highest 

position.   


Summary of Contents for MagniLink ZIP DUO

Page 1: ...User Manual MagniLink ZIP LVI Low Vision International Verkstadsgatan 5 Tel 46 470 727700 E mail info lvi se 352 46 V xj Fax 46 470 727725 Internet www lvi se...

Page 2: ...2 User Manual 79 39 080c MagniLink Zip...

Page 3: ...8 3 1 Packaging 8 4 PACKING 9 5 INSTALLATION 10 5 1 Height adjustment Optional 12 5 2 Work place 13 6 INSTRUCTION 14 6 1 Features camera unit 15 6 2 Features reading table 17 7 TROUBLESHOOTING 18 8 A...

Page 4: ...racies that may be contained in this manual In no event will LVI be liable for direct indirect special exemplary incidental or consequential damages resulting from any defect or omission in this manua...

Page 5: ...rs MLZIP one that uses a High Definition colour camera MLZIP HD Height adjustment Optional articlenumber and AD MLZIP HD AD It is possible to fold MagniLink Zip when the system is not in use or being...

Page 6: ...en operating the reading table do not place hands under or behind the reading table It could get one s finger caught between the reading table and the stand or the slides The MagniLink Zip has to be p...

Page 7: ...m in the room at least 30 minutes before use Do not exposure the system to sudden or extreme changes in temperature If you are unsure contact your dealer or service technician To prevent fire or shock...

Page 8: ...the LVI logotype facing up Open the zipper and release straps Lift the unit from the carrying case by holding the round bar closest to the screen Place the system on a table and remove packaging betw...

Page 9: ...creen under the front panel and hold the weight of the screen in your hand Pull out the back pull push button Fold the screen and let go of the pull push button Keep folding the screen until it locks...

Page 10: ...ts most extended position An overload in this position may cause the system to turn over Grab the screen under the front panel A and lift it so you can feel the weight of the screen in your hand the s...

Page 11: ...ed at the back of the screen Lift the camera G so you can feel its weight in your hand the camera should not move Pull out the pull push button H on the side of the unit which is placed just slightly...

Page 12: ...nd 10 degrees backwards counting from a vertical position Take both sides of the screen and tilt it forward backward to obtain the desired position Height adjustment Optional Height adjustment of the...

Page 13: ...ind The chair should have a back rest The seat of the chair should be of a height which does not make your legs become numb Let your feet rest on the floor The reading table should be at a height that...

Page 14: ...14 User Manual 79 39 080c MagniLink Zip 6 Instruction 1 8 9 2 3 4 5 6 7...

Page 15: ...unit 3 Brightness control By turning the control it is possible to adjust brightness This way best readability in different situations can be achieved 4 Magnification lever Lever for adjustment of the...

Page 16: ...w Black Black Yellow Green Black Black Green Background Text Red Black Black Red Yellow Blue Blue Yellow White Blue Blue White Option 2 Autofocus on off Pressing the button for 3 seconds locks the aut...

Page 17: ...in the left end position the reading table is unlocked To increase friction push the sideway brake to the right Writing position Place the reading table in desired position Lock the table by pushing t...

Page 18: ...ess once on the main switch and MagniLink Zip will make three attempts to restart If the light still indicates a solid red turn off the equipment and contact an authorised service technician If the li...

Page 19: ...time regardless of the amount of discharge Operation During operation the system will be configured as BATT PACK DC DC CONVERTER MLZIP 1 Connect the green marked DC cord from the DC DC converter to th...

Page 20: ...llow It is not possible to operate MagniLink Zip with the battery during charging The charger will indicate red light during charging When the light turns to green the charging is completed The chargi...

Page 21: ...le throughout the European Union and other European countries with separate collection programs Disposal of old Electrical Electronic Equipment Applicable throughout the European Union and other Europ...

Page 22: ...may cause harmful interference to radio communications However there is no guarantee that no interference will occur in a particular installation If this equipment cause harmful interference to radio...

Page 23: ...bility that the product follows the provisions of the Council Directive 93 42 EEC with amendments from directive 2007 47 EC we will keep the technical documentation described in section 3 of Annex VII...

Reviews: