background image

MagniLink S PREMIUM - PC 


User Manual 7944447a | MagniLink S PREMIUM - PC  

19


7.3


Installation of software 

Insert the USB stick containing the software into one of the computer's 
USB ports. Start the installation by clicking on the "Setup" file, which can 
be found in the “MagniLink PCViewer” folder. 

When the installation program starts, follow the instructions on the 
screen to complete installation of the software, or see below for a more 
detailed description. 


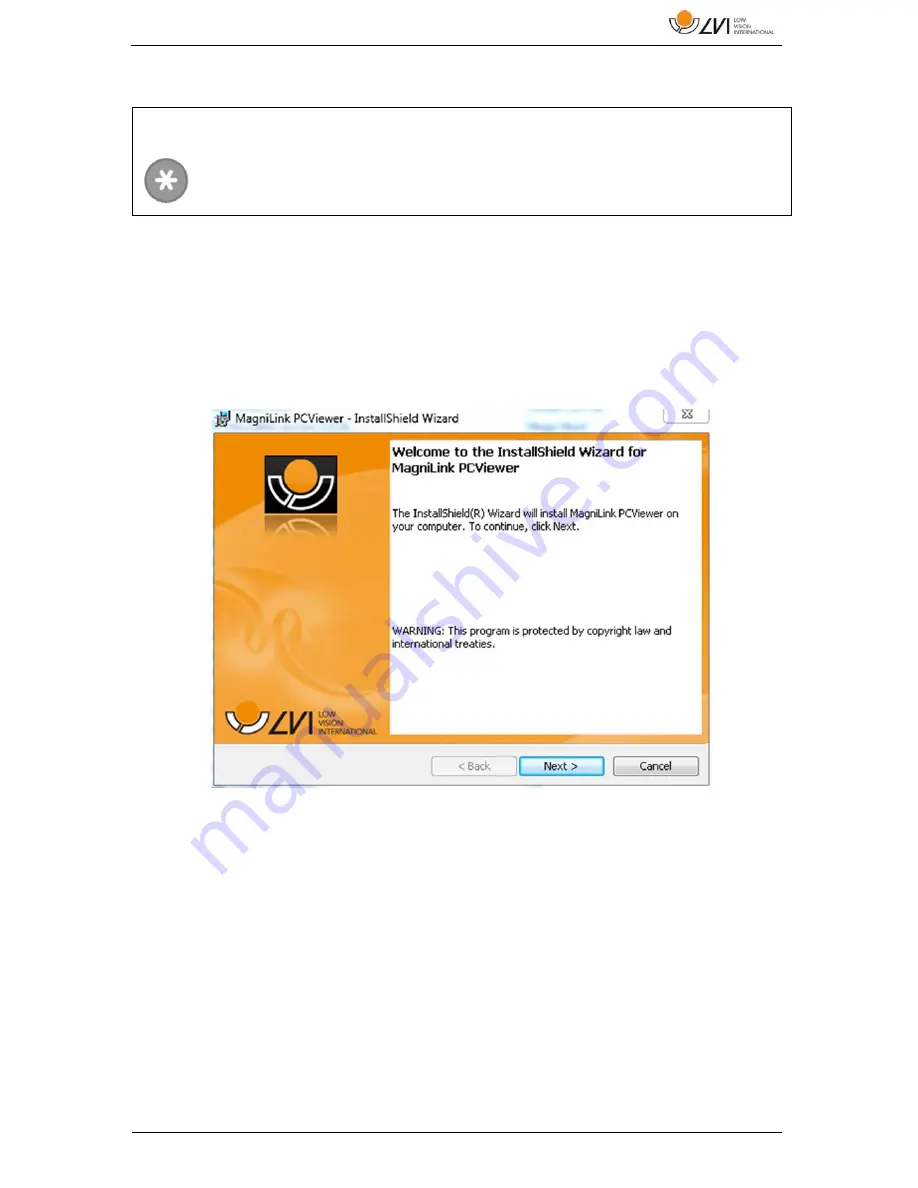
Select "Next" in the dialogue box "Welcome to the InstallShield 
Wizard for MagniLink PCViewer". 

NOTE


Installation requires administrator privileges on the computer in 
question and is performed on the user account currently in use. 

Summary of Contents for MagniLink S PREMIUM

Page 1: ...User Manual MagniLink S PREMIUM PC LVI Low Vision International Verkstadsgatan 5 Tel 46 470 727700 info lvi se SE 352 46 V xj Faks 46 470 727725 www lvi se...

Page 2: ......

Page 3: ...ssories 11 6 Hardware 14 6 1 Installation of hardware 14 6 2 Using the hardware 15 7 MagniLink PCViewer 18 7 1 Minimum system requirements 18 7 2 Recommended system requirements 18 7 3 Installation of...

Page 4: ...MagniLink S PREMIUM PC 4 User Manual 7944447a MagniLink S PREMIUM PC...

Page 5: ...ISO 9001 and Environmental System Certified ISO 14001 company The information in this manual has been carefully checked and is believed to be accurate However LVI assumes no responsibility for any in...

Page 6: ...your choice of supplier and reading aid The MagniLink S is a portable camera system with autofocus which can be connected to a computer or directly to an external monitor The system is controlled via...

Page 7: ...To Speech for Mac C MagniLink Docking Station with reading table DVI D MagniLink Docking Station with reading table HDMI E MagniLink Docking Station with table clamp DVI MagniLink S meets all the requ...

Page 8: ...product is moved from the cold into a warm room condensation moisture can form inside the unit or on the camera lens To prevent problems with condensation the apparatus should be installed in the roo...

Page 9: ...Case USB memory stick with software Polishing cloth User Guide Power adaptor HDMI to HDMI cable HDMI to DVI cable Check first that the box has no damage to its exterior In the event of damage contact...

Page 10: ...LVI recommends that the packaging be kept in case you have to return the system or you need to move it Packing material EPP Box corrugated cardboard Polyethylene LDPE4 For sorting and collection of pa...

Page 11: ...MagniLink S PREMIUM PC User Manual 7944447a MagniLink S PREMIUM PC 11 5 Accessories External control box MLS A100 Larger external control box MLV A110A...

Page 12: ...MagniLink S PREMIUM PC 12 User Manual 7944447a MagniLink S PREMIUM PC MagniLink Docking Station MLS A101 stationary reading table MagniLink Reading Table MLRT portable reading table...

Page 13: ...MagniLink S PREMIUM PC User Manual 7944447a MagniLink S PREMIUM PC 13 LVI Monitor 19 MLS A103 and 23 MLS A104 Text To Speech for PC TTS PC or Mac TTS MAC...

Page 14: ...ate the camera s arm until the supporting legs have been extended On the back of the camera there are several connection options The connection options available depend on the camera model 1 USB conne...

Page 15: ...off Press to start or shut down the system 3 Lighting configuration Used to configure the light intensity in order to optimize reading conditions Press the upper half to increase the light intensity a...

Page 16: ...mode Press the button to switch the picture mode between natural colours and grey scale Lighting adjustment Hold the button down to temporarily enable adjustment of the lighting via the lighting conf...

Page 17: ...points the camera down and flips the lens into place and distance mode the user opens the lens The settings for both modes are automatically saved when you switch from one to the other Settings that a...

Page 18: ...Text or SuperNova programmes 7 1 Minimum system requirements Microsoft Windows 7 2 integrated USB 2 0 ports i3 processor 1 GB RAM 32 bit 2 GB RAM 64 bit 7 2 Recommended system requirements Microsoft W...

Page 19: ...ich can be found in the MagniLink PCViewer folder When the installation program starts follow the instructions on the screen to complete installation of the software or see below for a more detailed d...

Page 20: ...by selecting I accept the terms of the license agreement and click on Next to start the installation If you have a camera with OCR functionality then mark the language s for which you have a license I...

Page 21: ...MagniLink S PREMIUM PC User Manual 7944447a MagniLink S PREMIUM PC 21 Select Install in the dialogue box Ready to Install the Program Select Finish in the dialogue box InstallShield Wizard Complete...

Page 22: ...e the system so that the software does not communicate with the internet It is possible via the licence to remove the functions video recording and take picture It is possible to license the system wi...

Page 23: ...to change between natural and artificial colours 2 Decrease magnification 3 Increase magnification 4 Overview mode Reduces magnification to overview mode Click again to restore the magnification When...

Page 24: ...Shift when you press the button 15 Show pictures Press to view the saved pictures Mark the picture you wish to view and press Enter or select Open The picture is normally opened in Windows standard p...

Page 25: ...s read If there is already text under the OCR tab this is replaced Hold down Shift when you press the button to insert the text on a new page 22 Whole image Only shown if the system has a licence for...

Page 26: ...so possible to choose bold and italic text The font that is used has no effect on the result of the OCR processing 5 Font size 6 Start Pause reading 7 Stop reading The next reading will begin from the...

Page 27: ...you move forwards one sentence If the reading mode is block you move forwards one block 12 Switch reading mode This command selects the reading mode that is to be employed when the Read previous or Re...

Page 28: ...Down arrow Decrease magnification Ctrl O Overview mode Ctrl J Autofocus on off Shift Up arrow Increase focusing distance Shift Down arrow Decrease focusing distance Right arrow Increase brightness con...

Page 29: ...s are only available together with cameras that are licensed for OCR F4 Start OCR The text from OCR processing replaces existing text Shift F4 Start OCR enter The text from OCR processing is entered o...

Page 30: ...Page Down Next page If several pages have been scanned you move to the next page Page Up Previous page If several pages have been scanned you move to the previous page Delete Remove the page in questi...

Page 31: ...mation and alternative settings 7 5 3 1 About the application Information regarding the software version and copyright can be found under this tab If you need to update the licence this can be done by...

Page 32: ...eded for both automatic and manual updates Language Change the language of the software The software is set to use the same language as the computer s default If this language is not available English...

Page 33: ...ect from the camera s various resolution options At resolution 1280x720 the frame rate can be set up to 60 Hz At resolution 1920x1080 only 30 Hz is possible Frame rate This setting allows the user to...

Page 34: ...es here from 1 to 60 minutes Frame rate The recording frame rate the number of images recorded per second can be set from 10 to 30 frames per second A lower frame rate means a poorer quality video rec...

Page 35: ...the new keyboard combination It is possible to set two different combinations for the same command If a combination already being used for another command is entered the other command will be erased...

Page 36: ...no effect on the result of the OCR processing Column mode When this setting is active the OCR engine processes the text by column which is useful if text from a newspaper is to be OCR processed Start...

Page 37: ...emove a colour combination press X To add to a colour combination press enter To change a colour combination press one of the triangular zones and a colour dialogue will appear Select colours and pres...

Page 38: ...west magnification on the reading camera Avoid glossy paper as this results in reflections in the image This impairs the results of the OCR conversion If you intend to use glossy paper we recommend th...

Page 39: ...rsion of the software is released an update can be made Follow the instructions below when the application finds a new version Click Next in the dialogue box Welcome If there is an update the followin...

Page 40: ...0 User Manual 7944447a MagniLink S PREMIUM PC Ensure that you close MagniLink PCViewer before clicking Next in the dialogue box Important information Click Next in the dialogue box Welcome to the Patc...

Page 41: ...MagniLink S PREMIUM PC User Manual 7944447a MagniLink S PREMIUM PC 41 Click Finish in the dialogue box Installshield Wizard Completed...

Page 42: ...r too long We recommend a good office chair with adjustable height The seat of the chair should be at a height that does not cause your legs to become numb legs should be at an angle of 90 degrees and...

Page 43: ...9 Troubleshooting If the indicator light is flashing A red light or a flashing red light indicates a system error Restart the system by disconnecting and reconnecting all cables and rebooting the sys...

Page 44: ...hat have specific collection systems If the product or its packaging has this symbol on it it is not to be handled as regular domestic waste It should instead be deposited at a suitable collection cen...

Page 45: ...MagniLink S PREMIUM PC User Manual 7944447a MagniLink S PREMIUM PC 45 11 Declaration of Conformity...

Page 46: ...allation of hardware 14 Installation of software 19 Introduction to the MagniLink S 6 Licensing 22 MagniLink PCViewer 18 Minimum system requirements 18 OCR Settings 36 Packaging 10 Position sensor 17...

Reviews: