INSTRUCTION | P18
Biltong
INSTRUCTION | P19
Biltong
SELECTING THE MEAT
Many different types of meats can be used to make biltong, from fish to turkey, but by
far the most popular meat to use is beef, as it will suit most tastes. Venison is a good
choice due to its leaner quality. Topside and silverside are also good cuts for biltong.
Whatever you select, the standard factors of cut, aging and fat content apply, and will
all affect your biltong in the same way they do when you cook with these meats. Fatty
cuts of meat are more likely to spoil during the drying process and should be
avoided.
PREPARATION:
Start by removing any excess fat. This will help with the drying
process, and ensure greater longevity of the final product. Leave some fat for extra
flavour, as you like it. Don’t cut the slices too thick or they will take too long to dry,
8mm to 10mm is ideal. When hanging biltong with six tray, cut to a length of 10cm
and when using nine trays cut to a maximum length of 19cm. Get rid of any gristle or
sinew as these parts become extremely tough to chew when dried. Longer strips are
more space efficient for drying, and reduce the number of drying hooks you’ll need
to use. However, it is important the biltong strips do not touch the base or sides of
the dehydrator.
BASTING & SEASONING RECIPE - FOR APPROXIMATELY 2KG OF MEAT:
!
!
NOTE:
When operating the dehydrator for more than 24 hours on the 25 or 30 degree
C temperature setting, it should be checked every 12 hours, after the first 24
hour period.
WARNING:
Do not operate the dehydrator above 30 degrees C for more that 24 hours.
250ml vinegar (for basting)
2 Tbs ground black pepper
1/2 cup ground coriander
2 Tbs sea salt
2 tsps paprika
DRYING:
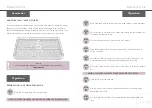
You are now ready to hang your biltong strips for drying. If any excess
liquid remains on the meat from basting, remove with paper towel. When hanging
your strips of meat, be sure to separate your strips evenly throughout the dehydrator,
using the 24 stainless steel hooks supplied. It is important that the strips of meat are
not touching each other, or the sides or bottom of the dehydrator. Once you have
completed hanging your meat, simply place the lid on to the dehydrator and set your
desired time and temperature.
TEMPERATURE & TIME SETTINGS:
For the best results, dry biltong on the 25 or
30 degree C temperature setting.
Depending on the type of meat used, biltong may take between 48 and
72 hours to dry. Personal taste comes into play, as some like their biltong moist
while others prefer the rock hard variety. Some experimentation with drying times
will be required when you first start making your biltong.
The easiest way to prepare meat for drying is to baste and season simultaneously.
Start by adding a layer of your basting mix (vinegar) and seasoning spices to the
bottom of a wide, flat dish or tray.
Lay your steaks flat in the dish, then add another equal layer of basting and seasoning
on top. Additional spices like paprika and peri peri can be added according to your
preference for spicy flavouring. Let the steaks marinade for three hours in the
fridge before proceeding to the drying phase.
STORING BILTONG:
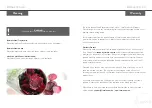
Even though biltong is cured and air-dried, it’s still meat.
Homemade biltong is preservative free, so we recommend storing it in the fridge in
a paper bag over short periods of 4-5 days. Should you wish to store it for longer
than 5 days, or you want the biltong to stay soft (moist), we recommend you store it
in an air-tight container in the freezer. Biltong can be stored in the freezer for up to 6
months. The Luvele range of vacuum sealers and vacuum canisters are ideal for storing
biltong in the freezer and can be purchased at
luvele.com.au.


