


Luowice Wireless Security Camera User Manual
Luowice Wireless Security Camera User Manual
2.3.4 Action with Alarm
2.3.4 Action with Alarm
2.3.4 Action with Alarm
2.3.4 Action with Alarm
2.3.4 Action with Alarm
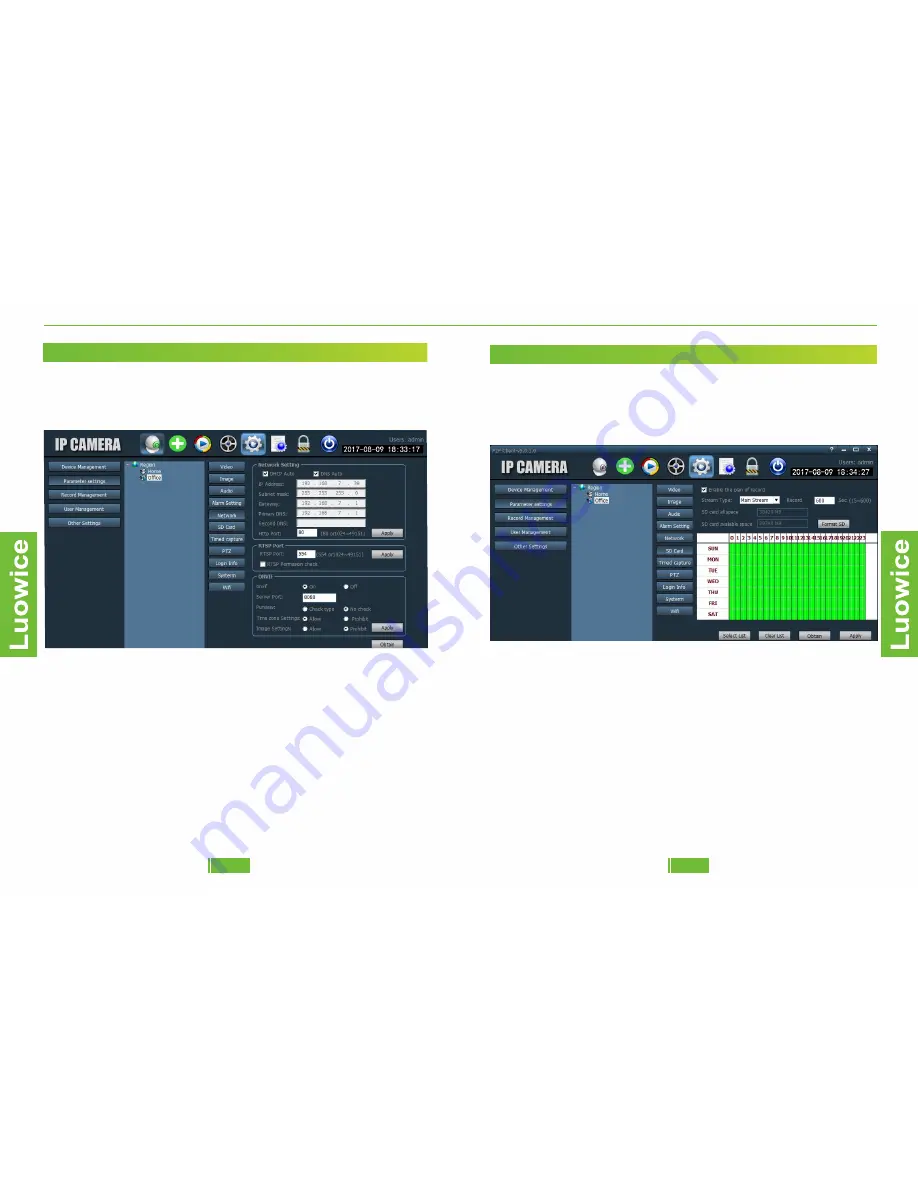
2.3.5 Network
Function: Modify the audio settings.
Operation: The device will obtain the appropriate settings automatically
based on your network condition. We suggest not to modify the settings
manually.
Note:
a)You can modify the IP Address to make it be compatible with specific
router only.
b)When the camera cannot be connected with your router, please check
whether the 'Subnet mask', 'Gateway', 'Primary DNS' and Http Port' is in
compatible with your router.
c)The default 'Http Port' is: 80. If you have modified the 'Http Port', for
example, 81, then you have to add ':81' behind the IP address
(192.168.7.39:81) when you want to view the camera via browser.
d)If you want to add the camera to your NVR/DVR, please input the 'IP
Address' and 'Server Port' of the device to the NVR's/DVR's
corresponding interface.
2.3.4 Action with Alarm
2.3.4 Action with Alarm
2.3.4 Action with Alarm
2.3.4 Action with Alarm
2.3.4 Action with Alarm
2.3.6 SD Card
Function: Modify the audio settings.
Operation: The device will obtain the appropriate settings
automatically based on your network condition. We suggest not to
modify the settings manually.
Note:
a)The default setting of record length is 600 seconds per video record.
You can modify the length from 15-600 seconds per record.
b)To format the SD card, please click 'Format SD' and the SD card will
be formatted. Please backup important files before formatting the SD
card.
c)The default setting is recording for 24 hours every day. To modify the
recording schedule, please take the mouse cursor to the hour bar, for
example, SUN '1', then press the mouse and move the mouse slightly.
Loosen the mouse and then the area of SUN '1' will turn into white color
and there will be no video recording during 1:00am-2:00am on Sunday.
If you want to set up record for SUN '1' again, please take the mouse
15
14
Luowice