© PROPERTY OF LUNDIX IT SWEDEN, ALL RIGHTS RESERVED – THE DISCLOSURE OR OTHER COMMUNICATION, COPYING, REPRODUCTION AND ANY USE WHATSOEVER IS FORBIDDEN WITHOUT THE WRITTEN AUTHORIZATION
OF LUNDIX IT.
SPC SmartBox User Manual
Revision
1.1
Page
9 of 62
Reference
2017-110
3
Installation
3.1
Installation Prerequisites
Vanderbilt SPC panel with firmware >= 3.6 (3.6 was the first version with support for FlexC)
Network router with DHCP server enabled
Network connection between the SPC SmartBox and the SPC panel
Internet access (to be able to use time synchronization via NTP and push notifications)
(Optional for use of Z-Wave) Z-Wave devices. Please see Appendix for
supported command classes
.
(Optional for use of KNX) Weinzierl KNX IP BAOS 777 Gateway and a KNX system. Please see Appendix
for a list of
supported KNX datapoint types
.
3.2
Installation Steps
1.
Read carefully
End-User License Agreement for SPC SmartBox(EULA)
in the Appendix. If you do not
agree to the terms of the EULA, do not install or use the SPC SmartBox.
2.
Unpack the SPC SmartBox.
3.
Mount the Z-wave antenna.
4.
Connect SPC SmartBox LAN port (black), with a regular network cable, to your network switch or
router.
5.
Power up the device by connecting the included power adapter to a wall socket and then to the SPC
SmartBox device. The Power LED should become steady green.
6.
Wait (~2 minutes) until the Status, Online and Z-Wave LEDs become steady green.
7.
Login to your router and look for the IP address assigned to the SPC SmartBox. (As an alternative you
can use a network scanning tool to discover the IP address. See Appendix for some examples)
8.
Open a web browser and enter the IP address of the SPC SmartBox.
9.
In the login window, enter Username (
smartbox
) and Password (default is
Smartbox!
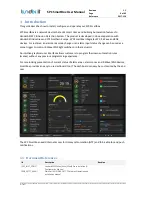
) and you will see
the main menu and an empty scene list.
10.
You can now start configuration of the device.


