background image

     selectIng rF outPut :  dtMB


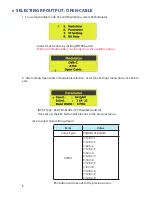
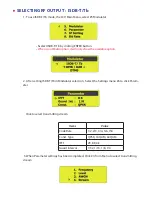
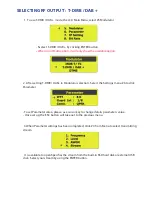
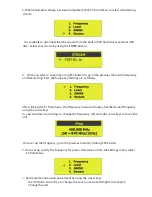
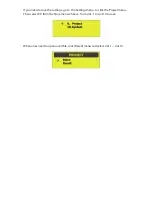
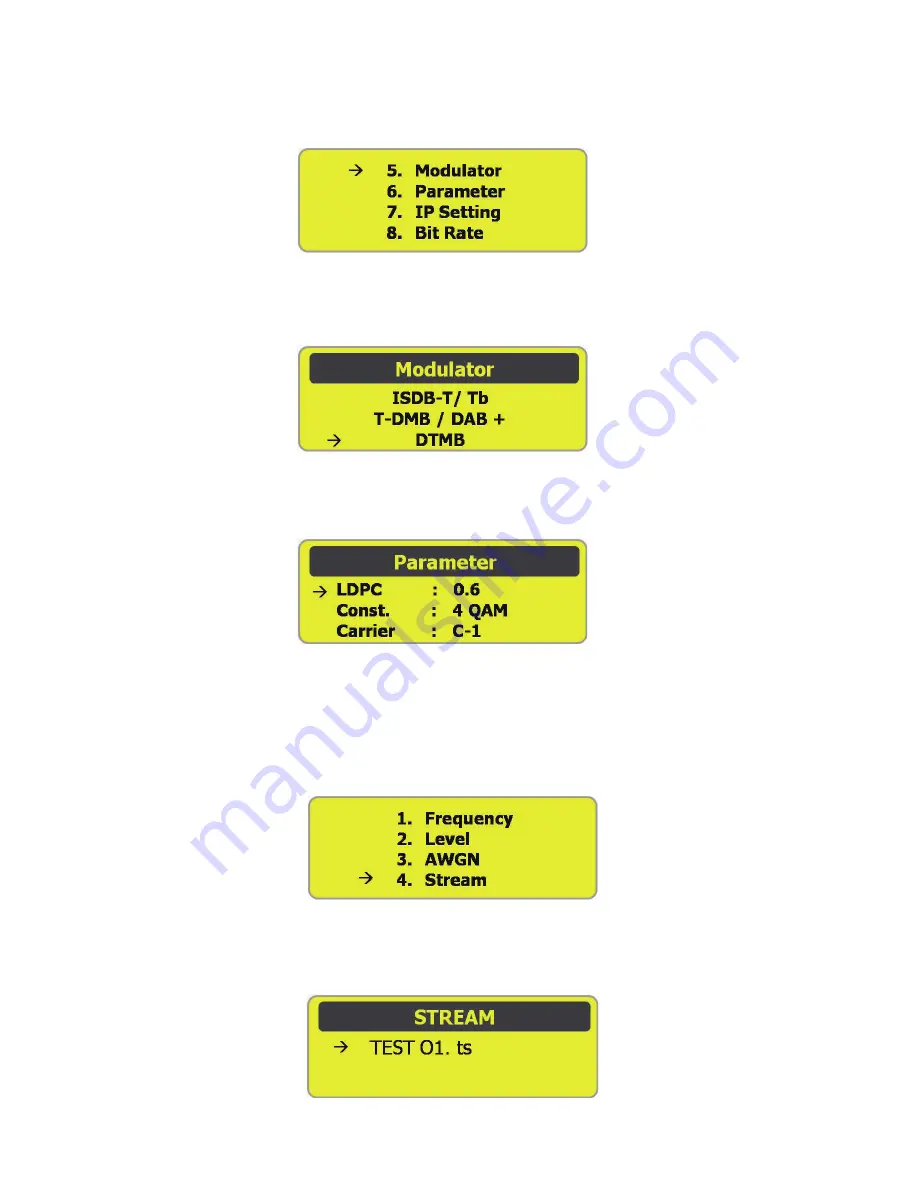
1.  To use DTMB mode, the LCD Main Menu, select #5 Modulator


                                      - Sselect  DTMB  by clicking ENTER button.

                                      - 

When is not Multi option, it will only show the available option

.

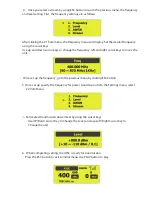
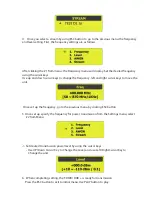
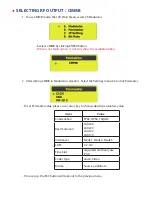
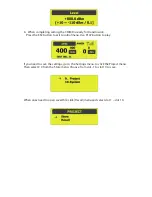
2.  After setting DTMB in Modulator selection,  Select the Settings menu #6 to click parameter.

- To set parameter value, please  use cursor key to change details parameters value.

- Once set up, the ESC button will take out to the previous menu.

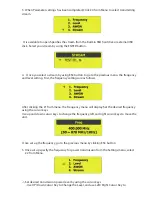
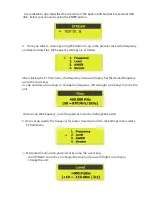
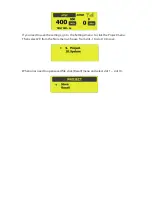
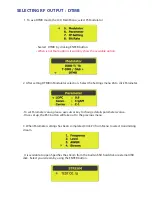
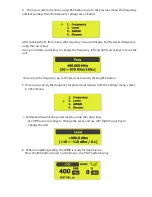
 3. When parameter settings has been completed, Click # 4 from Menu to select transmitting 

stream.

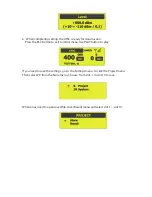
                   It is available to open Specifies the stream from the built-in SSD hard disk or external USB 

                 disk.  Select your stream by using the ENTER button.

Summary of Contents for VENTUS F1

Page 1: ...Office 1208 Woolim Lion s Valley II 680 Gasan Dong Geuncheon Gu SEOUL KOREA 150 803 TEL 82 2 2027 2400 FAX 82 2 2027 2409 e Mail inquire lumantek com User Operation Manual Stand Alone Type Modulator...

Page 2: ...cy LUMANTEK cannot under any circumstances accept responsibility for errors omissions or advice given in this manual Contact Us LUMANTEK is leading provider of platforms for Digital TV and Mobile TV s...

Page 3: ...D HDD built in ASI INPUT ASI OUTPUT port RF Modulator and RF Upconverter If the user wants any DTV SD format in the world can be used DTV SD formats supported by VENUS F1 are as follows DVB T H DVB C...

Page 4: ...or Notebook Picture 3 VENTUS F1 Basic Organization Main Feature All the system can be control from LCD panel Embedded System Built in Basic Hard Disk Built in SSD Type 32 GB External USB Disk and Memo...

Page 5: ...1 4 VENTUS Basic Organization VENTUS device is possible to transmit DTV Skill Standard by RF through USB Interface between VENTUS and PC or Notebook Picture 4 VENTUS F1 Basic Organization...

Page 6: ...ont and Rear Dimension 2 2 Rear View Picture 7 VENTUS F1 2 2 Feature Description 2 2 1 Fornt View RF OUTPUT Port RF Output port RF On OFF button Play Stop button LCD Window Enter ESC Button Arrow butt...

Page 7: ...to connect an external monitor USB Port Used to connect an external monitor Ethernet Port When using Network connection FTP ASI OUT ASI IN Built in 2 3 VENTUS F1 Package Contents VENTUS F1 Accessories...

Page 8: ...ilt in VENTUS F1 It is not necessory to install software Picture 8 VENTUS F1 3 2 VENTUS F1 Operation Procedure VENTUS F1 products with the following order Detail setting are available on LCD window Th...

Page 9: ...Reset Button Forced the Power off Enter Button VENTUS F1 Configuration Setting ESC Button PLAY STOP Button When completing setting use PLAY STOP Button To change the Modulation it is neccessory to en...

Page 10: ...menu CW Modulator Please Wait for the notification to display text set tings complete text disappears 3 On the Settings menu select the Parameter button you will select the following menu 4 Once set...

Page 11: ...T H in Modulator selection Select the Settings menu 6 to click Param eter To set Parameter value please use cursor key to change details parameters value Items Value Code Rate 1 2 2 3 3 4 5 6 7 8 Cons...

Page 12: ...to go to the previous menu the frequency and level setting First the frequency settings are as follows After clicking the 1 from menu the Frequency menu will display Set the desired frequency using th...

Page 13: ...en completing setting the DVB T is ready for transmission Press the ESC button to exit to initial menu Use PLAY button to play If you need to save the settings go to the Settings menu to click the Pro...

Page 14: ...Select the Settings menu 6 to click Parameter To set Parameter value please use cursor key to change details parameters value Items Value Const Type QPSK 16 QAM 64 QAM Once set up the ESC button will...

Page 15: ...ng the cursor keys Use up and down cursor keys to change the frequency left and right cursor keys to move the unit Once set up the frequency go to the previous menu by clicking ESC button 5 Once set u...

Page 16: ...to exit to initial menu Use PLAY button to play If you need to save the settings go to the Settings menu to click the Project menu Then select 9 from the Store menu Choose from slot 1 to slot 10 to s...

Page 17: ...Modulator selection Select the Settings menu 6 to click Parameter INPUT Type SSD Embedded PC Harddisk build in Once set up the ESC button will take out to the previous menu 3 When Parameter settings h...

Page 18: ...uency left and right cursor keys to move the unit Once set up the frequency go to the previous menu by clicking ESC button 5 Once set up specify the frequency for power transmission from the Settings...

Page 19: ...ave the settings go to the Settings menu to click the Project menu Then select 9 from the Store menu Choose from slot 1 to slot 10 to save When ones need to open saved file click Recall menu and selec...

Page 20: ...le in Modulator selection Select the Settings menu 6 to click Param eter INPUT Type SSD Embedded PC Harddisk build in Once set up the ESC button will take out to the previous menu click to select tran...

Page 21: ...frequency settings are as follows After clicking the 1 from menu the Frequency menu will display Set the desired frequency using the cursor keys Use up and down cursor keys to change the frequency lef...

Page 22: ...to exit to initial menu Use PLAY button to play If you need to save the settings go to the Settings menu to click the Project menu Then select 9 from the Store menu Choose from slot 1 to slot 10 to s...

Page 23: ...show the available option 2 After setting ISDB T Tb in Modulator selection Select the Settings menu 6 to click Param eter Click to select transmitting stream Items Value Code Rate 1 2 2 3 3 4 5 6 7 8...

Page 24: ...from menu the Frequency menu will display Set the desired frequency using the cursor keys Use up and down cursor keys to change the frequency left and right cursor keys to move the unit Once set up th...

Page 25: ...on to exit to initial menu Use PLAY button to play If you need to save the settings go to the Settings menu to click the Project menu Then select 9 from the Store menu Choose from slot 1 to slot 10 to...

Page 26: ...r selection Select the Settings menu 6 to click Parameter To set Parameter value please use cursor key to change details parameters value Once set up the ESC button will take out to the previous menu...

Page 27: ...cy left and right cursor keys to move the unit Once set up the frequency go to the previous menu by clicking ESC button 5 Once set up specify the frequency for power transmission from the Settings men...

Page 28: ...ave the settings go to the Settings menu to click the Project menu Then select 9 from the Store menu Choose from slot 1 to slot 10 to save When ones need to open saved file click Recall menu and selec...

Page 29: ...selection Select the Settings menu 6 to click Parameter To set Parameter value please use cursor key to change details parameters value Items Value Constellation BPSK QPSK 16QAM Reed Solomon 240 240...

Page 30: ...y settings are as follows After clicking the 1 from menu the Frequency menu will display Set the desired frequency using the cursor keys Use up and down cursor keys to change the frequency left and ri...

Page 31: ...to exit to initial menu Use PLAY button to play If you need to save the settings go to the Settings menu to click the Project menu Then select 9 from the Store menu Choose from slot 1 to slot 10 to s...

Page 32: ...n Select the Settings menu 6 to click Parameter To set Parameter value please use cursor key to change details parameters value Once set up the ESC button will take out to the previous menu 3 When Par...

Page 33: ...uency left and right cursor keys to move the unit Once set up the frequency go to the previous menu by clicking ESC button 5 Once set up specify the frequency for power transmission from the Settings...

Page 34: ...ave the settings go to the Settings menu to click the Project menu Then select 9 from the Store menu Choose from slot 1 to slot 10 to save When ones need to open saved file click Recall menu and selec...

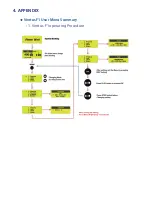
Page 35: ...4 Appendix u Ventus F1 User Menu Summary 1 Ventus F1 operating Procedure...

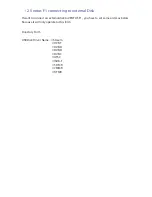
Page 36: ...nal Disk If want to connect an external disk to VENTUS F1 you have to set same order as below Because it will only operate to this form Directory Form USB Disk Driver Name Stream DVB T DVB H DVB H DVB...

Page 37: ...1208 Woolim Lion s Valley II 680 Gasan Dong Geuncheon Gu Seoul KOREA 150 803 Tel 82 2 2027 2404 Fax 82 2 2027 2409 e Mail inquire lumantek com...

Reviews: