background image


www.LumaComfort.com 

S

ET 

U

I

NSTRUCTIONS


1.


Remove the ice maker’s exterior and interior packaging, and remove any 
tape from the unit. Do not discard the unit’s box. Keep it for future storage 
purposes. 

2.


Check to make sure the ice scoop and other components shown in the list 
of main parts are included. 

3.


Clean the interior with lukewarm water and a soft cloth. 

4.


Find a location for your ice maker that is positioned away from direct 
sunlight and other heat sources such as stoves, furnaces and radiators. 

5.


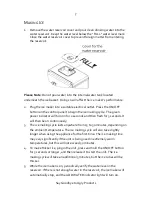
Allow the unit’s refrigerant to settle for one hour before plugging in the ice 
maker for the first time. Also ensure that the ice maker is positioned so 
that the plug is fully accessible. 

Important

: After unpacking your ice maker, it must rest in an 

upright position for at least one hour before you plug it in or the 
compressor may be damaged, shortening the life span of the 
unit. 


O

PERATING 

I

NSTRUCTIONS


C

ONTROL 

P

ANEL


A.


ADD WATER (Tank 
Empty) indicator 

B.


FULL ICE  indicator 

C.


Power Indicator 

D.


ON/OFF Button 


Summary of Contents for Comfort IMPC-2800S

Page 1: ...Because you re not like everyone else PORTABLE CLEAR ICE MAKER IMPC 2800S OWNER S MANUAL...

Page 2: ...any questions or concerns regarding your product or if you would simply like to share an idea with us please feel free to contact us Our friendly and knowledgeable customer support team is here for y...

Page 3: ...ol Panel 6 Making Ice 7 Additional Operating Tips 8 Maintenance 9 Technical Support 10 Product Specifications 10 Troubleshooting 10 Warranty 12 SAVE THESE INSTRUCTIONS Please carefully read this manua...

Page 4: ...matching receptacle Under no circumstances should the plug be altered in any way An improper connection can result in electric shock 8 If possible avoid using extension cords with this ice maker If an...

Page 5: ...conserving countertop design Sleek silver finish Push button controls LED display Utilizes commercial technology Clear ice melts 5x slower than cloudy ice Only portable clear ice maker on the market P...

Page 6: ...positioned away from direct sunlight and other heat sources such as stoves furnaces and radiators 5 Allow the unit s refrigerant to settle for one hour before plugging in the ice maker for the first...

Page 7: ...for 3 seconds It will then be on continuously 3 The ice making cycle lasts anywhere from 15 to 30 minutes depending on the ambient temperature The ice making cycle will also take slightly longer when...

Page 8: ...moving the unit allow the refrigerant inside the compressor to settle for at least 3 minutes before restarting the ice maker ADDITIONAL OPERATING TIPS 1 Clean the ice maker s interior water reservoir...

Page 9: ...ent into the internal water reservoir and then into the space below the clear viewing window 3 Use this water and detergent solution to clean the rest of the ice maker s interior and drain out the wat...

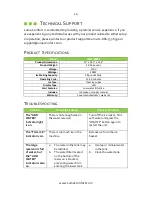
Page 10: ...ert Features Low water full ice Includes Ice maker scoop manual Warranty 1 year manufacturer s warranty TROUBLESHOOTING Problem Possible Cause s Possible Solution The ADD WATER indicator light is on T...

Page 11: ...water in the unit Clean this water tank The ice cubes being produced are thin and break easily The ambient temperature is too high Turn off the unit first and press hold the ON OFF button for more th...

Page 12: ...of parts that are designed to be replaced such as filters or batteries Power failure and improper power supply such as low voltage defective wiring or inadequate fuses Use of force or damage caused b...

Reviews: