


Operating Instructions Comparison Test Pump Version 1.0
10
3.1.2 Connecting the test specimen and the reference instrument
.
Place the device to be checked and the reference instrument in the quick connector with the
knurled nut. They can be freely positioned. The order makes no difference. Hand-tightening will
suffice for safe sealing.
To calibrate instruments with back pressure entry there is an a
ngle connection 90°
available (see
accessories section 7).
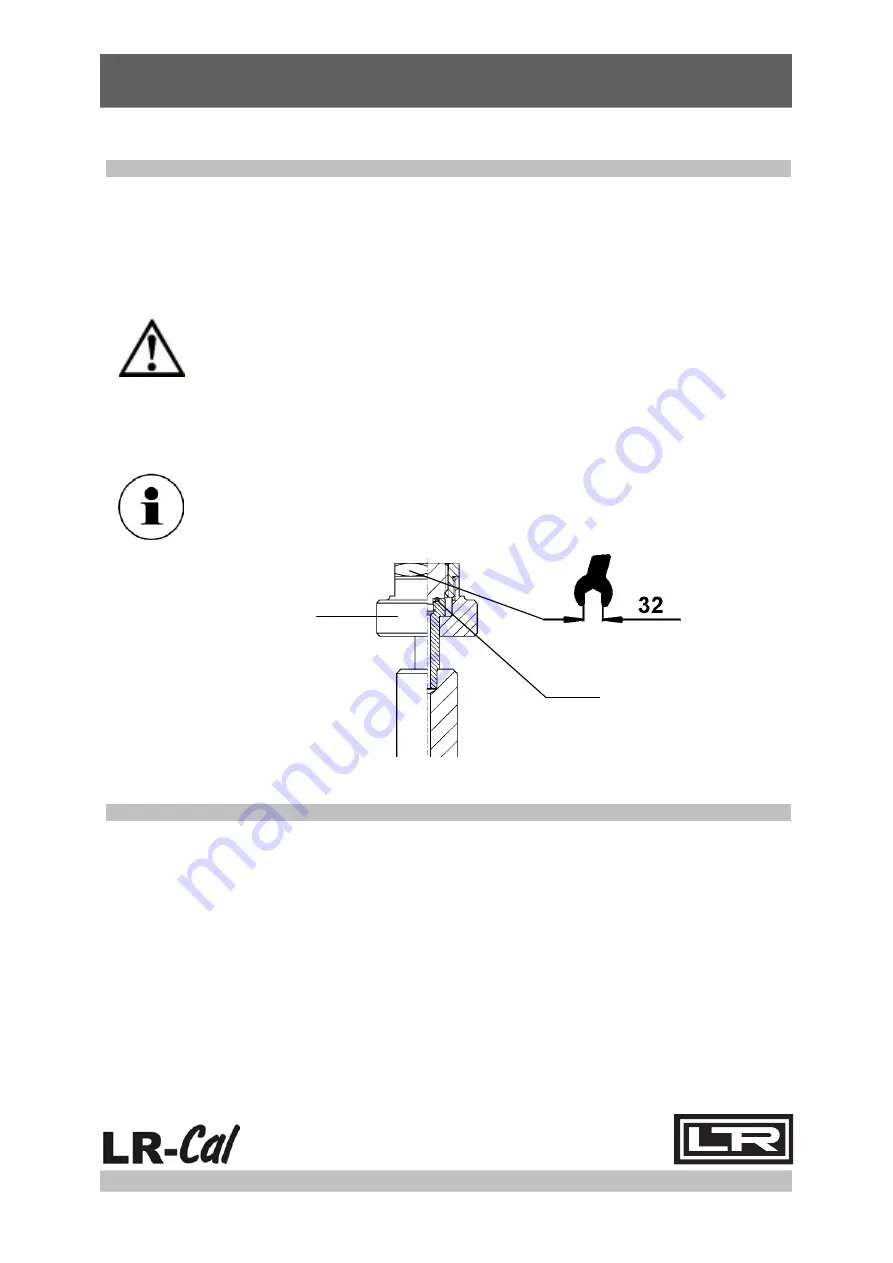
Check the O-ring seals in the test connections for proper seat and for any wear.
Replace, if necessary.
Please see to it, that each instrument mounted to the test pump must be clean
inside.
The quick connectors come equipped with a G 1/2 threaded insert in the standard delivery
package.
When you are calibrating devices with different connection threads, the threaded
inserts can be changed as appropriate (see accessories "Adapter Set").
3.1.3 Venting the system
.
After the clamping of the test specimen and the reference instrument, air may be trapped in the
system. The system may be vented before beginning with calibration using the following procedure:
The test specimen and the reference instrument must be clamped
The outlet valve must be closed.
Generate a pressure of approximately 50 bar using the initial pressure pump (Pay attention to the
measuring range of the instruments!)
Increase the pressure with the spindle pump until just below the final value of the measuring range
of the test specimen or of the reference instrument (the smaller pressure range is the decisive
factor).
Open the outlet valve, any trapped air will escape into the tank
This procedure may need to be repeated several times in order to remove all trapped air.
The device is now ready to use.
O-ring 8 x 2
(see accessories section 7.)
Knurled nut
Comparison Test Pump
GB
LSP 1000-BM and LSP 1600-BM