background image

49

To change either the track or speed, highlight the one you want to change,
then press the right or left arrow key. When the numbers are correct,
press the EXIT key.

Starting Position
Normally, the starting position for the simulator is your
present position. If you want to change the starting
position, highlight the “Set Starting Waypoint” label on
the Simulator Setup menu, then press the right arrow
key. The screen shown at right appears.

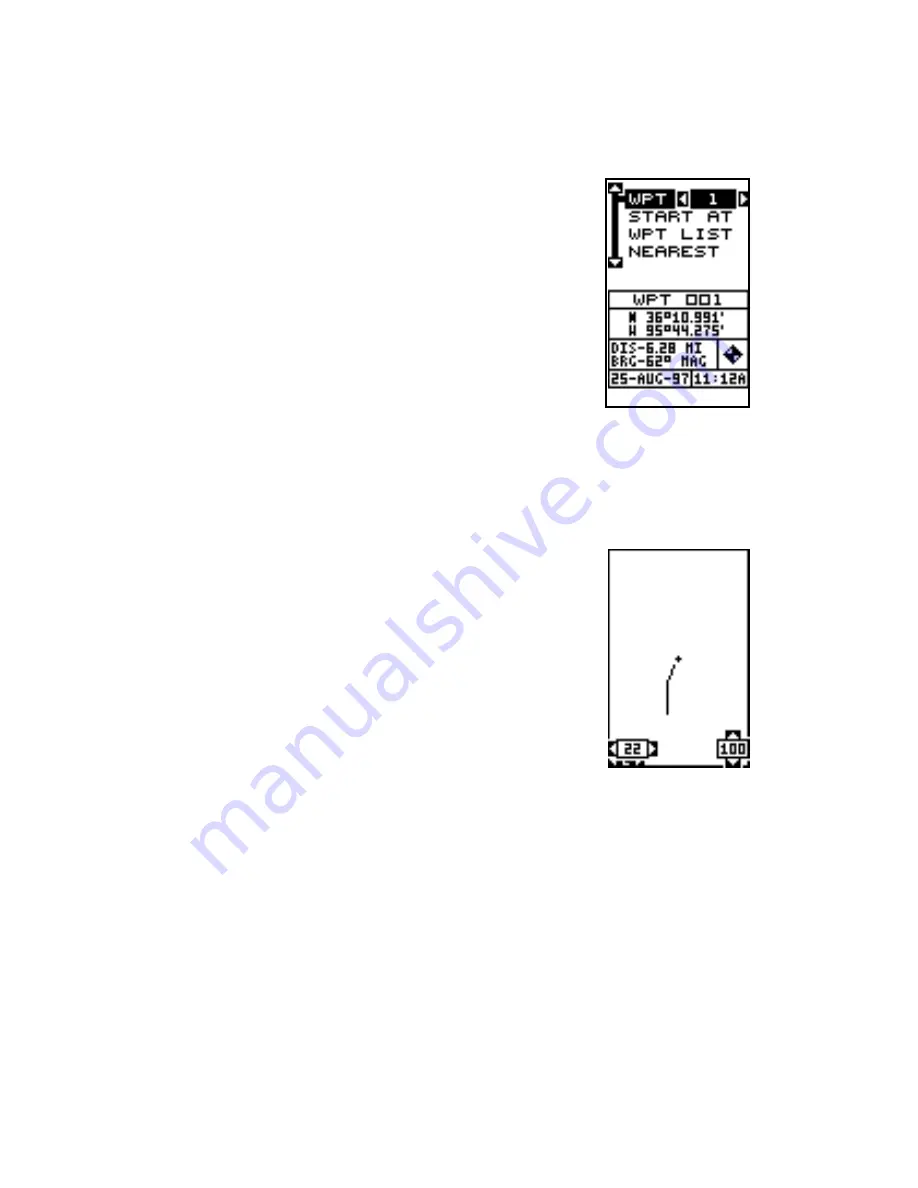
You can select any waypoint as the simulator’s starting
point. Select the starting point by pressing the right ar-
row key on the “WPT#” label until the desired starting
waypoint number appears. Now highlight the “Start At”
label and press the right arrow key. The GlobalNav 212 returns to the
Simulator Setup menu using the waypoint you specified as the starting
waypoint.

Use Arrow Keys to Steer
This option lets you change both the course and speed
on the screen as the simulator is running. To do this,
highlight the “Steer With Arrows” label on the Simula-
tor Setup screen, then press the right arrow key. The
screen shown at right appears. Use the up and down
arrow keys to increase or decrease the speed. Use
the right and left arrow keys to change the track.  Press
the EXIT key to erase these menus.

When you’re finished changing the track and speed,
press the EXIT key to erase the menus.

To turn the simulator off, press the MENU key, then move the black box to
the “Simulator Setup” label. Finally, press the left arrow key.

Summary of Contents for GlobalNav 212

Page 1: ...INSTALLATION AND OPERATION INSTRUCTIONS GlobalNav 212 TM ...

Page 2: ...antage of all available navigation tools when trav elling to a waypoint but will also visually check to make certain a clear safe path to the waypoint is always available The operating and storage temperature for your unit is from 4 degrees to 167 degrees Fahrenheit 20 to 75 degrees Celsius Extended storage temperatures higher or lower than specified will cause the liquid crystal display to fail N...

Page 3: ...2 Update Options 12 Plotter Orientation 13 Plot Trails 14 Save Trail 14 View Recall Trail 14 Clear Trail 14 Range Rings Grid Lines 14 GRIDS 15 ICONS 15 Place Icon Present Position 15 Place Icon Cursor Position 16 Icon Options 16 WINDOWS 17 Reprogram Window Groups 22 Reprogram Boxes 23 Reset Groups 24 WAYPOINTS 24 Waypoint Menu 24 Saving Your Present Position as a Waypoint Quick Save Method 25 Savi...

Page 4: ...ION 36 Navigation Notes 36 SYSTEM SETUP 37 Backlight 37 Sound 37 Contrast 37 Units of Measure 37 NMEA DGPS 38 NMEA Output 38 Configure NMEA Output 38 DGPS 40 Serial Communication Setup 40 Reset Options 41 Reset Groups 41 System Info 41 GPS SETUP 41 Position Format 41 Map Fix 42 Alternate Format 43 DATUM 44 PCF Position Correction Factor 44 POSITION PINNING 45 POWER SAVE 46 ALARMS 46 MESSAGES 47 SU...

Page 5: ...itude called a 3D fix Remember the unit must have a clear view of the satellites in order to receiver their signals Unlike radio or television GPS works at very high frequencies The signals can be blocked easily by trees buildings even your body Fortunately they do travel through glass and plastic so your receiver will work in the car if it has a clear view of the satellites through the windshield...

Page 6: ... transmitters and gives them to the GPS receiver which then uses them to show a more accurate position The ironic part is the federal government implemented SA and is also operat ing many DGPS transmitters You can use the signals from all of the Coast Guard DGPS stations for free by the way The downside to this is it requires another piece of electronic gear the DGPS receiver which usually isn t s...

Page 7: ...sted above Do not mix different types of batteries For example don t use both alkaline and ni cad batteries at the same time Battery Installation First turn the unit so that its back is facing you Push the two tabs to the left and re move the battery cover as shown at right Install the batteries according to this dia gram There s a decal in the battery com partment showing the correct polarity als...

Page 8: ...it will need to be a passive antenna This unit does not supply power to the antenna OPERATION Keyboard There are 12 keys on the keyboard You navi gate through the menus adjust the chart s cursor and enter data using the arrow keys The five major modes of operation are ac cessed using the PAGES key Press the MENU key to select or adjust a feature from a list The Z IN and Z OUT keys zoom in or zoom ...

Page 9: ... see which satellites are obstructed by obstacles in your immediate area if you hold the unit facing north The GPS receiver is tracking satellites that are surrounded by a black box If the satellite number is not surrounded by a box then the receiver hasn t locked onto that satellite and it isn t being used to solve the posi tion Beneath the graph are the bar graphs one for each satellite in view ...

Page 10: ...first time it doesn t know what your position or elevation altitude is It does know the current UTC time and date since these were programmed into it at the factory and an internal clock keeps the time while the unit is turned off It begins searching for the satellites using the above data that it ac quired the last time it was turned on This probably was at the Lowrance factory Since it s almost ...

Page 11: ... the data it needs to determine which satellites are in view Once the satellites are known the receiver searches for only those satellites making a lock much faster than an auto search method Full Initialization There are occasions when you will want or need to manually initialize the unit by entering the position elevation time and date To do this press the MENU key Now press the down arrow key u...

Page 12: ...ata flashes until the unit acquires a position Do not rely on any data that is flashing When the numbers are flashing they represent the last known values when the unit lost it s lock on the satellites Note The altitude data may still flash even if the unit shows a Position Acquired message and all other data is not flashing The unit must be locked onto at least four satellites to determine altitu...

Page 13: ...navigation screen looks like the one at right when you re not navigating to a waypoint Your position is shown by an arrow in the center of the screen Your trail history or path you ve taken is de picted by the line extending from the arrow The arrow pointing down at the top of the compass rose indicates the current track direction of travel you are taking This is also shown in the TRK track box in...

Page 14: ...t as shown on the screen at right Nav Screen 2 This navigation screen shows all navigation informa tion in large digital numbers To view this screen press the PAGES key then press the up arrow key until the NAV1 label is highlighted While it s highlighted press the right arrow key The screen shown at right appears Press the EXIT key to erase the menu This screen is composed of eight digital boxes ...

Page 15: ...a birds eye view If you re navigating to a waypoint the plotter shows your starting location present position course line and destination You don t have to navigate to a way point however to use the plotter Using the plotter is as simple as pressing the PAGES key then highlight ing PLOT 1 A screen similar to the one below appears The diamond flashing in the center of the screen is your present pos...

Page 16: ...iety of uses To turn the cursor on simply press the arrow key in the direction you want the cursor to move This lets you view areas on the plotter that are away from your present position The cursor s latitude and longitude show at the top of plot 1 s screen The zoom in and zoom out keys work from the cursor s position when it s active not the present position You can zoom in on any detail anywher...

Page 17: ...u see on the left side of the plotter should always be on your left The unit also has a course up mode that locks the course to the top of the display On the example screens shown below we re travelling southward about 150 In the north up view the present position indicator appears to move toward the lower right corner of the screen The anchor icon shown on the right side of the screen is actually...

Page 18: ...e right arrow key Your current trail is saved Press the EXIT key to erase this menu View Recall Trail Your current plot trail shows on the plotter by default To place a saved trail onto the plotter choose TRAILS SHOWN from the Plotter Options menu The screen shown at right appears Highlight the desired trail on this screen then press the right arrow key to select it Press the EXIT key to erase thi...

Page 19: ... position or at the cursor s location Place Icon Present Position To place an icon at your present position simply press the ENT key The screen shown at right appears Use the arrow keys to highlight the desired icon Now press the ENT key again The plotter screen reappears with the icon showing at the position you were at when the ENT key was pressed GRIDS RINGS BOTH PLOT 1 SCREEN PRESS ENT KEY SEL...

Page 20: ...ed from the plotter individually all of a specific type or all at once To delete an icon press the MENU key then choose Icon Options The screen shown at right appears The first menu on this page ICONS OFF ON simply turns all icon symbols off or on This doesn t erase the icons it simply hides the icons from the plotter You can use this feature to temporarily de clutter the dis play The DEL ALL ICON...

Page 21: ...e groups When the desired group appears press the EXIT key to erase the Pages menu A summary of the groups follows Note that many of the groups have navigation data that re quire navigation to a waypoint in order to show data See the waypoint section for information on setting up the unit for waypoint navigation Group A This screen has bearing BRG track TRK a trip meter distance to go DIS and grou...

Page 22: ...nd CDI show on this screen Velocity made good is the speed you re making towards the waypoint For example if you re in a boat and travelling directly towards a waypoint at 30 miles per hour but you re going against a 5 m p h cur rent then your velocity made good is 25 miles per hour Group E This screen has bearing track distance to go and velocity made good Group F A repeat of group E except veloc...

Page 23: ...ferent formats at the same time See the Position Format for information on changing the format Group J Set Local Time This screen includes a clock that shows your local time estimated time of arrival bearing ground speed dis tance to go and the small CDI The clock shows the time based upon the setting in the initialization It s an offset from UTC which is the time the GPS system uses If this time ...

Page 24: ...o change the numbers After setting the alarm press the ENT key to save it To turn the alarm on select the Clock Alm on off from the main menu and press the right arrow key Note The unit must be on in order for the alarm to work If you set the alarm then turn the unit off the alarm won t sound To silence the alarm press the EXIT key Group L Timers This group has two timers an up timer and a down ti...

Page 25: ...he countdown timer reaches zero it begins counting up until you press the EXIT key This tells you how long it s been since the alarm sounded The up timer has an alarm that can be set to sound at a preset time For example one hour from now three hours etc If you turn the up timer s alarm on press the right arrow key when the Up ALM Off On label is highlighted it sounds an alarm when it reaches the ...

Page 26: ...station s ID number plus fre quency baud rate signal strength signal to noise ratio SNR and time since the GPS receiver received the satellite corrections AGE all show on this screen Reprogram Window Groups You can reprogram or customize the window groups to meet your own needs This unit has over thirty different windows that can be rearranged into many combinations The changes you make to the scr...

Page 27: ...e desired windows have been added to the group When the last window has been added the unit returns to normal operation with the reprogrammed group showing on the screen as shown at right Reprogram Boxes The digital boxes on the PLOT 2 and both NAV screens can also be re programmed using a method similar to the one used to reprogram the window groups To customize a screen first switch to the scree...

Page 28: ... really want to do this Press the right arrow key to continue or the left arrow key to exit without resetting the groups WAYPOINTS This GPS receiver gives you the ability to create your own database of locations called waypoints You can save your present position cursor position or enter a coordinate and save it as a waypoint For example you may wish to store the location of your parked car as a w...

Page 29: ...with the position data It s icon is also placed on the plotter as shown at right In this case waypoint number one was assigned when the position was saved Saving The Cursor Position as a Waypoint When the cursor is showing on the plotter and you press the WPT key twice the cursor s position is placed into the first available waypoint num ber In the example screen shown below the cursor is placed a...

Page 30: ...mber you selected on the first page SELECTING A WAYPOINT In order to edit or navigate to a waypoint you must first select it There are three ways to do this by waypoint number waypoint list or nearest All waypoint selection methods are on the main waypoint menu shown at the top of this page Waypoint Number To select a waypoint by its number simply highlight the WPT label at the top of the waypoint...

Page 31: ...ght arrow key Follow the instructions below for each item Edit Name You can assign a name to each waypoint The name can have up to eight characters To do this first select Name Edit from the Options menu A screen similar to the one at right appears Press the up or down arrow keys to select the first let ter in the name Press the right arrow key to highlight the next position in the name Repeat thi...

Page 32: ... the arrow keys to select the icon that you want to assign to the waypoint then press the ENT key The waypoint now has the new icon WAYPOINT NAVIGATION The GlobalNav 212 makes it easy to navigate to any waypoint All you have to do is select the waypoint see page 26 then highlight the GO TO label on the waypoint screen and press the right arrow key The unit immediately shows navigation information ...

Page 33: ...ine is called a track line and is the shortest path from the starting location to the destination The number 1 is waypoint number one which is the recalled waypoint and the destination The D on the plotter screen at the top of this page is the cursor destination when the cursor position is used as a destination If you follow the track line you ll reach the destination cover ing the shortest distan...

Page 34: ... move waypoint number 1 to waypoint num ber 9 so we pressed the right arrow key until 9 ap peared As you can see on the screen below waypoint number 1 is show ing in the From box Now press the ENT key The From box is now empty and the To box has waypoint number 9 Note The names in the From and To boxes are not the waypoint num bers they are the waypoint names Press the EXIT key to erase this menu ...

Page 35: ...ou can select more waypoints to measure at this time or press the EXIT key to erase this screen Project a Waypoint You can save a waypoint even if you don t know it s position or location on the plotter This unit lets you project the location of a waypoint from a known waypoint using only bearing and distance from the known way point This is useful if you don t know the latitude longitude of a loc...

Page 36: ...cts of Selective Availability described in the Introduction can be minimized or virtually eliminated using position aver aging You can only save a waypoint using this method however the loca tion saved can be much more accurate than any other method without using DGPS The downside to this method is twofold It only works to save a waypoint and the unit must be in the location that you want to save ...

Page 37: ...eate a Route To create a route first press the MENU key highlight the PLAN EDIT ROUTES label and press the right arrow key The screen shown at right appears This unit can store up to 99 routes Route number one shows on this page If you wish to create a route using a different number simply press the left or right arrow keys until the desired route number appears In this example however we ll use r...

Page 38: ... key Now select the second waypoint for your route After selecting the second waypoint the unit returns to the waypoint list screen The second waypoint shows be neath the first one with bearing and distance from the first waypoint in the route to the second showing under the second waypoint s name The total route distance shows at the bottom of the screen Continue selecting way points in this mann...

Page 39: ...aypoint The default is forward To change it press the MENU key then select the PLAN EDIT ROUTES label and press the right arrow key The screen shown at right appears To run a route from the end to the beginning highlight the RUN la bel then press the right arrow key to change it To follow a route first select the route number that you wish to follow by highlighting the Route No label and pressing ...

Page 40: ...ssage appears asking if you really want to erase the route If you press the right arrow key the route will be erased If you select Yes by pressing the right arrow key the unit then asks if you want to erase the waypoints used in the route from memory also Press the right arrow key again to erase them or the left arrow key to leave the waypoints in memory The unit returns to the routes menu Press t...

Page 41: ...w key to increase the time the lights are on the left arrow key to decrease it Sound To turn the speaker off highlight the SOUND label as shown above then press the left arrow key Note This turns the speaker completely off The unit will not sound a tone when a key is pressed nor will any alarm sound The alarm messages will still flash on the screen however Contrast To adjust the display s contrast...

Page 42: ...ms on the next page for general wir ing procedures Read your other product s owner s manual for more wir ing information Once the cables are wired turn the unit on press the menu key and select NMEA DGPS CONFIG from the System Setup menu A screen similar to the one shown below appears NMEA Output To turn the NMEA output on highlight the NMEA OUTPUT menu shown at the bottom of the previous page the...

Page 43: ...00 S WIRES OTHER DEVICE S WIRES GLOBALNAV 212 TRANSMITTING NMEA DATA TO ANOTHER DEVICE TO GLOBALNAV 212 DGPS RECEIVER 12 VDC BATTERY BLACK WIRE GROUND WIRES WHITE WIRE RED WIRE TO 12V DGPS RECEIVER S RECEIVE DATA WIRE IF NEEDED GLOBALNAV 200 S WIRES GLOBALNAV 212 RECEIVING DATA FROM A DGPS RECEIVER GREEN WIRE DGPS RECEIVER S TRANSMIT DATA WIRE ...

Page 44: ...e with these receivers If you have any other Magnavox or Starlink compatible DGPS receiver connected to the GlobalNav 212 you may need to change the settings To do this move the black box to the Configure DGPS label and press the right arrow key A screen similar to the one at right ap pears These menus select the beacon receiver s frequency and bit rate in bits per second To change one of these se...

Page 45: ...he System Info label on the System Setup menu Now press the right arrow key Press the EXIT key when you re finished reading this screen GPS SETUP Items found under the GPS Setup menu include initialization covered at the beginning of this manual position format power save datums and more To use any of these features first press the MENU key highlight GPS Setup and press the right arrow key The scr...

Page 46: ...a reference position in latitude longitude which you take from a marked location on the map It then shows the present position as distance on the map from that reference point For example if it shows a distance of UP 4 00 and LEFT 0 50 you then measure up four inches and to the left a half inch from the reference point on the map to find your location To use this format you need to follow these st...

Page 47: ...ht the Position Format label and press the right arrow key Select Map Fix from the list and press the EXIT key All position information now shows as a distance from the reference point you entered and saved as a waypoint earlier Alternate Format Windows group I has two position screens You can change the format of each position display independently For example the position at the top of the scree...

Page 48: ...s to highlight the de sired datum then press the ENT key This selects the datum and erases the select datum menu To erase the menu without changing the datum simply press the EXIT key A list of the datums used by the GlobalNav 212 is in the back of this manual PCF Position Correction Factor Another method used to make your display match a chart or map is called PCF or Position Correction Factor Th...

Page 49: ...s 0 047 minutes north latitude and 0 degrees 0 244 minutes east longitude That is the difference between the present position shown by the GlobalNav 212 and the one on our chart After you ve entered the latitude longitude correction press the ENT key to accept it The GlobalNav 212 erases the PCF entry screen and returns to the navigation or mapping screens with the correc tion factor applied POSIT...

Page 50: ...y To turn the power save feature on press the MENU key then highlight the GPS SETUP label and press the right arrow key Now highlight the PWR SAVE label and press the right arrow key to turn it on Press the EXIT key to erase the menu The letters PS for Power Save show on the satellite status screen whenever the power save mode is on You can also verify the power save mode status by viewing the GPS...

Page 51: ...ve a DGPS beacon receiver connected to the GlobalNav 212 smaller ranges may be usable Arrival Alarm If you set the arrival alarm s distance to a small number and you run a route see the routes section the GlobalNav 212 may not show navigation data to the next waypoint once you arrive at the first one since you may not be able to come close enough to the first waypoint to trip the arrival alarm MES...

Page 52: ...set show for your present position If you move the plotter s cursor to a different position before using this calculator it will show the sunrise sunset for the cursor s location The moonrise moonset calculator works identically to the sunrise sunset calculator It looks like the screen at right A moon symbol shows near the bottom of the screen showing the approximate phase of the moon The arrow ne...

Page 53: ...ars Now highlight the Start At label and press the right arrow key The GlobalNav 212 returns to the Simulator Setup menu using the waypoint you specified as the starting waypoint Use Arrow Keys to Steer This option lets you change both the course and speed on the screen as the simulator is running To do this highlight the Steer With Arrows label on the Simula tor Setup screen then press the right ...

Page 54: ...imer UPT ETE Estimated Time En route FIX A measure of your receiver s position quality A fix of 1 is bad 9 is the best ICON A symbol you can place on the map representing a land mark POSITION Your present position GS Ground Speed Your actual speed TTG Time To Go Time remaining at your present speed until you reach a waypoint UTC Coordinated Universal Time Time at the prime meridian at Greenwich En...

Page 55: ...ARC 1960 MEAN ASCENSION ISLAND 1958 ASTRO BEACON E 1945 IWO JIMA ASTRO DOS 714 ST HELENA ISLAND ASTRO TERN ISLAND 1961 ASTRONOMICAL STATION 52 MARCUS ISLE AUSTRALIAN GEODETIC 1966 AUSTRALIAN GEODETIC 1984 AYABELLE LIGHTHOUSE DJIBOUTI BELLEVUE IGN EFATE ERRAOMANGO BERMUDA 1957 BISSAU GUINEA BOGOTA OBSERVATORY COLOMBIA BUKIT RIMPAH INDONESIA CAMP AREA ASTRO ANTARCTICA CAMPO INCHAUSPE ARGENTINA CANTO...

Page 56: ...ean 1950 England Channel Islands Ireland Scotland Shetland Islands European 1950 Finland Norway European 1950 Greece European 1950 Iran EUROPEAN 1950 ITALY SARDINIA EUROPEAN 1950 ITALY SICILY EUROPEAN 1950 MALTA EUROPEAN 1950 SPAIN PORTUGAL EUROPEAN 1979 MEAN FORT THOMAS 1955 NEVIS ST KITTS GAN 1970 REPUBLIC OF MALDIVES GEODETIC DATUM 1949 NEW ZEALAND GRACIOSA BASE SW 1948 AZORES GUAM 1963 GUNUNG ...

Page 57: ...A 1927 MEAN CARRIBEAN N AMERICA 1927 MEAN CENTRAL AMER N AMERICA 1927 MEAN CANADA N AMERICA 1927 MEAN CONUS N AMERICA 1927 MEAN CONUS EAST N AMERICA 1927 MEAN CONUS WEST N AMERICA 1927 ALASKA N AMERICA 1927 BAHAMAS NO SAN SALV N AMERICA 1927 BAHAMAS N AMERICAN 1927 CANADA WEST N AMERICAN 1927 CANADA CENTRAL N AMERICAN 1927 CANADA EAST N AMERICAN 1927 CANADA NORTH N AMERICAN 1927 CANADA YUKON Nahrw...

Page 58: ...n 1927 Mexico North American 1983 Alaska Canada CONUS North American 1983 Central America Mexico Observaorio Metereo 1939 Azores Corvo Flores Islands Old Egyptian 1907 Egypt Old Hawaiian Mean for Hawaii Kauai Maui Oahu Old Hawaiian Hawaii Old Hawaiian Kauai Old Hawaiian Maui Old Hawaiian Oahu Oman Oman Ordinance Survey Great Britain 1936 Mean for England Isle of Man Scotland Shetland Islands Wales...

Page 59: ...th American 1969 Argentina South American 1969 Bolivia South American 1969 Brazil South American 1969 Chile South American 1969 Colombia South American 1969 Ecuador South American 1969 Ecuador Baltra Galapagos South American 1969 Guyana South American 1969 Paraguay South American 1969 Peru South American 1969 Trinidad Tobago South American 1969 Venezuela SOUTH ASIA SINGAPORE TANANARIVE OBSERVATORY...

Page 60: ...rief note detailing the problem you re having with the unit Please include your name address and daytime telephone number 4 Please include payment for non warranty repairs Check money order Visa or MasterCard may be used 5 Fill in your name address zip code date and RA number in the blanks provided on the UPS form included with your unit 6 Attach the label to the shipping box tear off the tab for ...

Page 61: ...st quality dealers that handle marine elec tronic equipment should be able to assist you with these items Consult your local telephone directory for listings 2 LEI Extras Inc P O Box 129 Catoosa OK 74015 0129 or call 800 324 0045 USA orders only Lowrance Electronics may find it necessary to change or end our ship ping policies regulations and special offers at any time We reserve the right to do s...

Page 62: ...R REFUND AS JUST DESCRIBED IS THE EXCLUSIVE REMEDY AVAILABLE TO YOU AGAINST US FOR ANY DEFECT MALFUNCTION OR NON CON FORMITY CONCERNING THE PRODUCT OR FOR ANY LOSS OR DAMAGE RESULT ING FROM ANY OTHER CAUSE WHATSOEVER WE WILL NOT UNDER ANY CIR CUMSTANCES BE LIABLE TO ANYONE FOR ANY SPECIAL CONSEQUENTIAL INCI DENTAL OR OTHER INDIRECT DAMAGE OF ANY KIND Some states do not allow the exclusion or limit...

Page 63: ...nd a brief note with the product describing the problem Be sure to include your name return shipping address and a daytime telephone number How to Obtain Service International Customers Only Except Canada If you need service or repairs contact the dealer in the country you purchased your unit WARRANTY REPAIR WILL BE HONORED ONLY IN THE COUNTRY UNIT WAS PURCHASED Please follow the shipping instruct...

Page 64: ...page 60 inside this manual for complete warranty details If your unit fails and the failure is not covered by the original warranty Lowrance has a flat rate repair policy that covers your unit and accessories packed with the unit at the factory There is a 180 day warranty on all non warranty repairs from the factory which is similar to the original warranty but is for 180 days rather than one year...

Reviews: