background image

12. To set Minute Time, press 
either 

Up

   or 

Down   

to navigate

to correct minute time then press

Stop 

 to confirm.

P R O G R A M M I N G   A   B L I N D

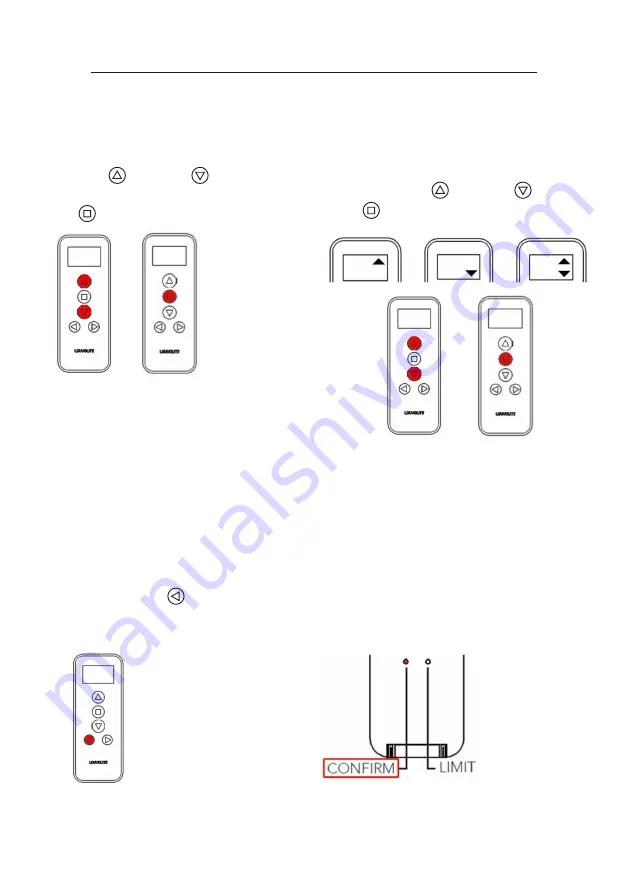
13. To select Blind Direction select either 
Up, Down or Mid Position, to navigate 
press either 

Up

   or 

Down   

then Press 

Stop   

to confirm selection.

15. Press and hold 


until

Time on Display flashes, next 
“No (Number)” will appear.

14. If the display on the handset is no 
longer flashing, everything is set.

If you have set all the blinds required then go to Step 16, to set further blinds go to 
15 and then repeat from step 1. 

16. Note: You can press 

Confirm 

to exit

the programming mode if the timing 
data is complete.

Summary of Contents for R1723

Page 1: ...R 1 7 2 3 6 C H A N N E L 1 8 S E T T I N G S TIMER REMOTE CONTROL operating instructions t 0161 882 5050 e sales louvolite com w www louvolite com ...

Page 2: ...splay will automatically move to Minute Time setting S E T T I N G T H E T I M E 1st time or re setting 2 Press and hold Limit and until a time appears 4 To set hour time press either Up or Down to navigate to correct hour time 6 To set Minute Time use either Up or Down to navigate to the correct minute time ...

Page 3: ...Press to confirm display will automatically move to Day setting 9 Press to confirm 8 Use either Up or Down to navigate to the Day of setting 10 Press hold until display flashes release Time and Day is set ...

Page 4: ... Jogs Twice up once down once 5 To check blind motor press either Up or Down to confirm correct direction of motor 2 Press until desired channel is selected 1 6 4 Press Confirm on the handset until the motor jogs twice up once down once NOTE If the blind is travelling in opposite direction press and hold Limit and Stop simultaneously until the motor jogs twice ...

Page 5: ... once down once up once down once 5 Press Stop when the blind is close to top limit position S E T T I N G T H E B L I N D L I M I T 2 Press until desired channel is selected 1 6 4 Press Up the blind should move upwards 6 To position exactly press either Up or Down until satisfied with top limit position of Blind ...

Page 6: ...11 Press Confirm The motor will jog twice up once down once bottom limit position is now set 8 Press Down The blind should move downwards 10 To position exactly press either Up or Down until satisfied with bottom limit position of blind 12 Both top and bottom limit positions of the blind have been set to operate using the handset ensure this is in Manual mode ...

Page 7: ...multaniously until the motor jogs twice up once down once 5 Repeat Setting the Blind Limits for more blinds S E T T I N G T H E B L I N D S L I M I T S mid position setting 2 Move blind to the desired Mid Position 4 To operate the mid position press and hold Stop until the blind moves ...

Page 8: ...hanged using 3 Press and the blind channel number on the handset Display will flash 5 Press Stop to add a channel or use either Up or Down to navigate to required channel or to add additional blinds channels P R O G R A M M I N G A B L I N D 2 Press Limit and simultaneously until display flashes the number 1 will appear 4 To move between blind channel numbers use either Up or Down ...

Page 9: ...Stop to confirm selections 10 To set hour time press either Up or Down to navigate to correct hour time 7 Display will automatically move onto day settings 9 Press Hour Time on display will automatically flash 11 Press Stop to confirm selection Minute Time will automatically flash on display ...

Page 10: ...te press either Up or Down then Press Stop to confirm selection 15 Press and hold until Time on Display flashes next No Number will appear 14 If the display on the handset is no longer flashing everything is set If you have set all the blinds required then go to Step 16 to set further blinds go to 15 and then repeat from step 1 16 Note You can press Confirm to exit the programming mode if the timi...

Page 11: ...Blind Channel Day Hour Minute Up Down Mid Position Example 1 Monday 8 00 Up ...

Page 12: ...ite website to view the links to all of our fitting instructional videos www louvolite com Louvolite Ashton Road Hyde Cheshire SK14 4BG Louvolite Customer Services Tel 0161 882 5050 Email sales louvolite com JUNE 2017 ...

Reviews: