www.lorextechnology.com
LW2300 Series Quick Start Guide_R2
Page 2
©2010 Lorex Technology Inc.
As our product is subject to continuous improvement, Lorex Technology &
subsidiaries reserve the right to modify product design, specifications, prices &
warranty without notice and without incurring any obligation. E&OE
Three recording modes are available on the system: Manual Recording, Schedule Recording, and Motion
Recording.
NOTE:
The system can record video to an SD card one channel at a time. You should always format the SD
card prior to initial recording. For details refer to the owner’s manual section “Format”.
NOTE:
Recording overrides other actions on the receiver. You must stop recording on the system in order
to perform other actions, such as opening the Main Menu, Quad Mode, etc.
D.
How to begin Recording?
MODE
DESCRIPTION
HOW TO OPERATE
MANUAL RECORDING
• Continuous recording from one
camera
• Cannot record while in Quad mode
• Cannot record while in Auto Sequence
Viewing Mode
• Press the RECORD—M button on the
remote control or receiver to start/stop
manual recording
SCHEDULE RECORDING
• Continuous recording from one
camera or from Auto Sequence
Viewing Mode (system will record from
one camera at a time)
• IMPORTANT:
Turn off Manual
Recording and Motion Recording to
enable Schedule Recording
• Enter a Start and Stop Time from Main
Menu > Record > Schedule Record
MOTION RECORDING
(AUTO)
• System only records when motion is
detected by a camera
• Compatible with Quad Mode
(recommended) – enable Quad Mode
BEFORE turning on Motion Recording
• Press the Motion button on the remote
control or RECORD—A on the receiver
to start/stop Motion Recording
It’s all on the Web
For detailed setup information, please
refer to your User’s Manual. For
additional information and accessory
purchases, please visit our website
www.lorextechnology.com
ExTENDING YOUR WIRELESS SIGNAL
Even with a clear line-of-sight between your camera(s) and your receiver, you
may experience a lower frame rate simply due to the distance between your
wireless devices. Accessory antennas are available that can help extend the
range of your wireless signal. Visit
www.lorexcctv.com
for more details.
The LW2300 series product is
ExPANDABLE UP TO 4 CAMERAS
To order additional cameras, please visit our website at
www.lorexcctv.com
For information on viewing recordings, refer to the owner’s manual section “Viewing Recorded Video”
C.
Basic System Setup
(using remote control)
Navigating Menu Screens:
Follow these steps to access the Menu screen and make
updates / changes to settings:
1. Press the MENU button to enter the Menu screen
2. Use the directional buttons to highlight a menu item
3. Press ENTER to enter the highlighted menu item
4. Use the directional buttons to change highlighted setting
5. Press ENTER to save a setting change (If you press MENU
instead, the setting change will NOT be saved)
6. Press MENU to go back to the previous menu. Press MENU
repeatedly to go back to camera view mode.
Setting Date/Time:
Set the date and time to ensure that they are properly
captured on recordings
1. Press MENU. Highlight SETTING menu and press ENTER
2. Highlight DATE & TIME and press ENTER
3. Press RIGHT / LEFT to move the cursor and UP / DOWN to
change the value for the date and time
4. Press ENTER to save setting. Press MENU to return to
previous menu
Changing Camera View Mode
View a single camera at a time, single cameras in sequence
(Auto Sequence) or all cameras at the same time (Quad).
Follow these steps to access each of the viewing modes:
Single Channel View:
Press CHANNEL-M repeatedly to manually
scroll through available camera channels (turn unused channels
off in CAMERA ON/OFF menu)
Auto Sequence View (default setting):
Press CHANNEL-A
to automatically scroll through every available channel at 5
second intervals. Press CHANNEL-M to return back to manually
switching camera channels
Quad View:
Press the QUAD button once to enter 4-channel
quad view. Press again to return to the previous camera view. To
quickly go to a specific channel while in Quad view, simply press
the corresponding directional button (1-4). Once you have exited
Quad view, return to using MANUAL-M to manually scroll to
specific channel
On-Screen Display
1.
Signal Indicator
2.
Recording Status Indicator
3.
File Name
4.
Camera indicator
1
2
3
4
5
6
7
5.
New Recording/
Memory Full indicator
6.
SD card status indicator
7.
Current Time/
Date Indicator
(see page 19 and 20 of Instruction
manual for further details)
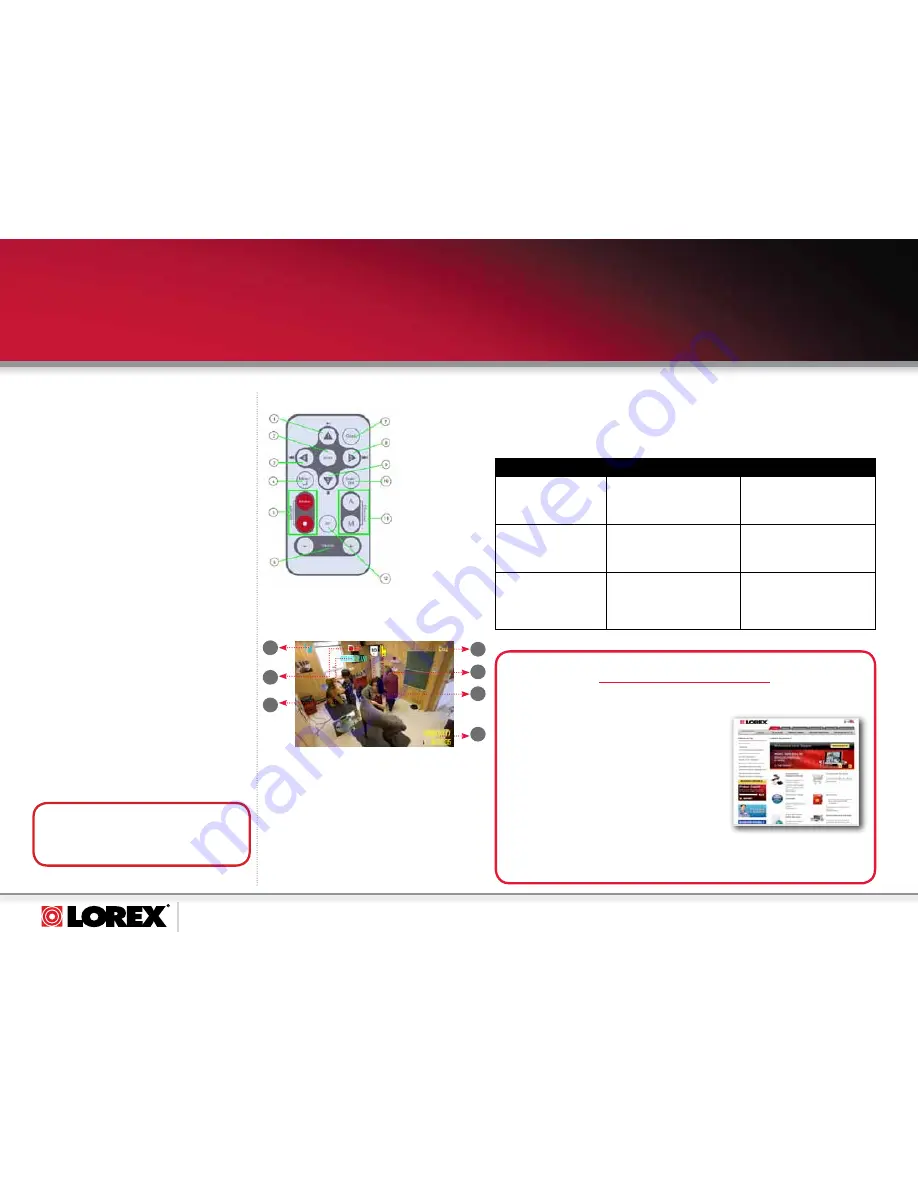
1. 1/Play/Pause
2. Confirm Setting
3. 4/Rewind
4. MENU/ Back
5. Record Motion/
Start/Stop
6. Volume
7. Quad View
8. 2/Fast Forward
9. 3/Stop
10. Scan/Delete
11. Channel
Autoscan/Manual
12. AV Output
Remote Control
By default, the system is set to beep when motion is
detected by the camera(s). To turn the beeping sound
off locate the dial on the left side of the receiver marked
ALARM VOL and turn it all the way to the right.
TIP: Beeping Sound
WIRELESS DIGITAL SECURITY SYSTEM
LW2300 SERIES - QUICk START GUIDE


