

DVR:
Full Setup
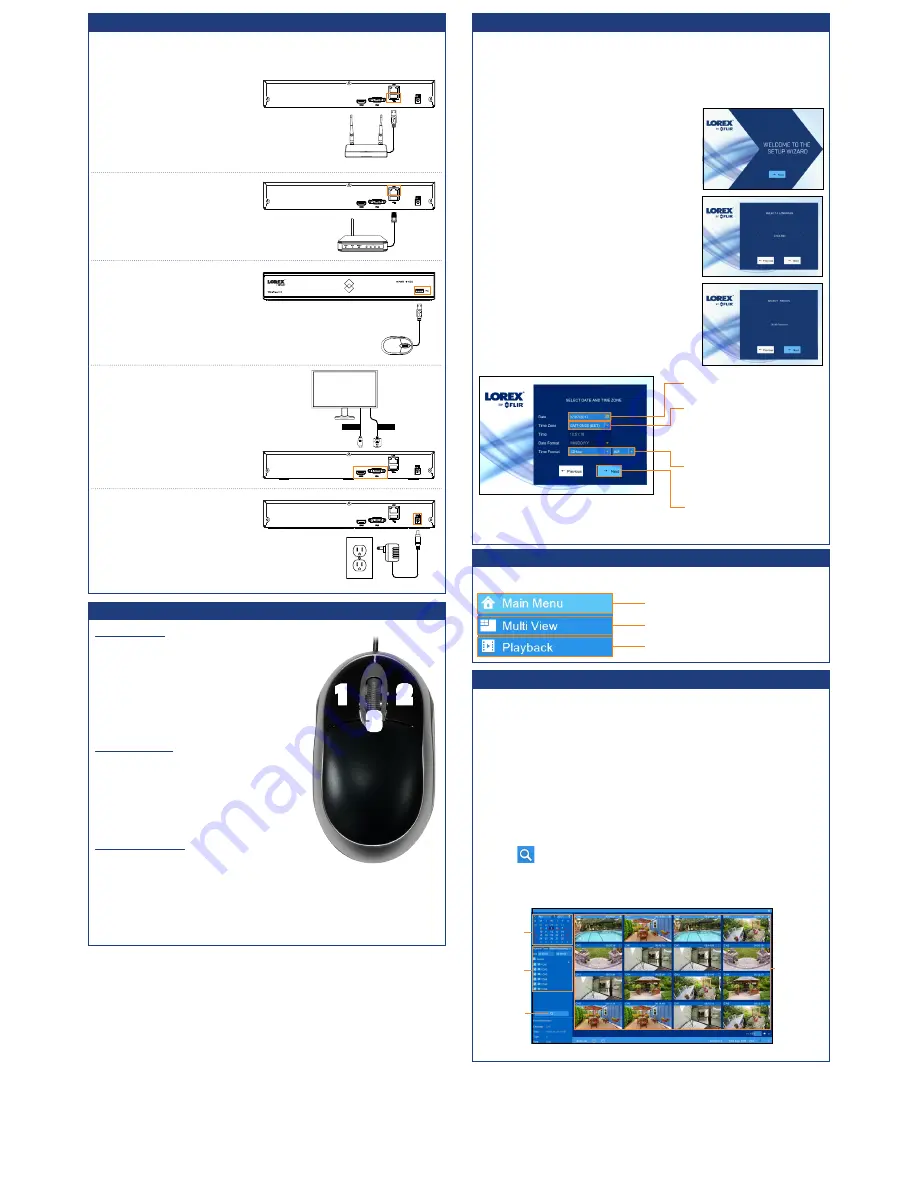
1. Connect the wireless receiver to
the USB port on the back panel of
the DVR.
2. Connect the DVR to your router
using the included Ethernet cable.
5. Connect the included power
adapter to the DVR. Wait a few
minutes for the system to start
up.
To set up the DVR:
The DVR setup detailed in the
Quick Connection Guide
is a simplified setup.
In order to access features using the DVR, you must complete the full setup
detailed below.
NOTE:
The receiver includes double-sided tape and
mounting screws for optional wall mounting for
improved line-of-sight with cameras.
3. Connect the included mouse to
the USB port on the front panel
of the DVR.
4. Connect a monitor (not included)
to the HDMI or VGA port of the
DVR (HDMI cable included; VGA
cable not included).
HDMI
VGA*
OR
DVR:
Using the Mouse
1. LEFT-CLICK:
• During split-screen display mode:
Double-click an individual channel to
view it in full-screen.
Double-click again to return to the
split-screen display mode.
• While navigating menus:
Click to open a menu option.
2. RIGHT-CLICK:
• During live view:
Right-click anywhere on the screen to
open the Quick Menu.
• While navigating menus:
Right-click to exit menus.
1
2
NOTE:
In live view, hover the mouse cursor over the top of the screen to
open the Navigation Bar. Move the mouse cursor away from the top of
the screen to close the Navigation Bar.
3
3. SCROLL WHEEL:
• While navigating menus:
Scroll to move up / down through the
menu content.
DVR:
Initial Setup Wizard
1. Log in using the system user name (default:
admin
) and your new, secure
password you recorded on the
Quick Connection Guide
.
3. Click the arrow keys to select a
language for the on-screen display. Click
Next
5. Enter the date and time:
6. Review the information you have set for the DVR. Click
Accept
to confirm.
When using the DVR for the first time, you will have to complete the DVR
Setup Wizard to confirm the correct date and time for the system.
To complete the setup wizard:
2. The Setup Wizard launches. Click
Next
to begin.
to confirm.
4. Click the arrow keys to select your region. Click
Next
to confirm.
DVR:
Quick Menu
Right-click anywhere on the live viewing screen to open the Quick Menu.
Search for and play back recordings
Select camera / live display view
Open Main Menu
DVR:
Search and Playback
Search for and play back video recordings on the DVR.
To play back recorded video:
1. From live view, right-click and then click
Playback
.
2. Log in using the system user name (default:
admin
) and your new, secure
password you recorded on the
Quick Connection Guide
.
3. Use the calendar on the left-side of the screen to select the date to
playback.
4. Check off the channels you would like to search for recordings from on the
left-side of the screen.
5. Click
to search for recordings.
6. Search results appear as thumbnails. Double-click any recording to begin
video playback.
Select
the day to
playback
Select
channels to
playback
Double-click
any event
to begin
playback
Click to select the correct date
from the calendar.
Select the correct time zone from
the dropdown.
Select a time format from the
dropdown. For
12Hour
format,
select either
AM
or
PM
from the
second dropdown.
Click
Next
to confirm.
Click to
search for
recordings


