

Digital Video Surveillance Recorder
ECO B LH010H Series
Quick Networking Guide
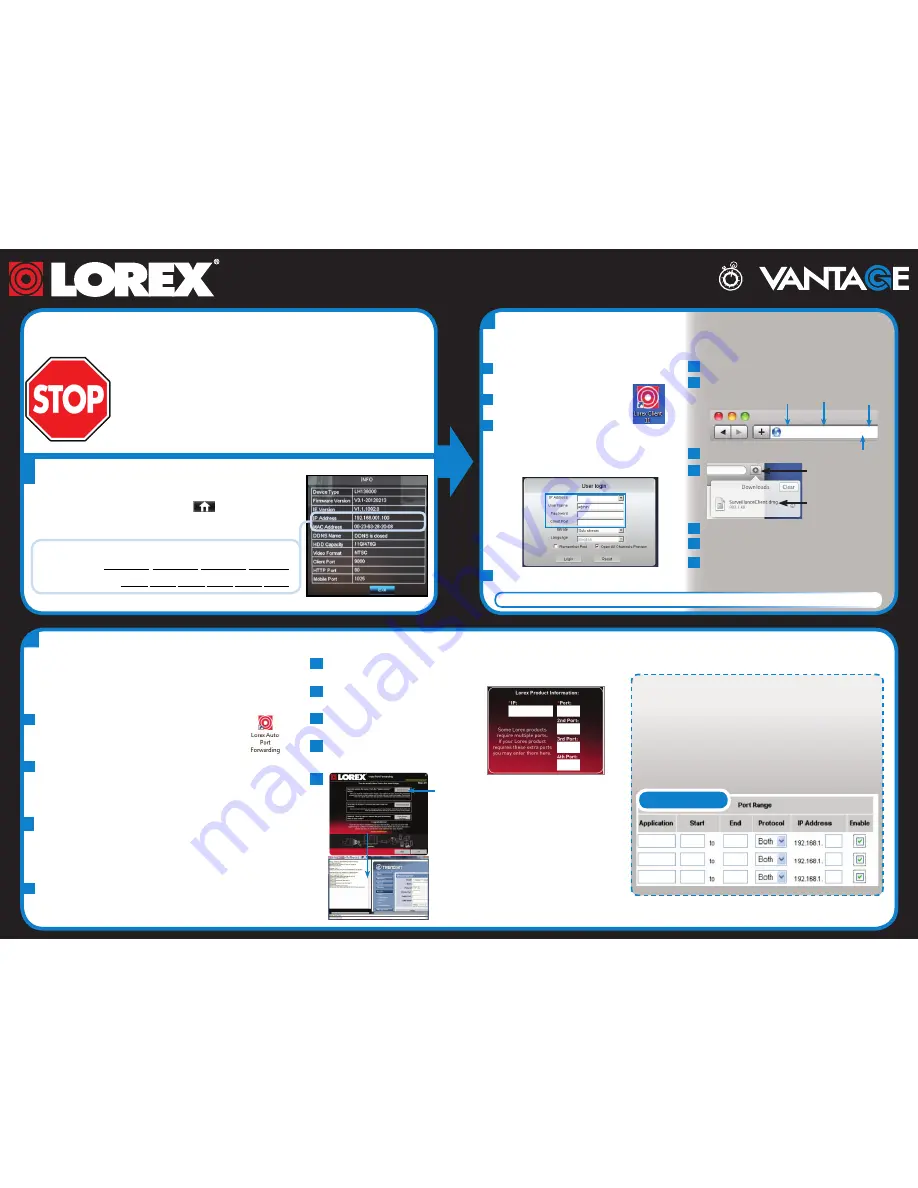
Find Your IP and MAC Address
Local Connection
Record your information below:
IP ADDRESS:
.
.
.
MAC ADDRESS:
-
-
-
-
-
Right-click and click the Main Menu button (
), then
System>Info
.
This guide will show you how to set up your new Lorex system for connection over the Internet
using a PC, Mac, Smartphone, or Tablet.
1
2
3
Enter the following information:
IP Address
: Enter the
IP Address
of your DVR.
User Name
: The default user name is
admin
.
Password
: By default, the password is
left blank
.
Client Port
: By default, this is
9000
.
PC
Mac
Open Safari.
b
c
Double-click on the
Lorex Client 11
icon on your desktop.
d
Click
Login
to access your DVR. Lorex Client 11 connects
to your DVR and streams live video from your cameras.
Manual Port Forwarding
Manually forward ports 80, 9000 and 1025 to your
DVR’s IP address.
All routers are different. To port forward your router, please
refer to your router’s user manual.
An example of a port forwarding screen is shown for
illustration purposes.
OR
EXAMPLE
80
80
HTTP
12
9000
12
Client
9000
1025
12
Mobile
1025
Before You Start:
Make sure you have:
• A router and high-speed Internet access (not included).
• Connected your DVR to your router using an Ethernet cable. (See the Quick
Connection Guide for details).
• A PC or Mac connected to the same router as your DVR.
Except where noted, the instructions are the same for PC and Mac users.
Install
Lorex Client Software for PC
from the
CD or from www.lorextechnology.com.
a
Enter the
IP Address
of your DVR into the address bar as shown.
b
a
c
Click
Download
to download the plug-in for Safari.
Double-click
SurveillanceClient
to install.
e
d
Click the Downloads button
Right-click
SurveillanceClient.dmg
and click Open
f
After installation, right-click the Safari icon in the dock and select
Quit and then restart Safari.
g
Re-enter the IP Address of your DVR, the same way as in Step b.
Enter the DVR User Name and Password and click
Login
.
By default, the User Name is
admin
and the Password is
left blank
.
i
Port Forwarding
Easy Connect Wizard (PC Only)
80
DVR IP
9000
1025
You must have the following before using the software:
1. Your router’s
model
and
version
numbers
2. Your router’s
user name
and
password
3. Your Lorex device’s
IP
address
(recorded in Step 1)
a
Install the
Lorex Easy Connect Wizard
software
from the CD or from www.lorextechnology.com and
double-click the Desktop icon to open.
b
The Easy Connect Wizard automatically detects routers on your
network.
Click the
Next
button.
NOTE:
If more than one router is detected, additional setup steps
may be required. See the Easy Connect Manual on CD for details.
c
Under the Router drop-down list, select the model of your router
OR
click the
Search
button to enter the name of your router model.
Linksys or Netgear Routers:
Click
Try to Auto Detect
(works
with most models).
d
Under
Router IP
, click the
Detect Router IP button
. The router’s
IP address is filled in.
e
Under
Username
and
Password
, enter the
router’s username and password.
f
Under
IP
, enter the IP address of your Lorex
device recorded in step 1.
g
Under
Port
, enter the system port number(s).
By default:
80, 9000, and 1025
.
h
Click
Next
to continue.
http://
IP Address HTTP Port
(Default: 80)
Colon
http://192.168.1.100:80
DVR IP
9000
60 Minutes
LH010H ECO B Series Quick Network Guide - English - R1
Congratulations!
You can now view & playback video on your system via LAN. Continue the setup to enable Internet remote access.
Click
Update Router
.
The program updates the router settings.
This may take around 30 seconds.
You may need to manually save the
router settings after the program makes
the required changes.
Close the update window once the update is finished.