background image

  14 


Figure 2                                                  Figure 3 


Figure 4 

2. Adjustment of reverse cable (see Figure 3 and Figure 4) 

1) Loosen the nut around the reverse cable. 
2) Turn clockwise the screw until its exposed part from the handle pipe is of its shortest length. 

3)  Insert  the  reverse  cable  into  the  fork  shaft  on  one  side  of  the  transmission  box  and  make  sure  the 

front end of the reverse cable is in the big hole of the fork shaft. 

4)  Turn  counterclockwise  the  reverse  shift  fork  shaft  appropriately  and  insert  the  cable  through  the 

Clutch cable 

Supporting 
block 

Reverse cable 

Cable lug


Fork shaft


Summary of Contents for 1WG3.4-90FQ-Z

Page 1: ......

Page 2: ...intain and repair and fuel efficient all these features make it an ideal mini farming machine It is a good helper for building a richer life of your family Warning Unauthorized reproduction of this manual or any part of it for any other purpose is prohibited when the mini tiller is resold this manual as part of the mini tiller shall be transferred with the mini tiller Warning Please pay special at...

Page 3: ...apter IV Operation method of the mini tiller 12 i Assembly after unpacking 12 ii Installation and adjustment of cables 12 iii Check and oiling 14 iv Starting 17 v Operation 17 vi Connection and operation of attached parts 18 vii Precautions for use of mini tiller 19 Chapter V Maintenance of mini tiller 19 i Running in 19 ii Technical maintenance of mini tiller 20 iii Technical maintenance schedule...

Page 4: ...od of adjusting clutch cable 22 iii Method of adjusting accelerator cable 23 iv Method of using and adjusting handle pipes 23 Chapter VII Trouble shooting of mini tiller 25 i Trouble shooting of clutch 25 ii Trouble shooting of transmission box 26 iii Trouble shooting of running mechanism 28 iv Trouble shooting for other parts 29 ...

Page 5: ...re no other persons or things with potential safety risk especially children and pets are inside the working area 2 Preparation a Thoroughly check the area for the machine to work in and remove all sundries b Before starting the engine put shift gear in neutral position c Don t operate the machine without the proper clothing If the working area has a slippery ground wear a pair of anti skid shoes ...

Page 6: ...lving parts or to be under such parts b When operating the machine on or while crossing a cobbled road sidewalk or highway stay alert to the traffic conditions to notice any potential traffic risk Never use the machine to carry any passenger c If the machine bumps against any foreign thing please shut off the engine immediately and thoroughly check whether the mini tiller is damaged if so repair i...

Page 7: ...perate the mini tiller without proper protection equipment guard or other protection devices in place k When the machine is running always keep it away from children and pets l Never overload the machine with a big tilling depth and a high speed m The machine is not allowed to run at a high speed on a slippery road Watch back to take care when driving backward n Never allow any looker on to approa...

Page 8: ...d interval whether bolts under shear stress mounting bolts of engine and other bolts are tightened properly so as to ensure the machine can work safely b The machine shall be stored indoors and away from flames and please cool the engine before storing it c If the mini tiller is to be stored for a long time the manual shall always be kept as an important material d Don t repair the machine at will...

Page 9: ... might be severely injured Please carefully read the symbols and notices about safety in the manual If these symbols peel off or are illegible please contact the distributor to replace such symbols Figure 2 1 Figure 2 2 Figure 2 1 to be stuck on engine fuel tank Figure 2 2 to be stuck on engine fuel tank ...

Page 10: ... 2 4 Figure 2 3 to be stuck on engine fuel tank Figure 2 4 to be stuck on engine air filter Figure 2 5 Figure 2 6 Figure 2 5 to be stuck on fender Figure 2 6 to be stuck on fender All the safety symbols conform to GB10396 ...

Page 11: ...ers JB T10266 2 2001 Testing Method for Handheld Tillers GB T5608 3 1995 Testing Method of Rotary Tillers GB10395 10 2006 Tractors and Machinery for Agriculture and Forestry Technical Means for Ensuring Safety and DB50 210 2005 Technical Means for Ensuring Safe Operation of Handheld Tillers i Major technical parameters of 1WG3 4 90FQ Z ...

Page 12: ...W r min 3 4 3600 Weight without rotary tilling device kg 70 External size L W H mm 1450 900 1000 Productivity hour hm 2 h m 0 04 Productivity Rotary tilling m2 h 400 Tilling depth Rotary tilling mm 100 Tilling width Rotary tilling mm 600 1000 Forward m s 1 1 2 13 Working speed Backward m s 0 812 Tilling blade rotation radius mm 160 ...

Page 13: ...Handle pipe assembly 2 Engine assembly 3 Damping lever 4 Transmission box assembly 5 Fender 6 Tilling blade assembly 7 Damping lever assembly Chapter IV Operation method of the mini tiller i Assembly after unpacking ...

Page 14: ...Installation of hand pipe assembly align the tooth disc on the handrail frame to the handle pipe adjusting tooth disc take care to adjust the vertical position o the handle pipes and use lifting handle and handle adjusting nut to connect handle pipe assembly onto the handle pipe connecting seat and tighten it 6 Installation of shift lever insert the shift lever through the hole of the handle pipe ...

Page 15: ...from the handle pipe is of its shortest length 3 Insert the reverse cable into the fork shaft on one side of the transmission box and make sure the front end of the reverse cable is in the big hole of the fork shaft 4 Turn counterclockwise the reverse shift fork shaft appropriately and insert the cable through the Clutch cable Supporting block Reverse cable Cable lug Fork shaft ...

Page 16: ...eat adjustment of the accelerator switch until the accelerator valve regulator lever s handle can move to the minimum and maximum positions iii Check and oiling 1 Check whether any bolt connection is loose and if there is any loose connection tighten it as per the requirement of bolt connection torques listed in Table 3 For information of tightening torques of diesel engine s bolts and nuts please...

Page 17: ...e oil filler hole don t engage the thread 3 Take out the dip stick to check oil level if the oil trace is between the upper and lower marks of the oil stick the oil level is acceptable 4 The SAE15W 40 engine oil is the recommended general purpose lubricant and it is applicable to a common ambient temperature see Table 1 5 Fill the reduction box with SAE15W 40 engine oil Put the whole machine in a ...

Page 18: ... engine oil according to the ambient temperature of the working environment see Table 1 5 Add fuel into engine No 93 or No 97 gasoline can be added into the fuel tank of engine refer to engine manual for details Note never let oil level be higher than the upper limit Temperatu Oil number Recommended numbers Extreme usable numbers Table 1 Figure 6 ...

Page 19: ...e right handrail note don t grip the reverse shift handle 3 Slowly tighten your grip on clutch handle to engage the clutch then the mini tiller can run at a low speed 4 Right hand opens accelerator valve wider appropriately then the mini tiller will run at a low speed namely about 5km h 2 Shift to fast position 1 Left hand releases the clutch handle to let clutch disengage 2 Right hand pushes up t...

Page 20: ...lever clockwise to the minimum position and put the start switch on OFF position then the mini tiller will stop running 3 When you want to stop the engine follow the relevant information in the engine s manual note normally the mini tiller can be stopped on a level ground vi Connection and operation of attached parts 1 When you want to start rotary tilling detach the wheel and put the hexagon bush...

Page 21: ...ith pebbles or the blades will be damaged 7 After using the mini tiller make sure to remove the mud weeds or oily grime on the mini tiller to keep the whole machine clean 8 Often clean the spongy element or steel mesh inside the filter and change its engine oil Chapter VII Maintenance of mini tiller Due to wear from running friction and change of load the mini tiller s bolts may get loose and part...

Page 22: ...me weeds and oil stains on the whole machine and its accessories Keep the farming record 2 First level maintenance every 150 hours of work Conduct all items of maintenance for each shift Clean transmission box and change engine oil Check test and adjust clutch gear shift system and reverse gear system 3 Second level maintenance every 800 hours of work Conduct all items of the maintenance for every...

Page 23: ...ter the first month or after 20 hours After the third month or after 150 hours Every year or 1 000 hours Every 2 years or 2 000 hours Check and tighten bolts and nuts Check and add new engine oil Clean and change engine oil First time Second time Third time and thereafter Check if there s oil leakage Clean dirt weeds and oil stains Solve problems Adjust operating parts Tension belt Gears and beari...

Page 24: ...er to Chapter III for method of adjustment Note 1 Grip firmly and release the reverse shift handle 2 to 3 times to confirm the working performance of gear shifting operation if it is abnormal readjust the reverse shift handle and reverse cable until the gear shifting operation is normal 2 During running of the mini tiller if you release the reverse shift handle the reverse gear should be able to r...

Page 25: ...g performance is not good when you turn the accelerator valve regulator lever please adjust the accelerator cable right away you can refer to Chapter III for method of adjustment Note Turn the accelerator valve regulator lever 2 to 3 times to confirm the engine s accelerating and decelerating performance iv Method of using and adjusting handle pipes According to your height and the special require...

Page 26: ...on the upper side of the handle pipe connecting part and secure the handle pipes 2 Leftward and rightward adjustment of handrail frame 1 Release the lifting handle let the handle pipe adjusting tooth disc be able to be adjusted leftward and rightward against the handle pipes 2 Turn the handles pipes leftward or rightward until they are in the position as needed 3 Tighten the lifting handle engage ...

Page 27: ...in Friction disk fails Replace friction disk Spring fails Replace spring Friction disk set can t contact bearing face inside the clutch housing Insert one washer or more of appropriate thickness behind the bearing Clutch unable to engage and disengage Bearing inside clutch is burnt out Replace bearing and if necessary add oil into transmission box Spring fails because of fatigue Replace spring For...

Page 28: ...place spring Main shaft bounces forward and backward due to loosening of gland bolt of the rear part of transmission box Retighten gland bolt Uncompleted gear engagement Interference during gear shifting caused by deformation of shift lever Straighten shift lever or replace it Wear of fork Readjust reverse cable or replace fork Reverse cable fails Readjust cable or replace it Reverse shaft is loos...

Page 29: ...il seal of main shaft fails Replace B25 40 7 oil seal Oil leak from back cover of main shaft Oil seal seat s O ring fails Replace Φ 45 1 8 O ring Back end bolt of reverse shaft is loose Retighten the bolt Oil leak from reverse shaft Reverse shaft s O ring fails Replace Φ18 1 8 O ring Oil leak from fork shaft O ring fails Replace Φ11 2 2 65 O ring Oil leak from clutch operating lever assembly O rin...
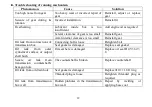
Page 30: ...install gear Connecting bolt is loose Retighten bolt Oil leak from connections of transmission box Seal gasket is damaged Replace seal gasket Oil leak from outer cylindrical surface of output shaft bush Oil seal here is damaged Replace oil seal B 45 62 8 Severe oil leak from transmission countershaft s hexagon hole The countershaft is broken Replace countershaft Seal gasket is damaged Replace Φ10 ...

Page 31: ...tary tilling blade is broken Blade hits stones bricks or other hard objects during working Replace broken blade and take care to avoid blade s clashing with stones or other hard objects in soil Operating cable is broken Wear caused by long work Replace operating cable ...

Page 32: ......

Reviews: