background image


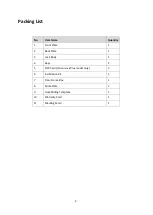
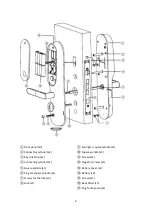
Packing List 


No. 

Item Name 

Quantity 

Front Plate 

Back Plate 

Lock Body 

Keys 

NFC Card (

Crown Lock Plus

 model only) 

Installation Kit 

Door Frame Box 

Strike Plate 

Hole Drilling Template 

10 

Warranty Card 

11 

Marking Pencil 


Summary of Contents for Smart Crown Lock

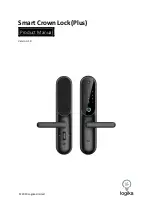
Page 1: ...2019 Logika Limited Smart Crown Lock Plus Product Manual Version 1 0...

Page 2: ...nstallation and use Before use the product must be properly installed as described in this manual by a qualified technician The product should be used with the supplied accessories Do not disassemble...

Page 3: ...Quantity 1 Front Plate 1 2 Back Plate 1 3 Lock Body 1 4 Keys 2 5 NFC Card Crown Lock Plus model only 2 6 Installation Kit 1 7 Door Frame Box 1 8 Strike Plate 1 9 Hole Drilling Template 1 10 Warranty...

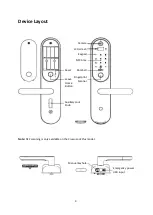
Page 4: ...t Note NFC scanning is only available on the Crown Lock Plus model Camera LCD screen Keypad NFC Area Auxiliary Lock Knob Reset Doorbell Leave Home Button Fingerprint Scanner Manual keyhole Emergency p...

Page 5: ...p x1 Connecting cylinder x1 Square spindle x1 Plug for square spindle x1 Screws for the lock x4 Lock x1 Spring for square spindle x1 Square spindle x1 Screws x1 Plugs for screws x1 Battery cover x1 Ba...

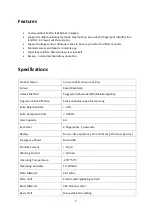
Page 6: ...duct Name Crown Lock Crown Lock Plus Colour Silver RoseGold Unlock Method Fingerprint Passcode NFC Mobile App Key Fingerprint Identi cation Semiconductor capacitor scanning False Rejection Rate 0 1 Fa...

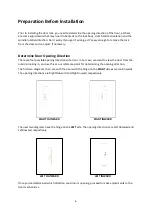
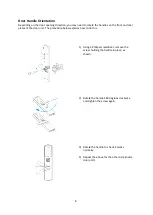
Page 7: ...opening directions of a door In our case we want to view the door from the outside looking in and use this as our reference point for determining the opening direction The first two diagrams then are...

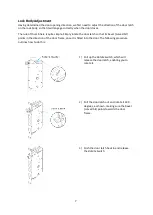
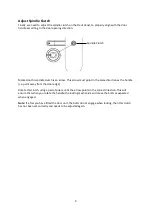
Page 8: ...tate the door latch so that its bevel curved bit points in the direction of the door frame once it is fitted into the door The following procedure outlines how to do this 1 Pull up the Rotate Switch w...

Page 9: ...plates of the door unit The procedure below explains how to do this 1 Using a Philips screwdriver remove the screw holding the handle in place as shown 2 Rotate the handle 180 degrees clockwise and ti...

Page 10: ...ame direction as the handle i e point away from the door edge Rotate this clutch using a pair of pliers until the arrow points in the correct direction This will ensure that when you rotate the handle...

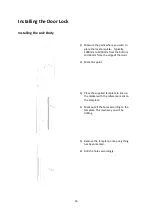
Page 11: ...200mm from the bottom and 60mm from the edge of the door 2 Mark this point 3 Place the supplied template to line up the marker with the reference mark on the template 4 Mark out all the holes accordin...

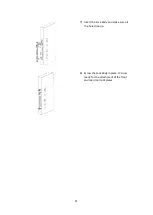
Page 12: ...11 7 Insert the Lock Body and make sure all the holes line up 8 Screw the Lock Body in place It s now ready for the attachment of the front and rear door lock plates...

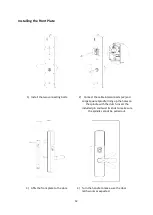
Page 13: ...e interconnects x2 and Large Square Spindle lining up the holes on the spindle with the clutch Insert the included pin and twist its ends to make sure the spindle cannot be pulled out 3 Affix the fron...

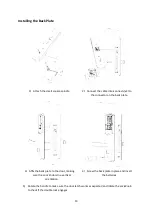
Page 14: ...he connector on the back plate 3 Affix the back plate to the door making sure the Lock Knob is in a vertical orientation 4 Screw the back plate in place and insert the batteries 5 Rotate the handle to...

Page 15: ...d the app will walk you through how to add the device to the system Device Category Smart Lock Device Name Wu Lock Crown or Wu Lock Crown Plus for the Plus model Note The default admin passcode is 123...

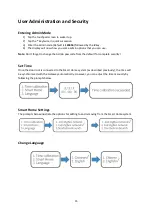
Page 16: ...you can use Note Don t forget to change the Admin passcode from the default for complete security Set Time Once the door lock is connected to the Smart Home system as described previously the time wi...

Page 17: ...e bolts Mobile App Unlock 1 Select the Crown Lock from the Devices section in the app 2 Enter the passcode from the device screen 3 You can also setup Touch ID to do the same by setting it in the devi...

Page 18: ...Reset button located near the Factory Reset button The door fails to lock on turning the handle or fails to engage the bolts The spindle clutch may have been set incorrectly You will need to remove th...

Reviews: