background image

GB

Cust

omising T

Settings

24

Care should be taken when editing the position of digital 
channels as this may affect EPG and reminder settings.

c.  Move
 

Press the YELLOW button and then press the 

 buttons to 

move to the selected channel. Press the YELLOW button or the 

OK button to confi rm.

d.  Skip
 

Press the BLUE button to skip the selected channel. Press the BLUE 
button again to undo it.

e.  FAV (Favourite)
 

Press the FAV button to set the selected channel as one of the 
favourite programmes. Press the FAV button again to undo it.

4.  Press the MENU button to return to the main menu.

5.  Press the EXIT button to exit the menu.

3.  Press the BACK button to return to the previous menu or press the 

MENU button to return to the main menu.

4.  Press the EXIT button to exit the menu.

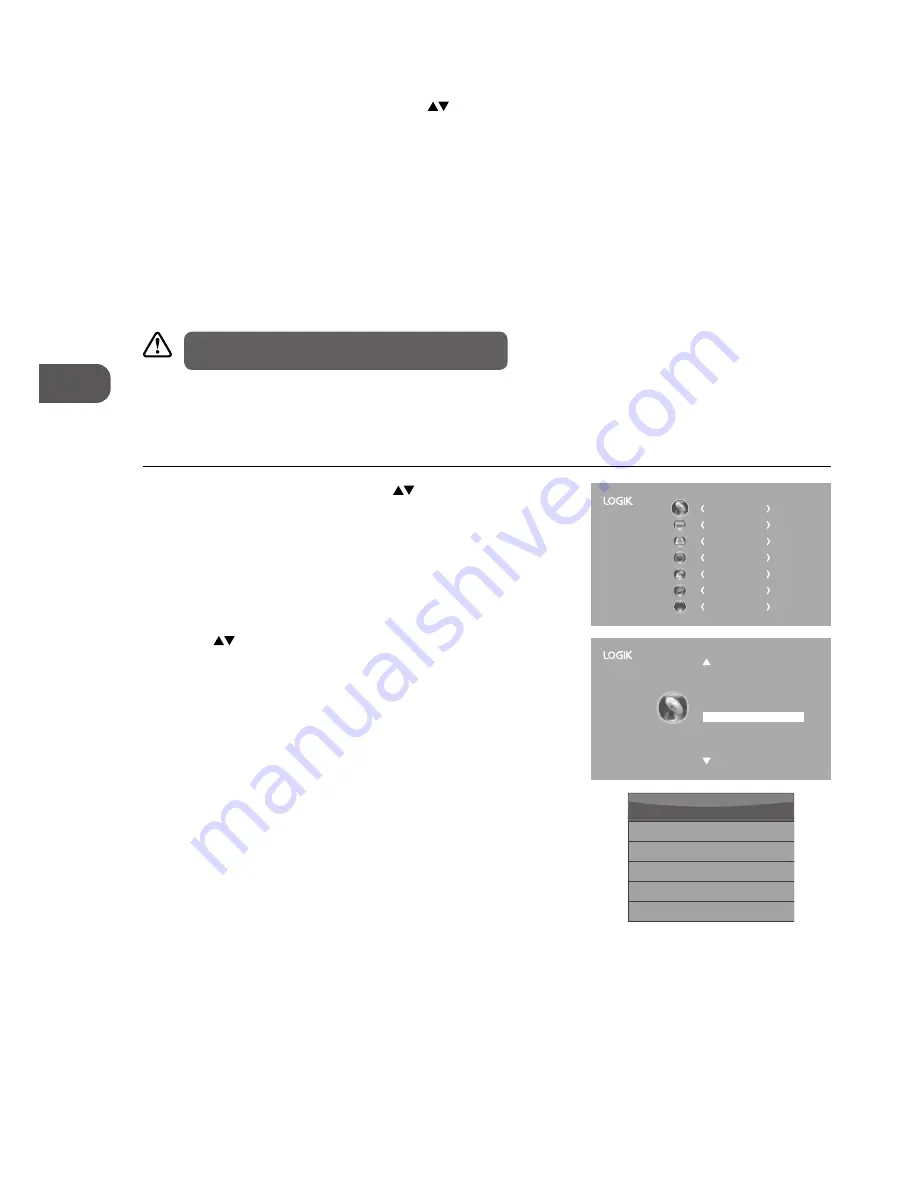
Signal Information (DTV Mode)

Allows you to view the signal information.

1.  Press the MENU button and then press the 

 buttons to select the 

CHANNEL menu and then press the OK button.

CHANNEL


PICTURE

SOUND

TIME

OPTION

LOCK

EXIT

EXIT

Auto Tuning
DTV Manual Tuning

CHANNEL

ATV Manual Tuning

Signal Information

CI Information
Software Update

Channel Edit

Channel 52

Network SZTVM

Modulation 16QAM

Quality 99


Signal Information

Strength 81

2.  Press the 

 buttons to select Signal Information and then press the 

OK button to view the signal information.

Summary of Contents for L24FE13

Page 1: ...Instruction Manual 24 LED TV L24FE13...

Page 2: ......

Page 3: ...Setup 18 Turning the TV On for the First Time 18 Target Region Setting 19 Selecting the Input Source 19 Channel Selection 20 Display Channel Information 20 Volume Adjustment 20 Customising TV Settings...

Page 4: ...tainment 43 Connecting a USB Storage Device 43 Viewing Photos 43 Listening to Music 44 Viewing Movies 45 My Text 46 PVR Personal Video Recorder 47 Time Shift Function 47 Recording DTV Programme onto a...

Page 5: ...connecting other devices or moving the unit Unplug the unit from the mains socket during a lightning storm Mains Cable Make sure the unit or unit stand is not resting on top of the mains cable as the...

Page 6: ...al electric shock CAUTION RISK OF ELECTRIC SHOCK DO NOT OPEN The lightning flash with arrowhead symbol within an equilateral triangle is intended to alert the user to the presence of uninsulated dange...

Page 7: ...porates the latest technology to enhance your viewing experience We recommend that you spend some time reading this instruction manual so that you fully understand these features You will also find so...

Page 8: ...ons included in the mounting kit Due to space restrictions we recommend that you make all connections refer to page 14 17 and page 43 for details before mounting on to the wall Installing Removing the...

Page 9: ...hing near the sensor as its function may be affected 3 INPUT Press to select among different input signal sources DTV ATV AV SCART YPbPr HDMI1 HDMI2 PC USB Use the buttons on the remote control to sel...

Page 10: ...l Connects to the aerial socket on the wall with the RF coaxial cable 6 PC IN PC AUDIO Connects to a computer or other devices with a VGA interface 7 COMMON INTERFACE Allows the insertion of a Common...

Page 11: ...rty Only use the battery type indicated in this manual When the batteries are exhausted the remote will not function Replace both batteries at the same time with new ones Do not install new batteries...

Page 12: ...picture mode Standard Mild User Dynamic 14 MENU Display the OSD On Screen Display menu 15 INPUT Select among the different input signal sources DTV ATV AV SCART YPbPr HDMI1 HDMI2 PC USB 16 Allows you...

Page 13: ...rding DVD USB DTV mode 28 Eject a disc DVD mode 29 Pause Pause playback DVD USB mode Start the time shift function DTV mode STEP Play the playback forward frame by frame DVD mode 30 PLAY Start playbac...

Page 14: ...on the remote control to turn on your TV 4 Press the button on the right side panel of the TV or the INPUT button on the remote control to display the Source List Use the buttons to select HDMI1 HDMI...

Page 15: ...the computer s audio output socket 2 Plug the connected devices into the mains socket before switching on the TV 3 Press the button on the right side panel of the TV or on the remote control to turn...

Page 16: ...yellow Audio Left white and Audio Right red 2 Plug the connected devices into the mains socket before switching on the TV 3 Press the button on the right side panel of the TV or on the remote control...

Page 17: ...dio Receiver Connecting a Coaxial Audio Receiver For better sound quality you may want to play the audio through your multi channel audio receiver 1 Use an audio cable not included to connect the TV s...

Page 18: ...te on the front panel of the TV 4 In standby mode press the button on the right side panel of the TV or on the remote control to turn the TV on The red LED indicator will turn blue Always disconnect t...

Page 19: ...to confirm Country Code This will be shown as GBR for the UK Primary Region This will show the regional country e g England Wales Scotland NI Secondary Region This will allow you to set the region fo...

Page 20: ...nlocked refer to page 39 for details on Block Channel Press the FAV button to view the Favourite List Then use the buttons to highlight and select the channel Press the OK button to view the selected...

Page 21: ...t under the channel menu refer to page 23 24 for details 3 In the Tune Type menu press the buttons to select DTV ATV DTV ATV Press the button and then press the buttons to select the country where you...

Page 22: ...and then press the buttons to select the CHANNEL menu and then press the OK button CHANNEL PICTURE SOUND TIME OPTION LOCK EXIT EXIT Auto Tuning DTV Manual Tuning CHANNEL ATV Manual Tuning Signal Infor...

Page 23: ...ANNEL menu and then press the OK button ATV Manual Tuning Storage To 1 System I Current CH 1 Search Fine Tune Frequency 255 25 MHz Save MENU a Delete Press the RED button to delete the selected channe...

Page 24: ...turn to the main menu 5 Press the EXIT button to exit the menu 3 Press the BACK button to return to the previous menu or press the MENU button to return to the main menu 4 Press the EXIT button to exi...

Page 25: ...U button and then press the buttons to select the CHANNEL menu and then press the OK button 2 Press the buttons to select CI Information and then press the OK button CI Common Interface DTV Mode The c...

Page 26: ...ver Air Download The TV auto detects the latest firmware through the DTV signal and allows you to accept or refuse the firmware upgrade service 1 Press the MENU button and then press the buttons to se...

Page 27: ...d dark areas of the picture for User mode Tint For NTSC format Adjusts the balance between red and green levels Tint is only available for NTSC signal reception CHANNEL PICTURE SOUND TIME OPTION LOCK...

Page 28: ...izontally in linear proportion to fill the entire screen This selection will allow you to view a picture with an original 16 9 aspect ratio Full DTV mode HDMI mode and YPbPr mode only This selection w...

Page 29: ...ght 6 BACK MENU EXIT 4 Press the BACK button to return to the previous menu or press the MENU button to return to the main menu 5 Press the EXIT button to exit the menu 2 Press the buttons to select t...

Page 30: ...is an auxiliary audio function that provides an additional audio track for visually challenged persons This function handles the Audio Stream for the AD Audio Description when it is sent along with t...

Page 31: ...will default to the SCART device Sleep Timer The sleep timer automatically switches the TV to standby after the preset time has elapsed The clock will be set automatically when receiving a digital si...

Page 32: ...navigate the menu and change the settings Press the OK button to confirm 4 Press the BACK button to return to the previous menu or press the MENU button to return to the main menu 5 Press the EXIT but...

Page 33: ...uttons to select the Primary Secondary Subtitle Language Press the button and then press the buttons to select your desired subtitle language Press the OK button to confirm 4 Press the BACK button to...

Page 34: ...d PVR File System Restore Factory Default HDMI CEC OSD Language Audio Language Country Subtitle Language On Off English English UK English OPTION Country This shows the country you selected in auto tu...

Page 35: ...isk File System Size PVR File System Type PVR File System Size Duration 104 Mins FAT32 All MENU Do not unplug USB device Formatting please wait Format disk Time Shift Size After formatting the Time Sh...

Page 36: ...rough HDMI by using only one of the remote controls e g controlling a TV set set top box and DVD player using only the remote control of the TV CEC also allows individual CEC enabled devices to comman...

Page 37: ...LOCK menu and then press the OK button CHANNEL PICTURE SOUND TIME OPTION LOCK EXIT EXIT 2 Press the OK button to select Lock System Lock System Set Password Block Channel Parental Guidance Off LOCK 4...

Page 38: ...E OPTION LOCK EXIT EXIT 2 Press the OK button to select Lock System 5 Use the 0 9 buttons to input the old password and then input the new 4 digit password Re enter new password for confirmation 4 Pre...

Page 39: ...assword is 6666 If you change the password be sure to remember the new password If you forget the new password enter the master password 9527 Lock System Set Password Block Channel Parental Guidance O...

Page 40: ...press the OK button CHANNEL PICTURE SOUND TIME OPTION LOCK EXIT EXIT Lock System Set Password Block Channel Parental Guidance Off LOCK Clear Cancel Please enter password The default password is 6666...

Page 41: ...l and then press the buttons to select the desired programme Press the OK button to confirm Button Functions in a 7 Day Guide Remote Control Button Function RED Record Timer Programming See page 49 fo...

Page 42: ...o display the Channel List Press the buttons and then press the OK button to select the teletext channel Press the LIST button to exit the Channel List and the teletext page will be displayed after a...

Page 43: ...versions of portable hard disk may require more power than the TV USB socket can provide To ensure correct operation please use the power adapter for that device If a USB hub is used make sure its mai...

Page 44: ...OK button If you want to select the specified photos press the buttons to select the picture file and then press the OK button A tick box will be displayed If you want to delete the file press the RED...

Page 45: ...elect the function Pause FB FF Prev Next Stop Repeat Repeat All Repeat Off Repeat 1 Set A Playlist Info Aspect Ratio 3 Press the buttons to select your storage device and then press the OK button View...

Page 46: ...Press the PLAY button to view 6 Press the OK button or the i button to display the function bar Press the buttons and then press the OK button to select the function Prev page Next page Prev Next Stop...

Page 47: ...e PVR Time Shift Progress Bar 1 Indicates the status of the currently displayed video 2 Indicates the time lagging behind the live broadcast PVR reviewing 3 Indicates the available recording time on y...

Page 48: ...he recording progress bar will disappear 3 Press the Stop button to stop recording Recording will stop automatically when the disk is full If you want to turn off your TV during recording press the bu...

Page 49: ...ngs Timer Programming This function is used to perform scheduled recording The recording from timer programme or direct recording may have a little bit of delay when it starts to record the broadcast...

Page 50: ...then press the OK button 4 Press the buttons to select the MY PVR folder and then press the OK button 5 Press the buttons to select your recorded programme and then press the OK button A tick box wil...

Page 51: ...e switched off before switching on your TV The remote control does not work Check to see if there are any objects between the TV and the remote control causing an obstruction Ensure that you are point...

Page 52: ...to re scan your digital box or TV Don t worry it is easy to do And once you ve done it you should get all the Freeview channels available to you If problems persist you may need to get your aerial che...

Page 53: ...1080 50 60 PC Mode Please check the display settings of your computer before connecting to the TV If the display setting of your computer does not match the TV there may be no video Resolution Vertica...

Page 54: ...inch Power Consumption In HOME STANDBY mode 25 3 W Average Annual Energy Consumption 36 9 kWh Standby Power Consumption 0 3 W Operating Temperature 0 C 40 C Operating Humidity 10 80 Mercury Content mg...

Page 55: ...GB Maintenance Hints and Tips Specification 55 A A B C D E F ENERG Y IE IJA IA 2010 1062 2014 37 kWh annum 25 Watt 61 cm 24 inch L24FE13 A...

Page 56: ...EW word and logo are trademarks of DTV services Ltd and are used under licence DTV Services Ltd 2002 The HD Ready logo is a trademark of DIGITALEUROPE SRS TruSurround HD creates an immersive feature r...

Reviews: