


Importing Music
Audio-CD Import
You can import your CD collection into the
Mediacenter
and then conveniently
access it
.
•
First make the settings as described on page 33. If you want to import
several audio CDs one after another, it is useful to set the option
CD Insert
to
Import and Eject
.
•
In the submenu
CD Import - Encoder
select the format to be used for
music coding:
MP3
: Most frequently used format for loss-prone compression.
In the submenu
Bitrate
you can set the bitrate for coding the music. Higher
bitrates provide a higher audio quality and at the same time require larger
storage space. 192kBit/s is good compromise.
FLAC
: Format for lossless compression. This format provides a good com-
promise between the audio quality and storage space requirement.
WAV
: Format for lossless coding without compression. Due to best audio
quality this format requires maximum storage space.
•
Insert the CD (page 32). If you have set the option
CD Insert
to
Import
and Eject
, the import process starts automatically. Otherwise, start the
import manually.
Call up Main Menu.
Select option
DVD/CD player
.
Confirm
OK
.
Select option
Import
.
Confirm
OK
.
The
CD Import
menu is displayed.
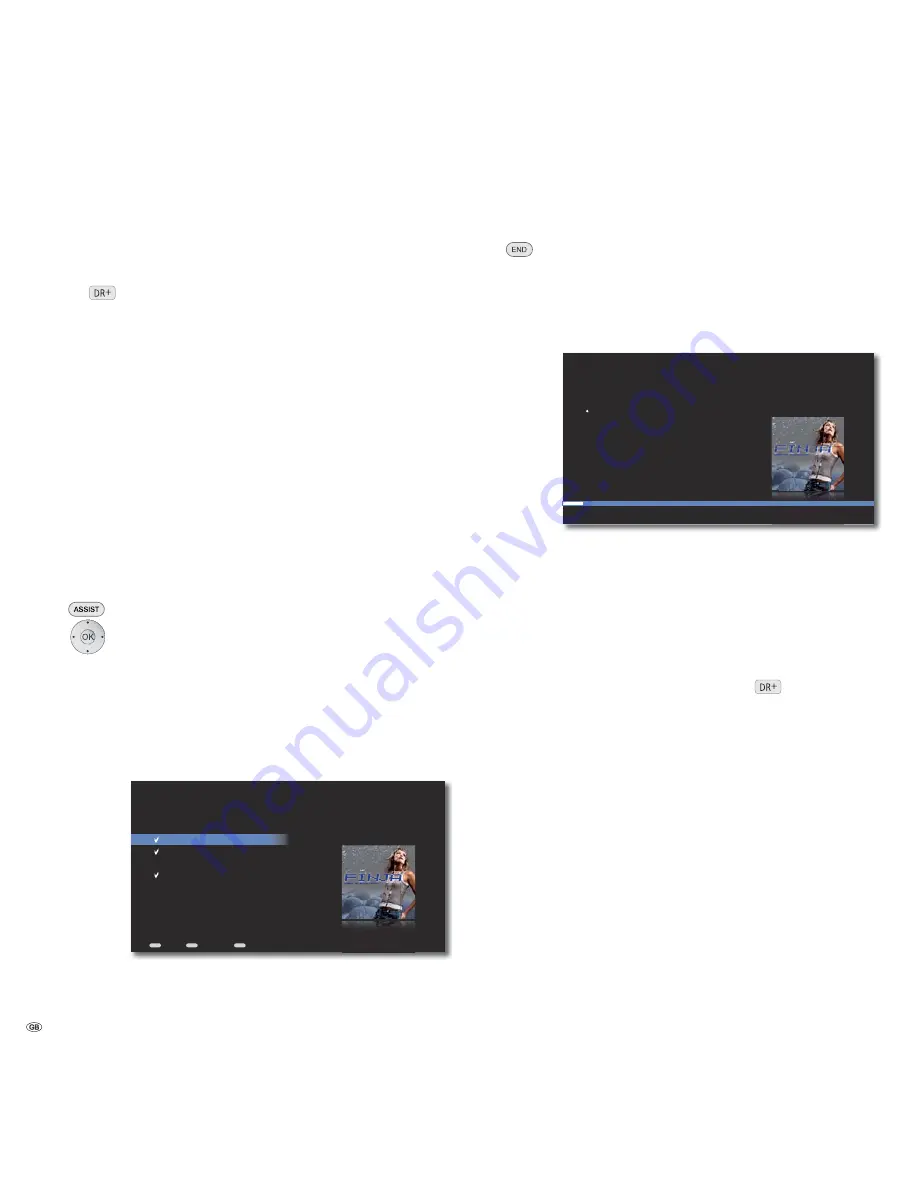
If required, set the option
Select/Unselect Tracks
only
to import specific track.
Press
OK
to tick mark the title that you wish to import.
END
MENU
ASSIST
Peace
Say it loud
If we were ...
Unborn
Select/Unselect Tracks to Import...
Back
Options
Home
Close menu.
Select option
Start Import
to start the import process.
Confirm
OK
.
The import process starts. On the screen user interface you will
be able to follow the progress and also read the remaining
processing time.
S
Peace
Say it loud
If we were ...
Unborn
CD Import
Cancel
about 7:51 minutes remaining
Cancel import process .
Close
CD Import
menu as soon as the import process is
complete.
•
After the completion of the import process, the new albums/titles are avail-
able for selection in the
Music
menu.
Copying Music to Harddisk
You can copy your existing music collection (supported file formats page 54) on to
the
Mediacenter
and access it conveniently from there
.
•
Ensure that your computer is connected to the same home network as your
Mediacenter
and start the File Manager.
Under “Network environment“, you will find your
Mediacenter
under the
name specified by you in the
Mediacenter network name
option
(page 22). The name set per default is
<Mediacenter>
.
•
Open the directory
Import on <Mediacenter>
.
•
With the File Manager, copy the desired music into the directory
Import on
<Mediacenter>
.
•
Your
Mediacenter
automatically recognises that new music files are avail-
able in the import folder and indexes them.
An appropriate message is displayed at the bottom of the screen. This proc-
ess may take some time depending upon the amount of data. Please wait
until the process is complete.
•
After the completion of the import process, the new albums/titles are avail-
able for selection in the
Music
menu.
•
In order to secure the music that is saved on the hard disc of the Mediacent-
er, copy the content of the
Content
folder on
<Mediacenter>
to your PC.
- 50


