background image

13

lococookers.com

OPERATION

LIGHTING YOUR SMARTTEMP™
PRECISION GRIDDLE:

 • 

Read all instructions before lighting. 
Only light burners outdoors.

 •  Open lid.
  •  Make sure to clean and season 

the cooking surface. 

See “CARE & 

MAINTENANCE” section.

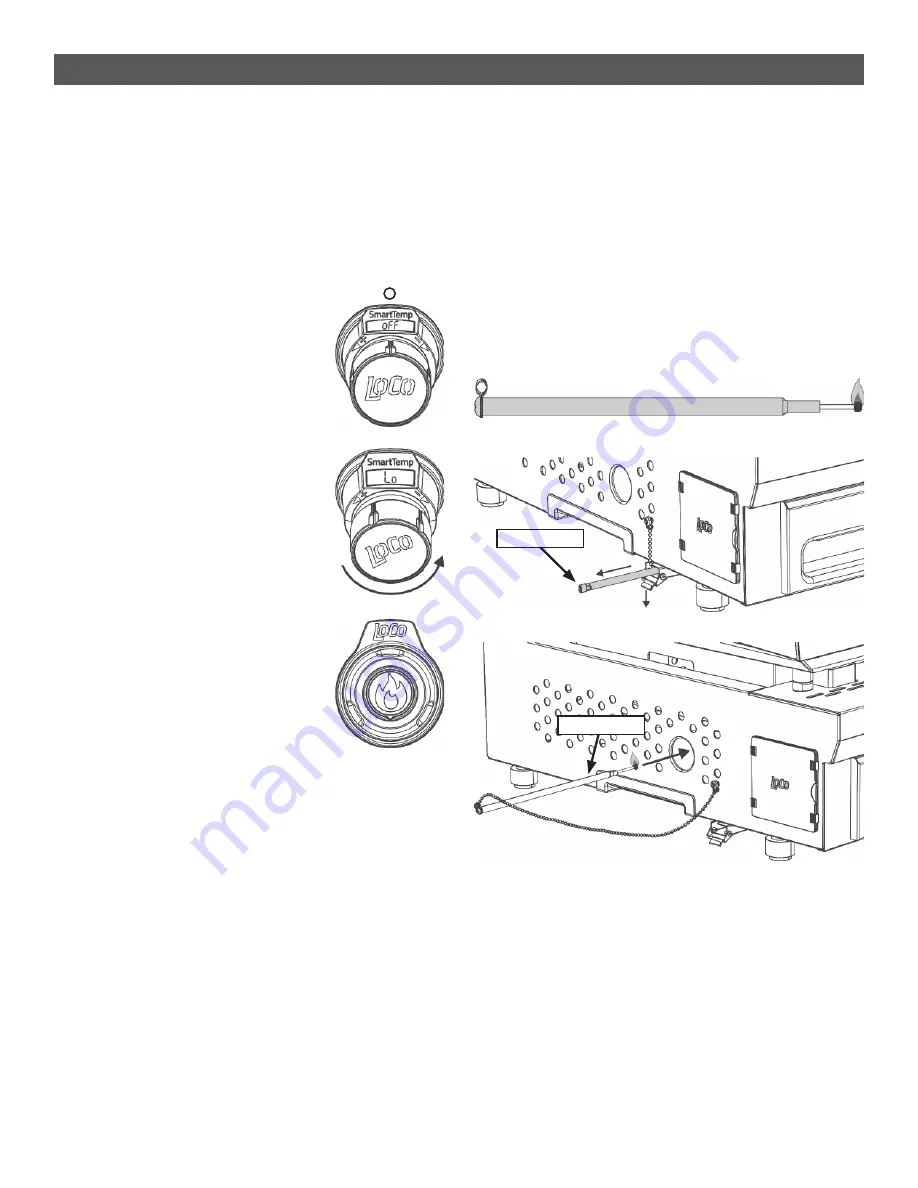
 1. Con

fi

 rm that the control knob 

is in the OFF position as 
pictured, with the LoCo logo 
horizontal.

 
  2.  Push in and turn control 

knob counterclockwise to 

Lo


position. 

 3. 

SureSpark™ Ignitor 
Lighting:

    Press and continually hold the 

ignition button until the burner 
is lit.

TIP: After lighting . . .

  Set your desired temperature and close the lid.
  The SmartTemp™ control knob display will 

cycle up to the set temperature.

  Allow the control knob to cycle up twice before 

cooking.

  This dual cycling to the set temperature will 

ensure that the cooking surface is heated 
evenly.

Match Holder

  5.  If ignition does not occur in 5 seconds, 

turn control knob clockwise to OFF, wait 5 
minutes, then repeat the lighting procedure.

  6.  When the burners are lit, turn the control 

knob to the desired preset cooking 
temperature.

Cooking Temperature Presets

Lo • 275F • 300F • 325F • 350F • 375F

400F • 450F • SEAR

Match Holder

Match Holder

Match Lighting:

  The match holder is located in a slot beneath 

the griddle on the left side, secured by a chain.

  1.  Lower the small slot door to pull match 

holder out.

  2.  Place a match into the end of the match 

holder, then insert the holder with lit match 
into the large hole on the side of the griddle.

 3. 

Push in and turn control knob 
counterclockwise to the 275F position to 
light burners.

Summary of Contents for LCG1STTC16

Page 1: ...OPERATE THIS PRODUCT Adult assembly required Keep screws and parts out of reach of children INSTALLER Leave these instructions with consumer CONSUMER Retain these instructions for future reference 16...

Page 2: ...or death DANGER Indicates a hazardous situation which if not avoided will result in serious injury or death DANGER WARNING Be alert to the possibility of serious personal injury if the instructions ar...

Page 3: ...BLE OF CONTENTS Warnings Parts Diagram and Parts List Assembly Instructions LP Gas Cylinder Leak Testing Operation Special Features Care and Maintenance Troubleshooting Warranty 2 4 5 6 7 10 11 12 13...

Page 4: ...of an oil or grease fire do not attempt to extinguish with water Immediately call the fire department 911 A Type BC or ABC fire extinguisher may in some circumstances contain the fire When cooking the...

Page 5: ...of this appliance Do not alter the appliance in any manner Do not use the appliance until it is completely assembled and all parts are securely fastened and tightened Do not build this appliance into...

Page 6: ...Lid Handle 1 12 Grease Tray 1 3 Lid Hinge Bracket Long 2 13 Control Knob 1 4 Lid Hinge Bracket Short 2 14 Ignition Button and Bezel 1 5 Cooktop 1 15 Battery AA 1 6 Cooktop Locking Foot 4 16 Regulator...

Page 7: ...7 lococookers com ASSEMBLY INSTRUCTIONS 1 2 10 11 11 11 11 13...

Page 8: ...8 ASSEMBLY INSTRUCTIONS 3 4 6 6 6 6 Use included adjustment wrench See page 14 Integrated Grease Management...

Page 9: ...9 lococookers com 9 ASSEMBLY INSTRUCTIONS 6 5 14 15...

Page 10: ...included 1 Make sure control knob is in the OFF position 2 Remove the protective cap from LP cylinder 3 Screw the LP cylinder clockwise into the regulator 4 Slide the regulator onto the gas port on t...

Page 11: ...spare LP gas cylinder under or near this appliance 2 NEVER fill the cylinder beyond 80 full 3 If the instructions in 1 and 2 are not followed exactly a fire causing serious injury or death may occur T...

Page 12: ...e LP GAS CYLINDER LEAK TESTING A leak test is recommended before each use and must be repeated each time LP cylinder is exchanged or refilled DO NOT smoke or have anything nearby that can easily ignit...

Page 13: ...nob to cycle up twice before cooking This dual cycling to the set temperature will ensure that the cooking surface is heated evenly Match Holder 5 If ignition does not occur in 5 seconds turn control...

Page 14: ...ng instructions SHUT DOWN INSTRUCTIONS 1 Clean and season griddle surface for next use See CARE MAINTENANCE section 2 Turn control knob to the OFF position DISCONNECTING LP CYLINDER FROM REGULATOR 1 T...

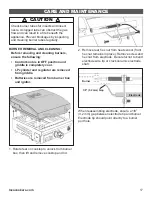
Page 15: ...table salt may be used to scrub residue away Repeat this step as necessary 4 Wipe griddle surface and inner and outer walls again with paper towels until clean 5 Apply an even coat of cooking oil to t...

Page 16: ...nd other flammable vapors and liquids Do not obstruct the flow of combustion and ventilation air Keep the ventilation opening s of the cylinder enclosure free and clear from debris BURNER FLAME CHECK...

Page 17: ...id Check burner tubes for insects and insect nests A clogged tube can obstruct the gas flow and can result in a fire beneath the appliance Prevent blockages by inspecting and cleaning burner tubes reg...

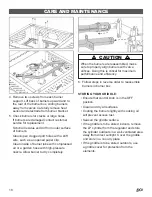
Page 18: ...rner support Lift back of burners upward and to the rear of the burner box sliding burners away from valves Carefully remove heat sensor and electrode from burner bracket 5 Check burners for cracks or...

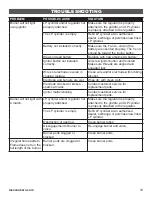
Page 19: ...s or electrode covered in cooking residue Clean wire and or electrode with rubbing alcohol Electrode and burners are wet Wipe dry with clean cloth Electrode cracked or broken sparks at crack Contact c...

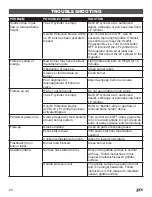
Page 20: ...s Do not use griddle in high winds The LP cylinder is empty Refill LP cylinder at an authorized dealer exchange or purchase new filled LP cylinder Overfill Protection Device OPD on LP cylinder has bee...

Page 21: ...re a 1 8 3 2 mm gap between electrode tip and burner Electrode tip should point directly to a burner port hole 6 Contact Customer Service 7 Contact Customer Service Error Code Err1 Temperature sensor...

Page 22: ...rt 15 of the FCC Rules Operation is subject to the following two conditions 1 This device may not cause harmful interference and 2 this device must accept any interference received including interfere...

Reviews: