background image

5

CHANGING HANDLE FOR RIGHT OR LEFT SWING DOORS

Step 2

The diagram below shows how to shift the door handle from right to left direction.  

The default setting of the handle is for right handed door. You do not need to 

change direction if you have a right handed door.

Use an Allen wrench to 

tighen two screws by 

turning counterclock-

wise until completely  

flushed

Take out the handle, then

rotate 180°  to shift handle 

to the left

Use allen wrench to loosen screws on both sides on the handle base.

Change the handle direction of the Exterior Assembly

3

1

2

Turn clockwise 

to loosen

Summary of Contents for 238SL

Page 1: ...DEFENDER INSTALLATION GUIDE WWW LOCKLYPRO COM PGD238F FOR COMMERCIAL USE PROFESSIONAL INSTALLATION SLIDE EDITION 238SL...

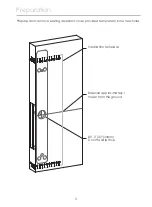
Page 2: ...3 Prepare door remove existing deadbolt or use provided template to bore new holes Preparation 1 11 32 34mm Door Handle Hole Baseline approximately 1 meter from the ground Installation template...

Page 3: ...e you have already adjusted your door handle Step 2 and identified the latch throw orientation according to door opening direction IMPORTANT LEFT OUT SWING DOOR Inside Outside Make sure the latch thro...

Page 4: ...ded door You do not need to change direction if you have a right handed door Use an Allen wrench to tighen two screws by turning counterclock wise until completely flushed Take out the handle then rot...

Page 5: ...ws top and bottom Lockset adapter is included with your interior door handle The adapter is installed according to the left or right door direction Install the adapter according to the user manual of...

Page 6: ...n screw clockwise and ensure it sits on the V shaped groove of the lockset assembly Exterior Ensure the hole for spindle stays in this position during installation 1 2 INSTALLING THE LOCKSET Step 3 co...

Page 7: ...d groove of the lockset assembly Note Lockset adapter is a part included with your interior door handle Check interior door handle installation instructions and install accordingly Install faceplate S...

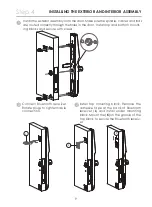
Page 8: ...ounting block Mount the K on the groove of the top block to secure the Bluetooth receiv er 3 Install the exterior assembly onto the door Make sure the spindle cables and rods are routed correctly thro...

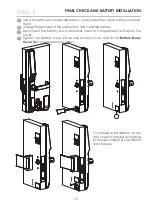
Page 9: ...tep 5 Use a screwdriver to loosen the battery cover screw then open battery compart ment Unplug the terminals of the battery box and install the battery Reconnect the battery box to terminals insert t...

Page 10: ...he Lockly Guard physical lock installa tion To complete your setup download the LocklyPro app from the iOS or Google Play app Store and follow on screen instructions Scan or visit Locklypro com app DO...

Page 11: ...e the equipment FCC Radiation Exposure Statement This equipment complies with FCC radiation exposure limits set forth for an uncontrolled environment It should be installed and operated with minimum d...

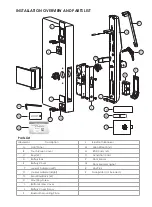
Page 12: ...C D Description Lockset Adapter Left F1 Lockset Adaptet Right Battery Cover Front Panel Touchscreen Cover Battery Box Keys x2 G H J K Mounting Block x2 Mounting Screw I Bottom Screw Cover Battery Cov...

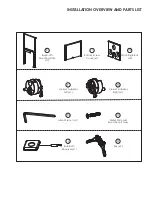
Page 13: ...ND PARTS LIST K Bluetooth Mounting Plate x1 F Lockset Adapter Left x1 M Allen Wrench x1 H KM5x30mm x4 Escutcheon Screw L Bluetooth Receiver x1 C Key x2 F1 Lockset Adapter Right x1 Bottom Screw Cover x...

Page 14: ...2022 Lockly All rights reserved USA Patent No US 9 881 146 B2 USA Patent No US 9 853 815 B2 USA Patent No US 9 875 350 B2 USA Patent No US 9 665 706 B2 USA Patent No US 11 010 463 B2 AUS Patent No 20...

Reviews: