32 GB/MT
Installation / Start-up
Preparation / Prior to installation / Installation
Preparation
Required tools
The tools and materials specified are not included.
This information and these values are non-binding
and are only provided as a reference. The nature
of the material is determined by the individual local
conditions.
- Pencil / making tool
- Voltage tester
- Screwdriver
- Electric drill
- Drill bit
- Screws for wall mounting
- Rawlplugs
- Side cutting pliers
- Ladder
Prior to installation
Important:
The electrical connection must be
established by a qualified electrician or a person
trained to perform electrical installations. This per-
son must be familiar with the properties of the light
and the connection regulations.
Familiarise yourself with all the instructions and
diagrams in this manual, as well as with the light
itself, before you install it.
Before installation ensure that the circuit, to which
the light will be connected, is not energised. To
do so, remove the fuse or switch off the circuit
breaker in the fuse box 0 position.
Use the voltage tester to verify the de-energised
status.
When selecting the mounting location, pay
attention to the following:
Ensure the area you wish to light will be lit. The
LED spotlight can be adjusted vertically.
Be sure the motion detector
9
covers the de-
sired area.
Be sure the motion detector
9
is not impacted
by other light sources at night, e.g. yard or street
lighting, as this could impair the function.
Installation
Wall mounting (Fig. C)
Prior to installation, remove the fuse or switch
off the circuit breaker 0 setting in the fuse box.
Hold the wall bracket
3
against the wall in the
location you wish to mount it and mark the drill
holes on the wall using the predrilled holes in the
wall bracket
3
. If necessary, use a spirit level.
Note:
Mount the light at a height of approx.
2.5 m to guarantee full functionality of the mo-
tion detector.
CAUTION! RISK OF INJURY!
Please refer
to the operating instructions of your electric drill.
Now drill the mounting holes (ø 8 mm). Be care-
ful not to damage the supply line.
Insert the rawlplugs into the bores.
Insert the screws (ST6) into the washers.
Secure the wall bracket
3
to the wall using the
self-tapping screws.
Note:
If the mounting position is higher than
3 m, use an additional self-tapping screw and
washer (not included).
After mounting, verify the wall bracket
3
is se-
curely fitted.
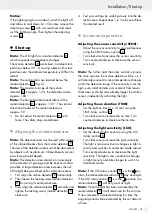
Open the cable terminal box
2
by loosening
the four screws
1
.
Now insert the 3-wire lead through the cable
gland and into the cable terminal box
2
.
Connect the cables
11
,
12
,
13
with the termi-
nals by adjusting their screws inside the cable
terminal box
2
(Fig. B).
Secure the cables
11
,
12
,
13
inside the cable
holder
15
by tightening the screws on the
cable holder.
Close the cable terminal box
2
using the four
screws
1
until it is watertight.
Replace the fuse or switch on the circuit breaker
in the circuit breaker box.
The light is now ready for operation.

