background image

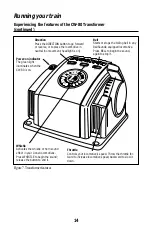
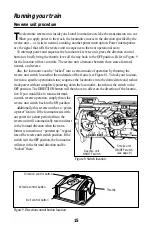
Refer to Figure 7 on page 14 for the location of the Transformer features listed in this section.

THROTTLE

Push the throttle forward to increase track power. The markings on the throttle approxi-

mate the percentage of full power. For more realism, push the throttle slowly to gradually
increase or decrease the speed of the locomotive. Slowing or stopping the locomotive with the
throttle instead of the DIRECTION button will allow you to continue in the same direction
when you increase the throttle again. To achieve this effect, reduce the throttle to the point
that the locomotive stops moving, but don’t completely turn off the throttle. That way, your
train won’t sequence into neutral.

DIRECTION

The DIRECTION control button interrupts track power to activate the reverse unit in your

locomotive. Your locomotive will not respond to this button when the reverse unit switch is in
the OFF position.

WHISTLE

The WHISTLE button will activate your locomotive’s whistle or horn. The sound will con-

tinue until the button is released. No external sound activation buttons are needed.

Your locomotive features an operating air whistle in the tender.

BELL

The BELL button will activate the bell sounds on locomotives equipped with this feature. Press

and hold the BELL button for two to three seconds to begin the sounds; press and hold the button
again to turn off the ringing. 

Your locomotive is not equipped with bell sounds.

Do not activate horns, whistles, or bells on RailSounds-equipped locomotives until
track power has been turned on for a few moments, or a continuous horn/whistle or
bell sound may occur. To correct this problem, simply turn off the CW-80
Transformer, then turn it back on.

POWER-ON INDICATOR

The green light will remain on during normal operation. The green light will begin to

flash if you exceed the power limit of the Transformer. The unit will allow you to momentarily
exceed the power limit, but power will be gradually reduced until the problem is corrected.
The benefit is that the Transformer will not instantly turn off. 

Running your train

13

Experiencing the features of the CW-80 Transformer

Note!

Note!

Note!

Summary of Contents for Neiman Marcus Holiday Express

Page 1: ...COMMENDED FOR CHILDREN UNDER EIGHTYEARS OFAGE ASWITH ALL ELECTRIC PRODUCTS PRECAUTIONS SHOULD BE OBSERVED DURING HANDLINGANDUSETOREDUCETHERISKOFELECTRICSHOCK TRANSFORMERRATINGS INPUT 120VAC 60HZONLY A...

Page 2: ...led in the closed position If you choose to open the doors you must first remove the foam and adhesive on the inside of each door The transformer included with this set should be periodically examined...

Page 3: ...ilding your Lionel layout 5 Joining the FasTrack track sections 6 Wiring your CW 80 Transformer 7 8 Running your train Running your train set 9 Adding smoke fluid to your locomotive s smoke generator...

Page 4: ...not use this device if water is present Serious or fatal injuries may result Use the CW 80 Transformer only for its intended purpose The CW 80 Transformer was meant to operate on 120 volt 60 Hertz pow...

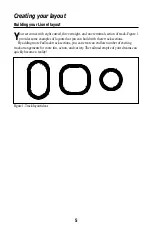
Page 5: ...des some examples of layouts that you can build with these track sections By adding more FasTrack track sections you can create an endless number of exciting track arrangements for more fun action and...

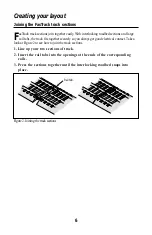
Page 6: ...fits together securely so you always get good electrical contact Take a look at Figure 2 to see how to join the track sections 1 Line up your two sections of track 2 Insert the rail tabs into the ope...

Page 7: ...e connector Be sure that the blades are touching the metal post 4 If you need to power an accessory available separately at your authorized Lionel dealer connect the accessory to the ACCESSORY thumbsc...

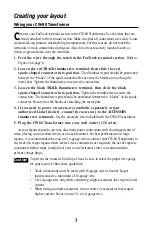
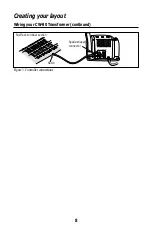
Page 8: ...Creating your layout 8 Wiring your CW 80 Transformer continued U 120 60z 0 18VAC A B U 0 18VAC TRACK ACCESSORY Figure 3 Controller connections FasTrack terminal section Notch Spade shaped connector...

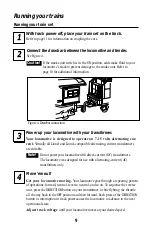
Page 9: ...e moving Your locomotive goes through a repeating pattern of operations forward neutral reverse neutral and so on To sequence the reverse unit press the DIRECTION button on your transformer or briefly...

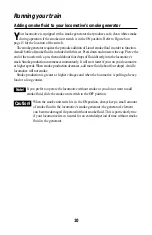
Page 10: ...oduction commences momentarily It will start faster if you run your locomotive at higher speeds When smoke production decreases add more fluid about four drops An idle locomotive will not smoke Smoke...

Page 11: ...plers must be open as shown at the left in Figure 5 Press down on the lock release to open the coupler then push the cars toward each other until they lock together Keep in mind that it s easier to co...

Page 12: ...body and lift it away To play the Christmas music slide the switch on the bottom of the car to the ON position For optimal sound quality the doors on your Musical Boxcar have been sealed in the close...

Page 13: ...le or horn The sound will con tinue until the button is released No external sound activation buttons are needed Your locomotive features an operating air whistle in the tender BELL The BELL button wi...

Page 14: ...RailSounds equipped locomotive Press BELL to begin the sound again to stop it Direction Press the DIRECTION button to go forward or reverse or to place the locomotive in neutral no movement headlight...

Page 15: ...To lock your locomo tive into a specific operational state sequence the locomotive into the desired state and reduce track power without completely powering down the locomotive then throw the switch t...

Page 16: ...sory voltage are 0 18 volts AC each This Transformer is capable of operating trains up to and including dual motored AC locomotives To operate at this level of track power it may be necessary to disco...

Page 17: ...sformer as discussed on page 7 2 Bring the throttle all the way back to the OFF position 3 Press and hold down the DIRECTION WHISTLE and BELL buttons on the Transformer Refer to Figure 7 on page 14 fo...

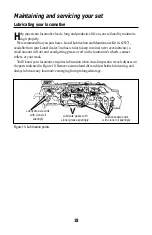
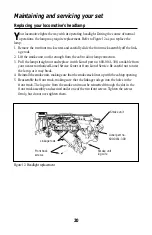
Page 18: ...to keep in mind never over lubricate a small amount will do and avoid getting grease or oil on the locomotive s wheels contact rollers or your track You ll know your locomotive requires lubrication wh...

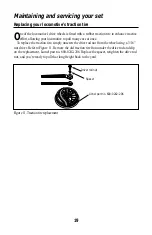
Page 19: ...once To replace the traction tire simply unscrew the drive rod nut from the wheel using a 3 16 nut driver Refer to Figure 11 Remove the old traction tire from under the drive rod and slip on the repla...

Page 20: ...ction 3 Pull the lamp straight out and replace it with Lionel part no 600 0161 300 available from your nearest authorized Lionel Service Center or from Lionel Service Be careful not to twist the lamp...

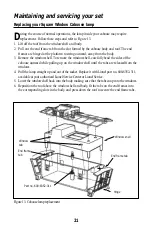
Page 21: ...hinged at the platform to swing outward away from the body 3 Remove the window shell To remove the window shell carefully bend the sides of the caboose outward while pulling up on the window shell un...

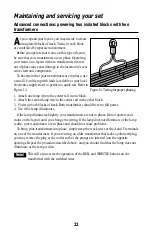
Page 22: ...lamp wire to the center rail in the other block 3 Power up both blocks of track Both transformers should be set to full power 4 See if the lamp illuminates If the lamp illuminates brightly your transf...

Page 23: ...Notes 23...
Page 24: ...th your dated sales receipt and completed warranty information to the nearest Authorized Lionel Service Center Your nearest Lionel Service Center can be found by calling 1 800 4 Lionel or by accessing...

Reviews:

Related manuals for Neiman Marcus Holiday Express