Chapter3
Configuration
RangePlus Wreless Notebook Adapter
security on the Adapter. If not, you will be taken directly to
the
Congratulations
screen.
If you have wireless security enabled on your network,
continue to step 2. If you don’t have wireless security
enabled, continue to step 3.
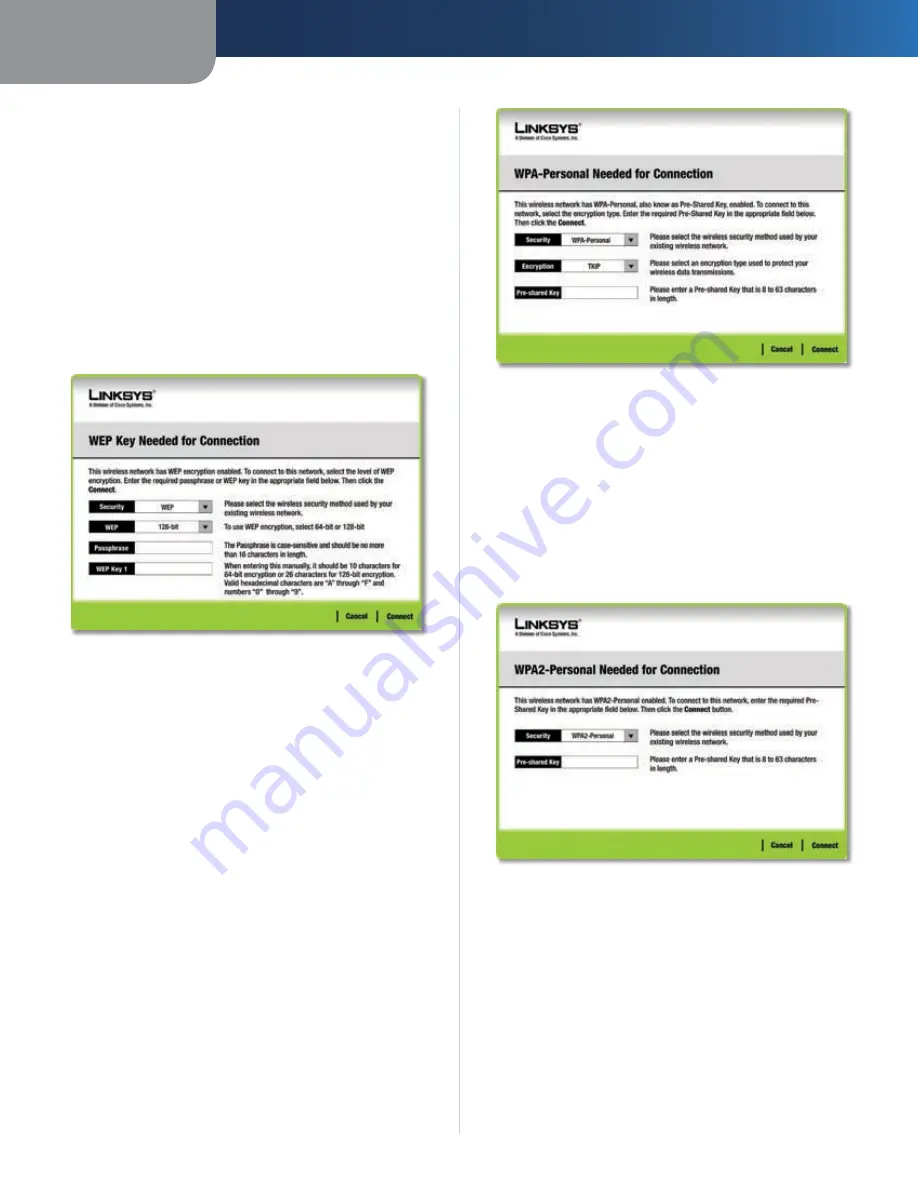
If your network has WEP, WPA Personal, or WPA2
Personal wireless security enabled, then that security
screen appears. Continue to the screen for your
wireless security.
WEP
If the network has WEP encryption enabled, then you see
the
WEP Key Needed for Connection
screen.
WEP Security
WEP
Select
64-bt
or
8-bt
encryption.
Passphrase
Enter a passphrase in the Passphrase field,
so a WEP key is automatically generated. The passphrase
is case-sensitive and must be 16 or fewer alphanumeric
characters. It must match the passphrase of your other
wireless network devices and is compatible with Linksys
wireless products only. (For non-Linksys wireless products,
enter the WEP key manually.)
WEP Key
The WEP key must match the WEP key of your
wireless network. For 64-bit encryption, enter exactly 10
hexadecimal characters (“0” to “9” and “A” to “F”.) For 128-bit
encryption, enter exactly 26 hexadecimal characters.
Click
Connect
and proceed to Step 3.
WPA Personal
If the network has WPA Personal security enabled, then
you see the
WPA Personal Needed for Connection
screen.
1.
2.
WPA Personal Security
Encrypton
Select the type of algorithm you want to use,
TKIP or AES, from the Encryption drop-down menu.
Pre-shared Key
Enter the network’s Pre-shared Key of
8-63 characters.
Click
Connect
and proceed to Step 3.
WPA2 Personal
If the network has WPA2 Personal security enabled, then
you see the
WPA2 Personal Needed for Connection
screen.
WPA2 Security
Pre-shared Key
Enter the network’s Pre-shared Key of
8-63 characters.
Click
Connect
and proceed to Step 3.
After the profile installs, the
Congratulations
screen
appears. Click
Connect to Network
to implement
the new settings immediately and return to the
Link
Information
screen. Click
Return to Profles screen
to keep the current settings active and return to the
Profiles
screen.
3.


