

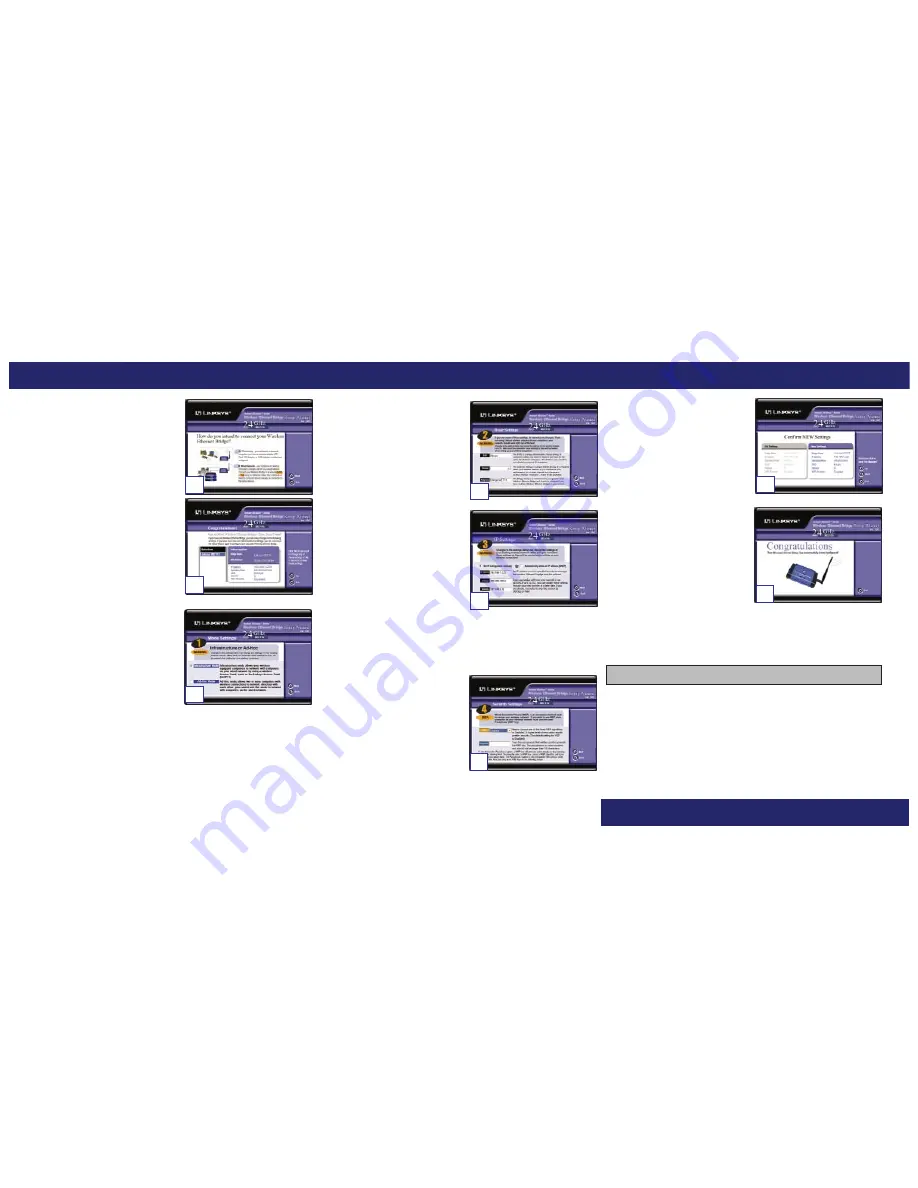
C. This screen shows the two ways to
configure the Bridge using this
Setup Wizard. Click the Next button.
D. Now displayed is a list of Wireless
Ethernet Bridges on your network. If
you have only one Bridge on your
network, it will be the only one dis-
played. If you have multiple Bridges
on your network, select the Bridge
you are currently installing by click-
ing its name in the Selection box.
Click the Yes button.
E. This screen shows a choice of two
wireless modes. Click the
Infrastructure Mode radio button if
you want your wireless computers to
network with computers on your
wired network using a wireless
access point. Click the Ad-Hoc
Mode radio button if you want mul-
tiple wireless computers to network
directly with each other. Then click
the Next button.
F. The Basic Settings screen will now
appear. Enter your wireless net-
work’s SSID, and select the Channel
at which the network broadcasts its
wireless signal. Enter a unique
Bridge Name for the Bridge. Then
click the Next button.
G. The IP Settings screen will now
appear. If your network has a DHCP
server, click the radio button next to
Automatically obtain an IP
address (DHCP). Then click the
Next button and proceed to step H.
If your network does not have an
DHCP server, click the radio button
beside Set IP configuration manu-
ally. Enter an IP Address, IP Mask, and Gateway appropriate to your
network. You must specify an IP address. If you are unsure about the IP
Mask and Gateway, it is better to leave these two fields alone. Then click
the Next button and proceed to step H.
H. The Security Setting screen will
appear. Set the Wired Equivalent
Privacy (WEP) encryption for your
wired network. Select a WEP con-
figuration method: Disabled (no
WEP encryption), 64-bit WEP, or
128-bit WEP. Then select a
passphrase, the code used when
logging a wireless device onto the
wireless network. The passphrase is
case-sensitive and should not be longer than 16 alphanumeric characters.
I. Review your settings. If these set-
tings are correct, click the Yes button
to save these settings. If any of these
settings are wrong, click the Back
button to make changes.
J. The configuration using the Setup
Wizard is complete. To configure
any other Bridges on your network,
you can run this Setup Wizard again.
Click the Exit button to exit the
Setup Wizard.
K. After configuration, unplug the crossover or straight-through cable from
the PC, and plug it into the RJ-45 jack on the Ethernet-ready network
device you wish to add to the WLAN.
F
W W W . L I N K S Y S . C O M
C
D
E
G
Your installation is complete. For advanced configuration, setup informa-
tion, or any other questions, refer to your products User Guide.
QI-WET11-052902B JL
H
I
J


