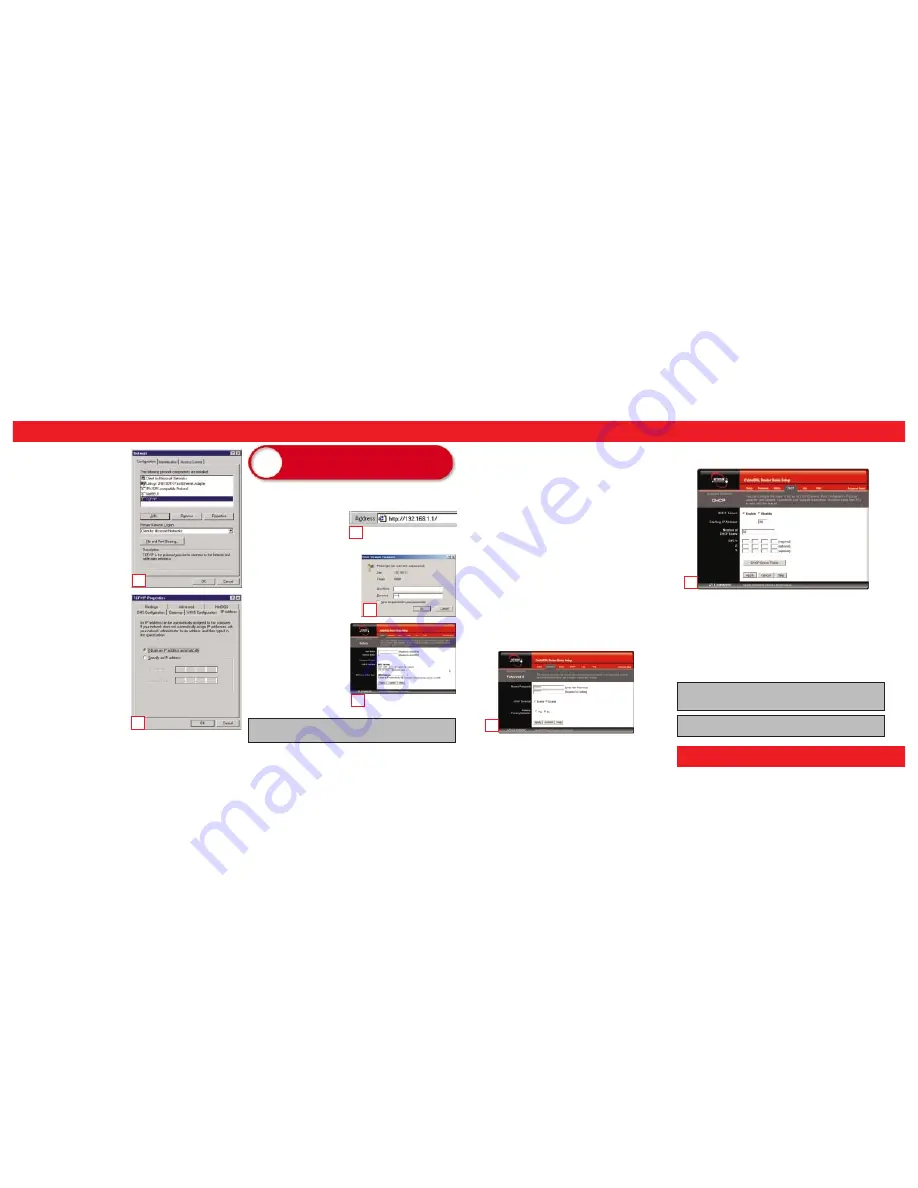
Now that the Router is connected to your network, and you’ve set up TCP/IP
on your PCs, you can begin configuring the Router.
A. Open your web browser and type
http://192.168.1.1
into the
browser’s Address field. Press the
Enter key.
B. An Enter Network Password screen
will appear. Leave the User Name
field blank, and enter admin (the
default password) in the Password
field. Then click the OK button.
C. The Router’s Setup tab will
appear. Based on the setup
instructions from your ISP, you
may need to provide the Host
Name and Domain Name.
These fields allow you to supply
a host and domain name for the
Router and are usually left blank.
If requested by your ISP (usually
cable ISPs), complete these two
fields.
A. Go to the Network
Configuration screen by click-
ing the Windows Start button,
selecting Settings, and selecting
the Control Panel. Then double-
click the Network icon.
B. In the Configuration window,
select the TCP/IP protocol line
that has been associated with
your network card/adapter. If
there is no TCP/IP line listed,
refer to the User Guide to install
the TCP/IP Protocol now.
C. Click the Properties button,
and choose the IP Address tab.
Select Obtain an IP address
automatically. Click the OK
button. You have completed the
client settings.
D. Click the OK button. Windows
may ask for original Windows
installation or additional files.
Supply them as needed (e.g.,
D:\win98, D:\win95, c:\win-
dows\options\cabs, etc.).
E. Windows will ask you to restart
the PC. Click the Yes button. If
Windows does not ask you to
restart, restart your PC at this
time.
The values for the Router’s LAN IP Address and Subnet Mask are shown
on the Setup screen. Unless you have specific internal needs, there should
be no reason to change these values. For the internal LAN, the default val-
ues are as follows.
•
Device IP Address: 192.168.1.1
•
Subnet Mask:
255.255.255.0
D. The Router supports three WAN Connection Types: DHCP (obtain an IP
automatically), Static IP Address, and PPPoE.
DHCP If your ISP supports DHCP, select this default option.
Static (Fixed) IP Address If your ISP assigns you a static IP Address, fill
in the WAN IP Address, Subnet Mask, Default Gateway Address, and
DNS fields.
PPPoE Enter your user name and password, if applicable.
When you have properly configured the Setup tab, click the Apply but-
ton, and then click the Continue button.
E. Click the Password tab, and set a password for the Router. You can use up
to 64 alphanumeric characters. The default password is admin. If you
don’t change the password, all users on your network will be able to access
the Router using the default password. When finished making your
changes, click the Apply button, and then click the Continue button.
F. If you want to use the Router as a DHCP server, choose the DHCP tab,
and configure the DHCP settings for your network.
G. Unless you already have a DHCP server on your internal network, choose
Enable. By choosing Enable, you will configure the Router to automati-
cally assign IP addresses to each of your PCs. You may enter the number
of PCs you plan on networking to the Router in the Number of DHCP
Users field.
H. Click the Apply button, and then click the Continue button.
I. Reset the power on the cable or DSL modem, and then restart the com-
puter so the computer can obtain the Router’s new settings.
w w w . n e t w o r k e v e r y w h e r e . c o m
QI-NR041-062402A JL
3
Configure the Cable/DSL 4-Port
Router
B
C
A
B
C
E
F
Note: The Setup screen and its available features may vary depending on the
WAN Connection Type you select.
The installation of the Cable/DSL 4-Port Router is complete.
If you wish to further customize its configuration or want additional
details, refer to the User Guide on the Setup CD-ROM.
Important:
Network Everywhere strongly recommends that you use the Setup
Wizard CD-ROM to install the Router.


