


9
Controller Mounting
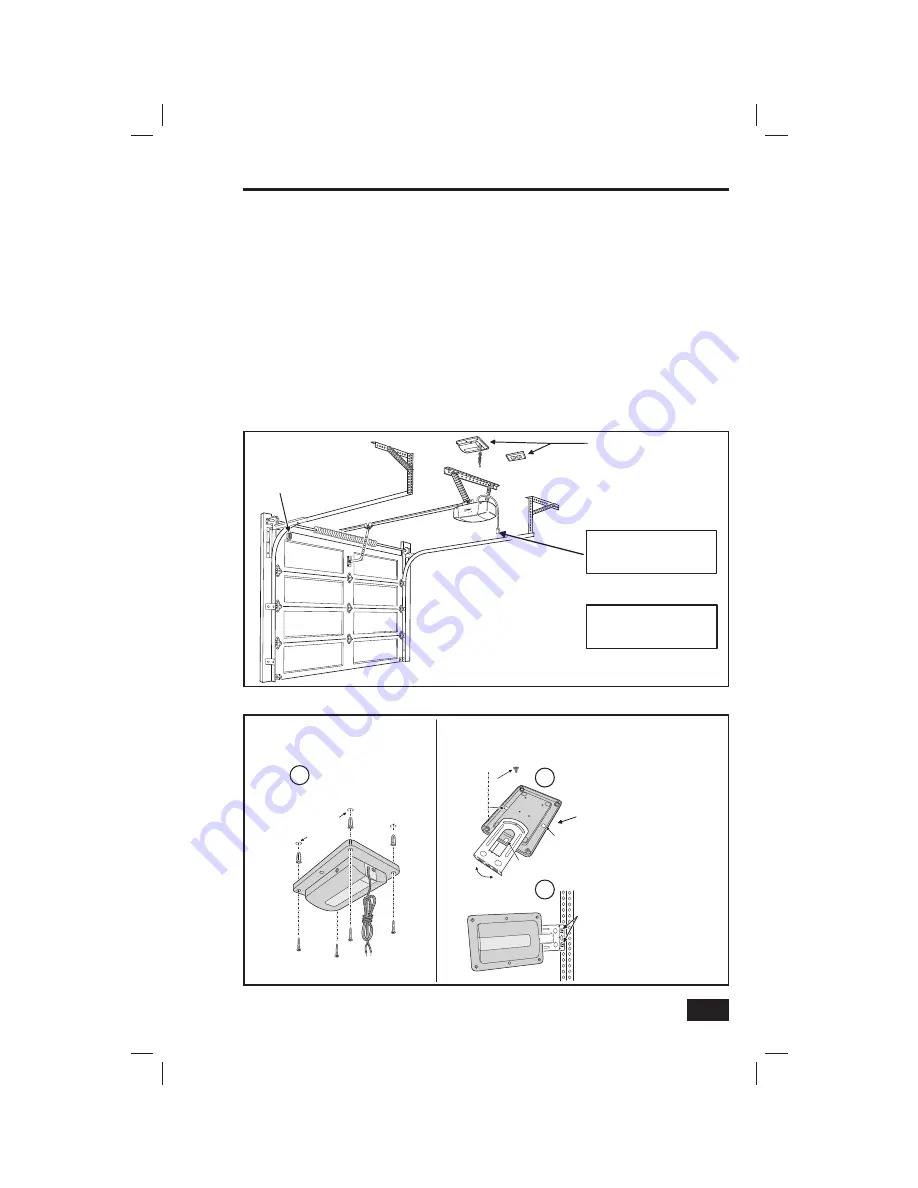
Mounting the Controller in the Garage
The Garage Door Controller mounts in the garage near the garage door opener. It will need
to be near a power outlet and where its warning lamp can be seen, regardless of the door
position.
Un-plug the garage door opener before continuing.
The Garage Door Controller can be screw mounted directly, or by using the supplied
adjustable mounting bracket.
1.
Use the four anchors and screws to directly mount the Controller (use a 3/16” drill for
the screw anchors, if the anchors are used).
- OR -
1.
Snap the adjustable mounting bracket onto the Controller and secure it with the short
screw.
2.
Use the bolts and nuts supplied to attach the mounting bracket to available hardware.
Figure 4. Controller Components
THE GD00Z-2 CAN ALSO BE ATTACHED TO THE OPENER'S
HARDWARE USING THE ADJUSTABLE MOUNTING BRACKET
THE OPTIONAL ADJUSTABLE
MOUNTING BRACKET FITS
3 WAYS ON THE CONTROLLER
THE BRACKET SNAPS ONTO
INDENTS ON EITHER SIDE OR
ON THE END OF THE CONTROLLER
SECURE
BRACKET
WITH SCREW
INDENT
INDENT
USE THE BOLTS AND NUTS
SUPPLIED TO ATTACH THE
BRACKET TO A SECURE
STRUCTURE
BE SURE THE CONTROLLER
IS CLEAR OF ALL MOVING
PARTS OF THE GARAGE DOOR
AND THE WARNING LAMP IS
NOT OBSTRUCTED
INDENT
1A
2A
3/16" HOLES
FOR ANCHORS
USE THE FOUR SCREWS
AND ANCHORS TO MOUNT
THE GD00Z-2 ABOVE
THE OPENER
1
TYPICAL MOUNTING METHOD
ALTERNATE MOUNTING METHOD
THE GD00Z-2 TYPICALLY
MOUNTS ON THE CEILING
NEAR THE OPENER AND
THE POWER OUTLET
TILT SENSOR
MOUNTED ON
THE TOP PANEL
OF THE DOOR
THE GD00Z-2 WARNING
LAMP MUST BE VISIBLE IN
ALL DOOR POSITIONS
REMOVE POWER FROM THE
GARAGE DOOR OPENER
BEFORE CONTINUING
! WARNING !
Figure 5. Controller Mounting


