background image

DO7051S

20

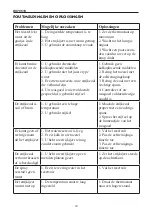
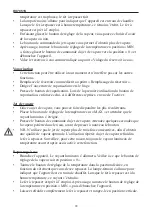
FOUTMELDINGEN EN OPLOSSINGEN

Problemen

Mogelijke oorzaken

Oplossingen

Het toestel lekt 

water uit de 

gaatjes in de 

strijkzool

1. De ingestelde temperatuur is te 

laag

2. Het strijkijzer is niet warm genoeg

3. U gebruikt de stoomknop te vaak

1. Zet de thermostaat op 

maximum

2. Wacht tot het lampje 

uitgaat

3. Wacht een paar secon-

den voordat u weer op de 

knop drukt

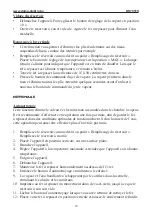
Er komt bruine 

vloeistof uit de 

strijkzool

1. U gebruikt chemische  

kalkoplossende middelen

2. U gebruikt niet het juiste type 

water

3. Er zitten stofvezels in de strijkzool 

die verbrand zijn

4. Uw wasgoed is niet voldoende 

gespoeld of u gebruikt stijfsel

1. Gebruik geen  

kalkoplossende middelen

2. Reinig het toestel met 

de zelfreinigingsknop

3. Reinig de zool met een 

vochtige spons.

4. Controleer of uw 

wasgoed voldoende afge-

spoeld is

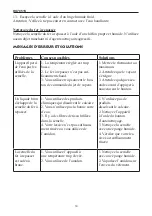
De strijkzool is 

vuil of bruin

1. U gebruikt een te hoge  

temperatuur

2. U gebruikt stijfsel

1. Maak de strijkzool 

proper met een vochtige 

spons

2. Sproei het stijfsel op 

de binnenzijde van het 

wasgoed

Er komt geen of 

weinig stoom 

uit het strijkijzer

1. Het waterreservoir is leeg

2. Er zit kalk in uw toestel

3. U hebt uw strijkijzer te lang 

zonder stoom gebruikt

1. Vul het reservoir

2. Pas de zelfreinigings-

functie toe

3. Pas de zelfreinigings-

functie toe

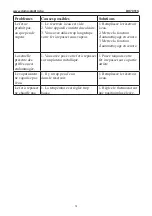
De strijkzool 

vertoont krassen 

of is beschadigd

1. U hebt uw strijkijzer op een  

metalen plateau gezet

1. Zet het strijkijzer steeds 

op de achterkant

De spray 

verstuift geen 

water

1. Er zit te weinig water in het  

reservoir

1. Vul het reservoir

Het strijkijzer 

warmt niet op

1. De temperatuur staat te laag 

ingesteld

1. Draai de thermostaat 

naar een hogere stand

Summary of Contents for DOMO DO7051S

Page 1: ...BRAUCHSANLEITUNG INSTRUCTION BOOKLET MANUAL DE INSTRUCCIONES NÁVOD K POUŽITÍ NÁVOD NA POUŽITIE PRODUCT OF STOOMSTRIJKIJZER FER A REPASSER DAMPFBÜGELEISEN STEAM IRON PLANCHA DE VAPOR NAPAŘOVACÍ ŽEHLIČKA NAPAROVACIA ŽEHLIČKA DO7051S ...

Page 2: ...rations ont été effectuées par des personnes non agréées La garantie est accordée sur la base du ticket de caisse original Toutes les pièces détachées non résistantes et par conséquent sujettes à l usure ne sont pas sous garantie Dans le cas où votre appareil est défectueux pendant la période de garantie de 2 ans vous pouvez ramener votre appareil ainsi que votre ticket de caisse au magasin où vou...

Page 3: ...uku začínající dnem prodeje spotřebiče platí na území ČR tyto podmínky 1 trvání záruky 2 roky 2 poskytování záruky a záruční opravu provedeme podle našeho zvážení opravou nebo výměnou vadných dílů jestliže tyto závady vznikly prokazatelně vadou materiálu nebo chybou při výrobě b záruční oprava bude provedena jen při předložení tohoto záručního listu a dokladu o zaplacení c jestliže dojde k opravě ...

Page 4: ...odenie b nesprávne používanie v rozpore s návodom na použitie 1 záruka zaniká Pri použití spotrebiča inak ako v domácnosti Pri vykonávaní opravy alebo zmeny na spotrebiči osobou inou ako poverenou naším servisom Na tento spotrebič poskytujeme záruku na nedostatky ktoré sú označené ako výrobné chyby alebo chyby materiálu Záručná doba začína dňom predaja a je uznaná po predložení potvrdeného tohoto ...

Page 5: ...ombre Jméno Adres Adresse Address Dirección Adresa Aankoopdatum Date d achat Kaufdatum Date of purchase Fecha de compra Datum nákupu podpis a razítko Tel Jméno kupujícího adresu a tel spojení je nutno vyplnit pokud si zákazník přeje zaslání opraveného přístroje domů Bez úplného vyplnění všech ostatních údajů v záručním listu nebude možno Vaši reklamaci včas vyřídit ...

Page 6: ...u 2 reklamace datum přijetí odeslání číslo reklamačního dokladu dátum prijatia odoslania číslo reklamačného dokladu 3 reklamace datum přijetí odeslání číslo reklamačního dokladu dátum prijatia odoslania číslo reklamačného dokladu Jméno kupujícího adresu a tel spojení je nutno vyplnit pokud si zákazník přeje zaslání opraveného přístroje domů Bez úplného vyplnění všech ostatních údajů v záručním lis...

Page 7: ...nt que ce produit est éliminé correctement vous favorisez la prévention des conséquences négatives pour l environnement et la santé humaine qui sinon seraient le résulat d un traitement inapproprié des déchets de ce produit Pour obtenir plus de détails sur le recyclage de ce produit veuillez prendre contact avec le bureau municipal de votre région votre service d éliminiation des déchets ménagers ...

Page 8: ...de este producto pónganse en contacto con la oficina municipal la empresa o el servicio de recogida de residuos domésticos correspondiente o con el establecimiento dónde ha adquirido el producto El material de embalaje es reciclable Trate el embalaje de manera ecológica INFORMACE O RECYKLACI ODPADU Symbol na přístroji či na jeho obalu znamená že s tímto výrobkem není možno nakládat jako s běžným d...

Page 9: ... Webshop gelangen Sie auch über die Domo Internetseite www domo elektro be Außerdem können Sie nach wie vor Domo Zubehör und Ersatzteile in Geschäften bekommen wo Domo Gerät verkauft werden From now on accessories and parts of Domo appliances can also be ordered online from the Domo webshop http webshop domo elektro be You can reach the webshop through the Domo website as well www domo elektro be ...

Page 10: ...rtig geschulten Person ersetzt werden um Unfälle zu verhindern If the power supply cord is damaged it must be replaced by the manufacturer its service agent or a similarly qualified person in order to avoid a hazard Cuando el cable de alimentación está dañado tiene que ser reemplazado por el fabricante el servicio posventa o una persona similarmente calificada para evitar accidentes Jestliže je po...

Page 11: ...e verpakkingsmaterialen en eventuele promotionele stickers Zorg ervoor dat kinderen niet met de verpakkingsmaterialen spelen Dit toestel is geschikt om te gebruiken in de huishoudelijke omgeving en in gelijkaardige omgevingen zoals Keukenhoek voor personeel van winkels kantoren en andere gelijkaardige professionele omgevingen Boerderijen Hotel en motelkamers en andere omgevingen met een residentie...

Page 12: ...t met het toestel spelen Dit toestel mag gebruikt worden door kinderen vanaf 16 jaar en personen met een fysieke of sensoriële beperking of mensen met een beperkte mentale capaciteit of gebrek aan ervaring of kennis op voorwaarde dat deze personen toezicht krijgen of instructies hebben gekregen over het gebruik van het toestel op een veilige manier en dat ze ook de gevaren kennen bij het gebruik v...

Page 13: ...dingskabel beschadigd is moet hij vervangen worden door de fabrikant een service center of gekwalificeerde personen om ongevallen te vermijden OPGELET Om ongevallen te vermijden mag dit toestel niet bediend worden door een externe bediening zoals een externe timer of op een net aangesloten worden dat regelmatig op en afgezet wordt Laat het toestel niet zonder toezicht achter wanneer het aangeslote...

Page 14: ...l beschadigd is Breng het toestel dan naar de dienst na verkoop van DOMO of het dichtsbijzijnde gekwalificeerde service center voor nazicht reparatie of elektrische mechanische aanpassingen Probeer het toestel nooit eigenhandig te repareren Houd het toestel en de voedingskabel buiten het bereik van kinderen jonger dan 16 jaar wanneer het aan staat of aan het afkoelen is De oppervlaktes van het toe...

Page 15: ...r nooit onder in water of een andere vloeistof Dit om elektrische schokken of brandwonden te voorkomen Gebruik dit toestel niet met natte handen Rol de voedingskabel volledig af om oververhitting van de kabel te voorkomen Laat de voedingskabel niet in contact komen met warme oppervlakken Sluit de voedingskabel pas op het stopcontact aan nadat het toestel zeker correct gemonteerd is Om de stekker t...

Page 16: ...tjes ingevet zodat het toestel bij het eerste gebruik een lichte geur en rook kan afgeven Dit is normaal en zal daarna niet meer voorkomen Houd de strijkzool glad en pas op voor krassen Schuur met de strijkzool niet over metalen oppervlakten zoals de rand van de strijkplank knopen of ritsen Vul het waterreservoir zoals aangegeven onder het waterreservoir vullen Zorg er voor dat de stoomregelknop o...

Page 17: ...st met een strijkdoek om te voorkomen dat de stof beschadigd raakt Nylon Silk Nylon Zijde Wool Wol Cotton Katoen Linen Linnen Het waterreservoir vullen Haal de stekker uit het stopcontact Zet de stoomregelknop op strijken zonder stoom positie 0 Vul het waterreservoir door de opening tot ten hoogste aan het niveau MAX Als u in een streek woont met hard water is het aangewezen gedemineraliseerd of g...

Page 18: ...n om tot een optimale stoomkwaliteit te komen Het meermaals gebruik van de stoomstoot zal het strijkijzer doen afkoelen Let daarom steeds op het temperatuurindicatielichtje voor en nadat u deze functie gebruikt Droog strijken Steek de stekker in het stopcontact Het indicatielampje zal aangaan Zorg ervoor dat de stoomregelknop op positie 0 staat Draai de temperatuurregeling naar de gewenste stand n...

Page 19: ...ervoir vullen Vul de watertank half 2 Plaats het strijkijzer rechtstaand op een vlakke ondergrond 3 Steek de stekker in het stopcontact 4 Zet het toestel aan op de max temperatuur Wacht tot het toestel op temperatuur is 5 Zet het toestel uit 6 Verwijder de stekker uit het stopcontact 7 Houd het strijkijzer horizontaal boven de afwasbak 8 Druk op de zelfreinigingsknop en houd deze ingedrukt 9 Stoom...

Page 20: ...sknop 3 Reinig de zool met een vochtige spons 4 Controleer of uw wasgoed voldoende afge spoeld is De strijkzool is vuil of bruin 1 U gebruikt een te hoge temperatuur 2 U gebruikt stijfsel 1 Maak de strijkzool proper met een vochtige spons 2 Sproei het stijfsel op de binnenzijde van het wasgoed Er komt geen of weinig stoom uit het strijkijzer 1 Het waterreservoir is leeg 2 Er zit kalk in uw toestel...

Page 21: ... enlevez tous les éléments d emballage et les éventuels autocollants promotionnels Veillez à ce que les enfants ne jouent pas avec les matériaux d emballage Cet appareil est conçu pour être utilisé dans un environnement domestique ou dans des environnements comparables tels que Coin cuisine du personnel dans les commerces les bureaux et autres environnements professionnels comparables Fermes Chamb...

Page 22: ... être sous surveillance afin qu ils ne jouent pas avec l appareil Cet appareil peut être utilisé par des enfants âgés de 16 ans ou plus et par des personnes présentant un handicap physique ou sensoriel une capacité mentale limitée ou un manque d expérience ou de connaissances à condition que ces personnes soient sous surveillance ou qu elles aient reçu des instructions sur la manière d utiliser l ...

Page 23: ...il en saisissant la fiche électrique Ne tirez jamais sur le cordon pour retirer la fiche de la prise En cas de dégâts au cordon d alimentation celui ci doit être remplacé par le fabricant un centre de services ou une personne qualifiée afin d éviter tout accident ATTENTION Pour éviter tout accident cet appareil ne peut pas être actionné via une commande externe comme un minuteur extérieur ni être ...

Page 24: ...l appareil si le cordon d alimentation ou la fiche est endommagé e après un mauvais fonctionnement de l appareil ou lorsque l appareil est lui même endommagé Portez dans ce cas l appareil au service après vente de DOMO ou au centre de services qualifié le plus proche pour contrôle réparation ou modifications électriques mécaniques Ne tentez jamais de réparer cet appareil vous même Gardez l apparei...

Page 25: ...n d alimentation ou la fiche dans l eau ou tout autre liquide Ceci afin d éviter des chocs électriques ou un incendie N utilisez pas l appareil si vous avez les mains mouillées Déroulez complètement le cordon d alimentation pour éviter toute surchauffe Ne laissez pas le cordon d alimentation au contact de surfaces chaudes Ne branchez le cordon d alimentation dans la prise de courant qu après vous ...

Page 26: ... éléments du fer à repasser sont légèrement graissés de sorte que l appareil peut dégager une légère odeur ainsi que de la fumée lors de sa première utilisation Ce phénomène est normal et ne se reproduira plus par la suite Faites en sorte que la semelle du fer à repasser reste lisse et exempte de rayures Ne passez pas sur des surfaces métalliques comme par exemple le bord de la planche à repasser ...

Page 27: ...age Commencez par les vêtements exigeant une température basse pour terminer par ceux exigeant la plus haute température Il est préférable de repasser les laines et autres tissus délicats comme la soie le velours etc avec une pattemouille afin de ne pas abîmer le tissu Nylon Silk Nylon Soie Wool Laine Cotton Coton Linen Lin Remplissage du réservoir Débranchez l appareil Mettez le bouton de réglage...

Page 28: ...apeur Grâce au jet de vapeur vous pouvez faire disparaître les plis récalcitrants Placez le bouton de réglage de la température sur MAX et attendez que le voyant lumineux s éteigne Pressez le bouton de commande du jet de vapeur Attendez quelques secondes que la vapeur pénètre dans le tissu avant de presser à nouveau le bouton N B N utilisez pas le jet de vapeur plus de trois fois consécutives afin...

Page 29: ...onction élimine le calcaire et les minéraux accumulés dans le chambre à vapeur Il est recommandé d effectuer cette opération une fois par mois afin de garder le fer à repasser dans des conditions optimales de fonctionnement Selon la dureté de l eau cette opération peut aussi être effectuée plus d une fois par mois 1 Remplissez le réservoir comme décrit au point Remplissage du réservoir Remplissez ...

Page 30: ...endez que le voyant s éteigne 3 Attendez quelques sec ondes avant d appuyer à nouveau sur le bouton Un liquide brun s échappe de la semelle du fer à repasser 1 Vous utilisez des produits chimiques qui dissolvent le calcaire 2 Vous n utilisez pas la bonne sorte d eau 3 Il y a des fibres de tissu brûlées dans la semelle 4 Votre lessive n est pas suffisam ment rincée ou vous utilisez de l amidon 1 N ...

Page 31: ...a fonction d autonettoyage en œuvre 3 Mettez la fonction d autonettoyage en œuvre La semelle présente des griffes ou est endommagée 1 Vous avez posé votre fer à repasser sur un plateau métallique 1 Posez toujours votre fer à repasser sur sa partie arrière Le vaporisateur ne vaporise pas l eau 1 Il y a trop peu d eau dans le réservoir 1 Remplissez le réservoir à eau Le fer à repasser ne chauffe pas...

Page 32: ...Gebrauch alle Verpackungsmaterialien und möglichen Werbeaufkleber Sorgen Sie dafür dass Kinder nicht mit den Verpackungsmaterialien spielen Dieses Gerät eignet sich für den Einsatz im Haushalt und in ähnlichen Umfeldern zum Beispiel in folgenden Bereichen Küchenbereich für Mitarbeiter von Geschäften Büros und anderen ähnlichen beruflichen Umfeldern Bauernhöfe Hotel und Motelzimmer und andere Berei...

Page 33: ...e für ihre Sicherheit verantwortlich ist Kinder sollten beaufsichtigt werden um ein Spielen mit dem Gerät auszuschließen Diese Gerät darf von Kindern ab 16 Jahren und Menschen mit körperlichen oder sensorischen Behinderungen oder Menschen mit eingeschränkten geistigen Fähigkeiten oder mangelnder Erfahrung bzw Sachkenntnis unter der Bedingung verwendet werden dass diese Personen beaufsichtigt werde...

Page 34: ... Sie zunächst alle Schalter auf Aus und ziehen Sie den Stecker am Stecker selbst aus der Steckdose Ziehen Sie den Stecker nie am Netzkabel aus der Steckdose Wenn das Netzkabel beschädigt ist sollte es um Unfälle auszuschließen durch den Hersteller den Kundendienst oder eine qualifizierte Person ersetzt werden ACHTUNG Zur Vermeidung von Unfällen sollte das Gerät nicht mit einem externen Zusatzgerät...

Page 35: ...efallen ist sichtbar beschädigt ist oder leckt Verwenden Sie das Gerät nie wenn das Netzkabel oder der Stecker beschädigt ist wenn es nicht richtig funktioniert oder beschädigt ist Bringen Sie das Gerät in diesem Fall zur Durchsicht Reparatur oder für elektrische mechanische Anpassungen zum DOMO Kundendienst oder zum nächstgelegenen Servicecenter Versuchen Sie nie das Gerät selbst zu reparieren Be...

Page 36: ... den Stecker auf keinen Fall in Wasser oder andere Flüssigkeiten Dies könnte andernfalls zu Stromschlägen und Brandgefahr führen Verwenden Sie das Gerät nicht mit nassen Händen Rollen Sie das Netzkabel vollständig ab um eine Überhitzung des Kabels zu vermeiden Das Netzkabel darf nicht mit heißen Flächen in Kontakt kommen Schließen Sie das Netzkabel erst an die Steckdose an wenn das Gerät korrekt z...

Page 37: ...eisens wurden leicht eingefettet sodass das Gerät bei der ersten Inbetriebnahme einen leichten Geruch und Rauch absondern kann Dies ist normal und tritt später nicht mehr auf Erhalten Sie die Bügelsohle glatt und vor Kratzern geschützt Führen Sie das Bügeleisen nicht über Metallflächen wie den Rand des Bügelbretts Knöpfe oder Reißverschlüsse Füllen Sie den Wasserbehälter wie unter Den Wasserbehält...

Page 38: ...e Temperatur erfordert Wolle und andere empfindliche Stoffe wie Seide Samt usw bügeln Sie am besten mit einem Bügeltuch um Beschädigungen am Stoff zu vermeiden Nylon Silk Nylon Seide Wool Wolle Cotton Baumwolle Linen Leinen Den Wasserbehälter füllen Ziehen Sie den Netzstecker aus der Steckdose Stellen Sie den Dampfregler auf Bügeln ohne Dampf Position 0 Füllen Sie den Wasserbehälter an der Öffnung...

Page 39: ...it dem Dampfstoß können Sie hartnäckige Falten entfernen Stellen Sie den Temperaturregler auf MAX und warten Sie bis die Kontrollleuchte erlischt Dampfstoßtaste drücken Warten Sie einige Sekunden dass der Dampf ins Gewebe eindringt bevor Sie nochmals drücken Anmerkung Verwenden Sie den Dampfstoß nicht mehr als dreimal hintereinander um eine optimale Dampfqualität zu erhalten Die mehrfache Verwendu...

Page 40: ...ineralien die sich in der Dampfkammer angesammelt haben Dieser Vorgang wird am besten einmal pro Monat ausgeführt um die optimale Betriebsbereitschaft des Bügeleisens zu erhalten Abhängig von der Wasserhärte kann dieser Vorgang auch mehrmals pro Monat ausgeführt werden 1 Füllen Sie den Wasserbehälter wie im Abschnitt Den Wasserbehälter füllen angegeben Füllen Sie den Wasserbehälter bis zur Hälfte ...

Page 41: ...ler auf das Maxi mum ein 2 Warten Sie bis die Kontrollleuchte erlischt 3 Warten Sie einige Sekunden bevor Sie die Taste erneut drücken Es tritt braune Flüssigkeit aus der Bügelsohle aus 1 Sie verwenden chemische Kalklösungsmittel 2 Sie verwenden den falschen Was sertyp 3 Es befinden sich Stofffasern in der Bügelsohle die verbrannt sind 4 Ihre Wäsche ist nicht ausreichend gespült oder Sie verwenden...

Page 42: ...ungsfunktion 3 Verwenden Sie die Selbstreinigungsfunktion Die Bügelsohle hat Kratzer oder ist beschädigt 1 Sie haben Ihr Bügeleisen auf eine Metallplatte gestellt 1 Stellen Sie das Bügel eisen immer auf der Rückseite ab Die Sprühöff nung versprüht kein Wasser 1 Es befindet sich zu wenig Wasser im Wasserbehälter 1 Füllen Sie den Wasser behälter Das Bügeleisen erwärmt sich nicht 1 Die Temperatur ist...

Page 43: ...ickers have been removed before using the appliance for the first time Make sure children cannot play with the packaging materials This appliance is intended to be used in household and similar applications such as staff kitchen areas in shops offices and other working environments farm houses by clients in hotels motels and other residential type environments bed and breakfast type environments T...

Page 44: ...ons with reduced physical sensory or mental capabilities or lack of experience and knowledge if they have been given supervision or instruction concerning use of the appliance in a safe way and understand the hazards involved Children shall not play with the appliance Cleaning and user maintenance shall not be made by children unless they are older than 8 and supervised Keep the appliance and its ...

Page 45: ...itching device such as a timer or connected to a circuit that is regularly switched on and off by the utility The iron must not be left unattended while it is connected to the supply mains The plug must be removed from the socket outlet before the water reservoir is filled with water The iron must be used and rested on a flat stable surface and resistant to heat and hot steam The iron is not to be...

Page 46: ...pliance outdoors Do not move the iron while in use or when still hot Allow to cool before moving the iron or before maintenance Do not use this appliance for other than intended use Do not fill the water reservoir with any other liquid than water Do not use the steam function of the iron without water in the reservoir This might cause damage to the iron Check carefully that the voltage and frequen...

Page 47: ...n the wall outlet To disconnect turn controls to OFF or 0 position then remove the plug from the wall Never pull the cord or appliance to remove the plug from the socket Failure to maintain this appliance in a clean condition could adversely affect the life of the appliance and possibly result in a hazardous situation Any injury or damage caused by failure to comply with these rules are at your ow...

Page 48: ...t a slight odour and some smoke with initial use This is normal and will not happen after initial use Keep the sole of the iron smooth and be careful for scratches Do not slide with the sole of the iron over metal surfaces such as the edge of the ironing board buttons or zippers Fill the water reservoir as indicated in Filling the water reservoir Make sure that the steam regulation button is at 0 ...

Page 49: ...st be ironed with a pressing cloth to prevent the fabric from being damaged Nylon Silk Nylon Silk Wool Wool Cotton Cotton Linen Linnn Filling the water reservoir Remove the plug from the outlet Position the steam regulator button to iron without steam position 0 Fill the water reservoir through the opening to the MAX level If you live in an area with hard water it is recommended you use deminerali...

Page 50: ...a row in order to maintain optimal steam quality Using the steam boost several times in a row will cool the iron For this reason pay attention to the temperature indicator light before and after you use this function Dry ironing Put the plug in the mains The indicator light will turn on Make sure that the steam regulator button is at 0 Turn the temperature regulator to the desired position dependi...

Page 51: ... in Filling the water reservoir Fill the water tank halfway 2 Place the iron straight up on a flat surface 3 Put the plug in the mains 4 Put the device on at the max temperature Wait until the device is at temperature 5 Turn the device off 6 Remove the plug from the outlet 7 Hold the iron horizontally above the sink 8 Press the self cleaning button and hold it down 9 Steam and boiling water will c...

Page 52: ...lime scale dissolving fluids 2 Clean the device with the self cleaning button 3 Clean the sole with a damp sponge 4 Check whether your laundry is rinsed suffi ciently The sole of the iron is dirty or brown 1 You used too high a temperature 2 You used starch 1 Clean the sole of the iron properly with a damp sponge 2 Spray the starch on the inside of the clothes Little or no steam comes out of the i...

Page 53: ...DO7051S 53 www domo elektro be Problems Possible causes Solutions The iron does not heat up 1 The temperature is set too low 1 Turn the thermostat to a higher position ...

Page 54: ...iquetas promocionales Asegúrese de que los niños no puedan jugar con el material de embalaje Este aparato es adecuado para su uso en el ámbito doméstico y entornos similares como Zona de cocina para el personal de tiendas oficinas y otros entornos profesionales similares Granjas Habitaciones de hoteles y moteles y otros entornos de carácter residencial Habitaciones de invitados o similares Este ap...

Page 55: ...nas con discapacidad física o sensorial o personas con capacidad mental limitada o falta de experiencia o conocimiento siempre y en tanto en cuanto dichas personas estén vigiladas o hayan recibido instrucciones sobre el uso del aparato de manera segura y conozcan los peligros del uso del mismo Los niños no deben jugar con el ventilador El mantenimiento y la limpieza del dispositivo no deben ser re...

Page 56: ...stituirlo el fabricante un centro de reparación autorizado o una persona cualificada ATENCIÓN para evitar peligros el aparato no debe ser controlado con un dispositivo externo como un temporizador externo ni debe conectarse a una red que se encienda y se apague con frecuencia No deje el aparato desatendido cuando esté conectado a la red eléctrica El cable de alimentación debe desconectarse de la t...

Page 57: ...de que el aparato esté dañado llévelo al servicio de postventa de DOMO o al centro de servicio cualificado más cercano para su inspección reparación o para realizar ajustes eléctricos mecánicos Nunca intente reparar el aparato por su cuenta Mantenga el aparato y el cable de alimentación fuera del alcance de los menores de 16 años mientras esté encendido o enfriándose Si ve este símbolo eso quiere ...

Page 58: ...ará choques eléctricos o incendios No utilice el aparato con las manos mojadas Desenrolle el cable de alimentación completamente para evitar el sobrecalentamiento del mismo No deje que el cable de alimentación toque superficies calientes Solo debe introducir el cable de alimentación en la toma de corriente después de que el aparato se haya montado correctamente Antes de retirar el cable del aparat...

Page 59: ... un paño suave Algunas partes de la plancha están ligeramente engrasadas por lo que la primera vez que utilice el aparato este puede emitir un ligero olor y humo Esto es normal y a partir de ese primer uso ya no se volverá a producir Mantenga la suela de la plancha lisa y tenga cuidado con los rasguños No pase la plancha sobre superficies metálicas como el borde de la tabla de planchar botones o c...

Page 60: ... vapor Clasifique la ropa según el tipo de tejido y la temperatura a la cual se debe planchar Comience con las prendas que se deben planchar a baja temperatura para acabar con las prendas que se planchan a la temperatura más alta Se recomienda planchar las prendas de lana y otros tejidos delicados como la seda el terciopelo etc con un paño especial de planchado para evitar dañar los tejidos Nylon ...

Page 61: ...Antes de usar por primera vez el botón de pulverización debe presionarlo varias veces para activarlo Impulsor de vapor Puede eliminar las arrugas rebeldes con un golpe de vapor Ajuste el termostato en MAX y espere hasta que la luz indicadora se apague Presione el botón impulsor de vapor Espere unos segundos hasta que el vapor penetre en el tejido antes de presionar el botón de nuevo Nota no utilic...

Page 62: ...ulsor de vapor LIMPIEZA Autolimpieza Esta función elimina la cal y los minerales que se acumulan en la cámara de vapor Le recomendamos realizar esta operación una vez al mes para mantener la plancha en un estado de funcionamiento óptimo Dependiendo de la dureza del agua esta operación también se puede realizar más de una vez al mes 1 Llene la plancha de la manera descrita en Llenar el depósito de ...

Page 63: ...cha en posición vertical y deje que se enfríe por completo 13 Seque la placa inferior con un paño húmedo y frío Atención asegúrese de que no entra en contacto con el agua caliente Limpiar la plancha Limpie la suela de la plancha con un paño limpio y húmedo No utilice objetos afilados o productos de limpieza agresivos ...

Page 64: ...a enjuagado lo suficiente o ha utilizado almidón 1 No utilice productos que disuelven la cal 2 Limpie el aparato con el botón de autolimpieza 3 Limpie la suela de la plancha con una esponja húmeda 4 Asegúrese de que su ropa se enjuaga suficiente mente La suela de la plancha está sucia o marrón 1 Ha utilizado una temperatura demasiado alta 2 Ha utilizado almidón 1 Limpie la suela de la plancha con ...

Page 65: ...blemas Posibles causas Soluciones El pulverizador no atomiza agua 1 No hay suficiente agua en el depósito 1 Llene el depósito La plancha no se calienta 1 La temperatura es demasiado baja 1 Gire el termostato hacia una posición más alta ...

Page 66: ...ré reklamní a ochranné fólie Děti si s ochrannými ani reklamními polepy nesmí hrát Přístroj je určen pro používání v domácnostech a podobných prostředích tak jako je kuchyňky v obchodech kancelářích atd chaty chalupy hotely penziony a jiné dočasné ubytování Přístroj nesmí používat osoby ani děti se sníženou psychickou motorickou nebo mentální schopností Pokud nejsou pod odborným dohledem tak jej n...

Page 67: ...ní a běžnou údržbu smí provádět pouze osoby starší 16 let a při tom být pod dohledem Přístroj a jeho el kabel skladujte mimo dosah dětí mladších 16 let Pokud přístroj nepoužíváte nebo se jej chystáte rozebírat či měnit součásti tak přístroj odpojte od el napětí Před rozebírání skládáním i před čistěním vždy nechte přístroj dostatečně vychladnout Pokud je přívodní kabel poškozen musí být vždy okamž...

Page 68: ... je odolná horkým povrchům Žehličku nepoužívejte pokud z ní kape voda nebo je jakkoli viditelně poškozena či netěsní Žehličku s poškozeným přívodním kabelem nepoužívejte i když je stále plně funkční Jakkoli poškozený přístroj je nutné nechat zkontrolovat odborným servisem DOMO ELEKTRO nebo jiným proškoleným pracovníkem Nezkoušejte opravovat žehličku sami Žehličku držte mimo dosah dětí mladších 16 ...

Page 69: ...sítě Používejte pouze přístlušenství s přístrojem dodané Přístroj ani přívodní kabel nikdy neponořujte pod vodu jinak hrozí nebezpečí úrazu Nepoužívejte nesahejte na přístroj s mokrýma rukama Přívodní kabel co nejvíce rozviňte aby se nepřehříval Nenechávejte viset kabel přístroje přes hranu stolu a vyvarujte se toho aby přišel do styku s horkými plochami Nikdy nenalévejte do zásobníku na vodu jino...

Page 70: ... odloupněte ochrannou fólii a plochu otřete jemným vlhkým hadříkem Při výrobě byly některé části promazány mazivem proto je možné že při prvním použití se z přístroje bude lehce kouřit Pokud se tak stane a kouř po chvíli zmizí tak je vše v pořádku Žehlící plochu udržujte čistou a zabraňte jejímu poškrábání Nežehlete s ní přes kovové části jako je zip nebo knoflíky Naplňte zásobník vody na minimáln...

Page 71: ...hadr tak aby se zabránilo jejich poškození Nylon Silk Nylon hedvábí Wool Vina Cotton Bavlna Linen Len Doplnění vody do zásobníku Vypojte přístroj z el sítě Regulátor páry nastavte na nejnižší stupeň 0 Přes nálevku naplňte zásobník do maximálního objemu k rysce MAX Pokud je ve vašem okolí příliš tvrdá voda doporučujeme používat vodu destilovanou Nepoužívejte chemicky upravovanou vodu Pokud žehličku...

Page 72: ...u rázu ochlazuje žehlící plocha která nadále ztrácí možnost vytvářet dostatek páry Před parním rázem vždy musí být žehlička dostatečně nahřátá Žehlení na sucho Zapojte žehličku do zásuvky rozsvítí se kontrolka Regulátor páry musí být v pozici 0 Nastavte požadovanou teplotu dle pokynů na oblečení Počkejte až se přístroj nahřeje a kontrolka nahřívání zhasne Nyní je žehlička připravena k žehlení Po s...

Page 73: ...hličku vypněte a vypojte z el sítě 6 Přeneste ji nad umyvadlo a držte ji nad ním ve vodorovné poloze 7 Stiskněte tlačítko samočistící funkce 8 Ze žehlící plochy bude odkapávat vařící voda i pára tím se odstraní vodní kámen i případné nečistoty 9 Žehličkou zlehka hýbejte ze strany na stranu aby se vyprázdnila všechna voda ze zásobníku 10 Po dokončení čištění opět tlačítko samočištění uvolněte 11 Od...

Page 74: ...če 2 Vyčistěte žehličku pomocí samočistící funkce 3 Vyčistěte žehlící plochu 4 Zkontrolujte zda se prádlo dostatečně propla chuje Žehlící plocha je zanesená špinavá nebo hnědá 1 Používáte zbytečně vysoké žehlící teploty 2 Používáte příliš mnoho škrobu 1 Jemnou houbičkou plochu očistěte 2 Škrobte prádlo z vnitřní strany Produkuje se jen málo nebo žádná pára 1 Zásobník na vodu je prázdný 2 Žehlící p...

Page 75: ...chajte aj pre neskoršie nahliadnutie Uistite sa že pred použitím odlepíte a odstránite všetky reklamné a ochrannej fólie Deti si s ochrannými ani reklamnými polepy nesmie hrať Prístroj je určený pre používanie v domácnostiach a podobných prostrediach tak ako je kuchynky v obchodoch kanceláriách atď chaty chalupy hotely penzióny a iné dočasné ubytovanie Prístroj nesmú používať osoby ani deti so zní...

Page 76: ...adu zodpovednej osoby ktorá je oboznámená s pravidlami používania a prípadným rizikom Čistenie a bežnú údržbu môžu vykonávať len osoby staršie ako 16 rokov a pri tom byť pod dohľadom Prístroj a jeho el kábel skladujte mimo dosahu detí mladších ako 16 rokov Pokiaľ prístroj nepoužívate alebo sa ho chystáte rozoberať či meniť súčasti tak prístroj odpojte od el napätia Pred rozoberanie skladaním aj pr...

Page 77: ... z el siete Žehličku používajte a skladujte iba na rovným a stabilným mieste Miesto musí mať tepluvzdorné nehorľavý povrch Žehličku nepoužívajte pokiaľ z nej kvapká voda alebo je akokoľvek viditeľne poškodená alebo netesní Žehličku s poškodeným prívodným káblom nepoužívajte aj keď je stále plne funkčná Akokoľvek poškodený prístroj je nutné nechať skontrolovať odborným servisom DOMO ELEKTRO alebo i...

Page 78: ...ky s uzemnením a všetkými štandardnými parametrami podľa miesta siete Používajte iba přístlušenství s prístrojom dodané Prístroj ani prívodný kábel nikdy neponárajte pod vodu inak hrozí nebezpečenstvo úrazu Nenechávajte visieť kábel prístroja cez hranu stola a vyvarujte sa toho aby prišiel do styku s horúcimi plochami Nikdy nenalievajte do zásobníka na vodu inú tekutinu ako je čistá voda Vypnutý p...

Page 79: ...kou Pri výrobe boli niektoré časti premazané mazivom preto je možné že pri prvom použití sa z prístroja bude ľahko fajčiť Ak sa tak stane a dym po chvíli zmiznú tak je všetko v poriadku Žehliacu plochu udržujte čistú a zabráňte poškrabaniu Nežehlite s ňou cez kovové časti ako je zips alebo gombíky Naplňte zásobník vody na minimálny požadovaný objem podľa kapitoly doplnenie vody Regulátor pary nast...

Page 80: ... jemné látky odporúčame žehliť cez handru tak aby sa zabránilo ich poškodeniu Nylon Silk Nylon hod váb Wool Vina Cotton Bavlna Linen Ľan Doplnenie vody do zásobníka Vypojte prístroj z el siete Regulátor pary nastavte na najnižší stupeň 0 Cez lievik naplňte zásobník do maximálneho objemu k ryske MAX Ak je vo vašom okolí príliš tvrdá voda odporúčame používať vodu destilovanú Nepoužívajte chemicky up...

Page 81: ...aximálnu hodnotu a počkajte až sa nahreje a kontrolka zhasne Stlačte tlačidlo parného rázu a počkajte chvíľku ako para prenikne dovnútra do tkaniny potom môžete postup opakovať POZNÁMKA Nepoužívajte parný ráz viac ako 3x za sebou lebo sa vďaka parnému rázu ochladzuje žehliaca plocha ktorá naďalej stráca možnosť vytvárať dostatok pary Pred parným rázom vždy musí byť žehlička dostatočne nahriata Žeh...

Page 82: ...sobník vody naplňte do polovice 2 Žehličku postavte nastojato na rovný povrch 3 Zapojte do el siete 4 Nastavte na maximálnu teplotu a počkajte až sa nahreje 5 Žehličku vypnite a vypojte z el siete 6 Preneste ju nad umývadlo a držte ju nad ním vo vodorovnej polohe 7 Stlačte tlačidlo samočistiacej funkcie 8 Zo žehliacej plochy bude odkvapkávať vriaca voda i para tým sa odstráni vodný kameň aj prípad...

Page 83: ...ače 2 Vyčistite žehličku pomocou samočistiacej funkcie 3 Vyčistite žehliacu plochu 4 Skontrolujte či sa bielizeň dostatočne pre plachuje Žehliaca plocha je zanesená špinavá alebo hnedá 1 Používate zbytočne vysoké žehliacej teploty 2 Používate príliš veľa škrobu 1 Jemnou hubkou plochu očistite 2 Škrob bielizeň z vnú tornej strany Produkuje sa len málo alebo žiadna para 1 Zásobník na vodu je prázdny...

Page 84: ...ssoires en onderdelen online via of scan hier COMMANDEZ d authentiques accessoires et pièces Domo en ligne sur ou scannez ici BESTELLEN SIE die Domo Original Zubehör und Ersatzteile online über oder hier scannen ORDER the original Domo accessories and parts online at or scan here webshop domo elektro be Webshop ...

Reviews: