background image

34

DO158A

EN

 SPEED BUTTON

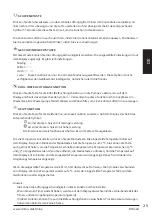
This button adjusts the ventilation speed. The display will show your selected setting. There are four 
settings:

 · Low 
 · Medium 
 · High 
 · Silent.    You can only select this speed in normal mode. This option is not available for the wind 

modes: intelligent, natural, or sleep.

 COOLER/HUMIDIFIER

Press the cooler/humidifier button to activate the pump. The associated symbol   appears on the 
display. Make sure the water reservoir contains water before activating this function. The water pump 
transports water to the honeycomb filter in generate a cool airflow. 

 HEATER

Press the heater button to activate this function. The associated symbol appears on the display:

 ·

 Press 1 time: low capacity heating

 ·

 Press 2 times: high capacity heating

 · Press 3 times: turn off heating. Cold air will blow.

Press the mode button to set the temperature. The set temperature flashes on the display. Each press 
of the mode button will decrease the temperature by 1 °C. You can also hold the button to change the 
temperature setting more quickly. The temperature can be set between 15 °C and 35 °C. When you stop 
pressing the mode button, the temperature shown on the display stops flashing and the set temperature 
is displayed. You will then see the ambient temperature again.

When the set temperature is reached, the device will stop heating. The symbols disappear from the 
display. If the temperature drops 2 degrees under the set temperature, the heating function will activate 
again.

Note: 

 · With this function, you cannot set the ventilation speed.  
 · If you set a timer, the remaining timer time and ambient temperature will alternate on the display.
 · With this function, you can also turn on the humidifier function. There is no chance of dry skin or eyes 

while the heater is on. 

  TIMER

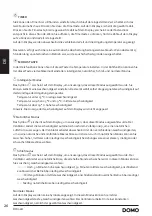
You can set the timer to up to 8 hours. Once the set time has passed, the device will turn off automatically. 
Press the timer button. The selected time appears on the display. Keep pressing the timer button until the 
desired time appears on the display. Each press bumps the time by 1 hour. When you stop pressing the 
timer button, the number on the display will no longer flash and the time is then set. 
The remaining timer time and ambient temperature will alternate on the display.

The device will automatically turn off after it has been used for a long time. For safety, the device turns off 
after 15 hours of use.

Summary of Contents for DOMO DO158A

Page 1: ...OF DO158A Handleiding Air cooler Mode d emploi Air cooler Gebrauchsanleitung Air cooler Instruction booklet Air cooler Manual de instrucciones Refrigerador de aire Istruzioni per l uso Raffrescatore...

Page 2: ...sanleitung f r sp tere heranziehung Read all instructions carefully save this instruction manual for future reference Lea detenidamente todas las instrucciones Conserve este manual para futura referen...

Page 3: ...de winkel waar je het toestel hebt aangekocht De garantie op accessoires en onderdelen die onderhevig zijn aan slijtage bedraagt 6 maanden De garantie en verantwoordelijkheid aansprakelijkheid van de...

Page 4: ...zelf uit het stopcontact Trek nooit aan het snoer om de stekker uit het stopcontact te trekken Laat een werkend toestel niet zonder toezicht achter Zet dit toestel nooit op of in de buurt van een gasv...

Page 5: ...nkant van het toestel schoonmaken met een zachte vochtige doek Bevestig de wieltjes aan de bodem van het toestel Duw de wieltjes in de voorziene openingen AFSTANDSBEDIENING Je kan het toestel ook bedi...

Page 6: ...lelementen toevoegt 4 Plaats het reservoir terug in het toestel en sluit de clips Tip voeg het tweede koelelement toe voor een nog lagere temperatuur De 2 koelelementen zijn herbruikbaar Je kan ook ij...

Page 7: ...te passen De temperatuur kan ingesteld worden tussen 15 C en 35 C Als je stopt met drukken op de modusknop zal de temperatuur op het display stoppen met knipperen en wordt de ingestelde temperatuur g...

Page 8: ...idscyclus Oftewel een sterke matige of zwakke zeebries Slaapmodus Op de display verschijnt symbool om aan te geven dat deze modus is geselecteerd De ventilator verspreidt een natuurlijke bries die elk...

Page 9: ...conden Op het display zie je de snelheidsaanduiding knipperen De droogfunctie duurt 20 minuten en schakelt nadien automatisch uit Tijdens deze functie werken de andere knoppen niet Als je de droogfunc...

Page 10: ...he sturing van de kamertemperatuur Ja elektronische sturing van de kamertemperatuur plus dag tijdschakelaar Nee elektronische sturing van de kamertemperatuur plus week tijdschakelaar Nee Andere sturin...

Page 11: ...dit product op de correcte manier wordt verwijderd voorkom je mogelijk voor mens en milieu negatieve gevolgen die zich zouden kunnen voordoen in geval van verkeerde afvalbehandeling Voor meer details...

Page 12: ...brutale ou anormale Entretien insuffisant ou non conforme R paration ou modification de l appareil par le consommateur ou un tiers non autoris Utilisation d l ments ou d accessoires qui ne sont pas re...

Page 13: ...l chaud N utilisez pas l appareil l ext rieur Utilisez l appareil uniquement dans le but auquel il est destin Utilisez toujours l appareil sur une surface solide s che et plane Cet appareil ne convien...

Page 14: ...promotionnels Vous pouvez nettoyer l ext rieur de l appareil avec un chiffon doux humide Fixez les roulettes dans le bas de l appareil Ins rez les roulettes dans les orifices pr vus cet effet T L COMM...

Page 15: ...s mettez les l ments r frig rants 4 Replacez le r servoir dans l appareil et fermez les clips Suggestion pour une temp rature encore plus fra che ajoutez le deuxi me l ment r frig rant Les 2 l ments r...

Page 16: ...onc pour faire d filer plus rapidement les degr s La temp rature peut tre r gl e entre 15 C et 35 C Si vous arr tez d appuyer sur le bouton de mode la temp rature l cran va cesser de clignoter et la t...

Page 17: ...sse lev e Note l affichage de la vitesse l cran ne s ajuste pas Naturel Le symbole s affiche l cran pour indiquer que ce mode a t s lectionn Le ventilateur change automatiquement de vitesse de fa on a...

Page 18: ...e dans l eau ou tout autre liquide N utilisez pas de produits chimiques ou abrasifs pour nettoyer l appareil RANGEMENT Videz et s chez le r servoir d eau Assurez vous que le filtre en nid d abeille es...

Page 19: ...ntr le thermique lectronique de la charge avec r ception d informations sur la temp rature de la pi ce et ou ext rieure N A Consommation d lectricit auxiliaire puissance thermique r gulable par ventil...

Page 20: ...it ou son emballage indique que ce produit ne peut tre trait comme d chet m nager Il doit plut t tre remis au point de ramassage concern se chargeant du recyclage du mat riel lectrique et lectronique...

Page 21: ...Monate Die Garantie und dieVerantwortung Haftung des Lieferanten und Herstellers entfallen automatisch in den folgenden F llen Bei Nichtbeachtung der Anweisungen in dieser Bedienungsanleitung Bei fal...

Page 22: ...ecker direkt am Stecker selber und nicht an der Kabelschnur aus der Steckdose Lassen Sie das im Betrieb befindliche Ger t nicht unbeaufsichtigt Stellen Sie das Ger t nicht in der N he oder auf einer G...

Page 23: ...18 SPEED Geschwindigkeitstaste 19 SWING Oszillationstaste 20 ON OFF Ein Aus Taste VOR DER ERSTEN INBETRIEBNAHME Nehmen Sie das Ger t und das Zubeh r aus derVerpackung Entfernen Sie m glicherweise vorh...

Page 24: ...er tes 2 Legen Sie die beiden K hlelemente mitWasser in den Gefrierschrank bis sie vollst ndig gefroren sind Achtung ffnen Sie niemals die K hlelemente um m gliche Sch den zu vermeiden 3 Legen Sie 1 K...

Page 25: ...ie dieTaste f r die Heizfunktion um diese Funktion zu starten Auf dem Display erscheint das entsprechende Symbol Einmal dr cken heizen mit niedriger Leistung Zweimal dr cken heizen mit hoher Leistung...

Page 26: ...29 C mittlere Geschwindigkeit Temperatur ber 29 C hohe Geschwindigkeit Hinweis Die Anzeige der Geschwindigkeit auf dem Display wird nicht angepasst Nat rlicher Modus Das Symbol erscheint auf dem Disp...

Page 27: ...s Stromkabel oder den Stecker niemals inWasser oder andere Fl ssigkeiten ein Verwenden Sie keine chemischen oder scheuernden Reinigungsmittel zur Reinigung des Ger tes LAGERUNG Leeren denWassertank un...

Page 28: ...er Raum und oder Au entemperatur N A Zus tzlicher Stromverbrauch Heizleistung mit Gebl seunterst tzung N A Bei Nennw rmeleistung elmax N A kW Typ von Heizleistung Raumtemperaturregler Bei Mindestw rme...

Page 29: ...rn an einem Sammelpunkt f r das Recyling von elektrischen und elektronischen Ger ten abgegeben werden muss Durch Ihren Beitrag zum korrekten Entsorgen dieses Produkts sch tzen Sie die Umwelt und die G...

Page 30: ...ty of the supplier and manufacturer lapse automatically in the following cases If the instructions in this manual have not been followed In case of incorrect connection e g electrical voltage that is...

Page 31: ...ectrical stove or in a place where it may come into contact with a warm appliance Do not use the appliance outdoors Only use the appliance for its intended use Always use the appliance on a steady dry...

Page 32: ...th Secure the wheels at the bottom of the device Push the wheels into the provided openings REMOTE CONTROL You can also operate the device with the included remote control Insert a CR2032 button batte...

Page 33: ...element 4 Put the reservoir back in the device and close the clips Tip add the second refrigerating element to lower the temperature even further The 2 refrigerating elements are reusable Alternative...

Page 34: ...stop pressing the mode button the temperature shown on the display stops flashing and the set temperature is displayed You will then see the ambient temperature again When the set temperature is reac...

Page 35: ...very half hour This mode offers 3 speeds High 30 minutes of high speed then 30 minutes of medium speed then continues working at low speed Medium 30 minutes of medium speed then continues working at l...

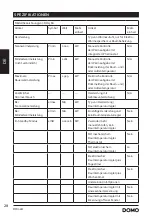
Page 36: ...nction If you want to use the drier function again you must start from the beginning SPECIFICATIONS Model identifier s DO158A Item Symbol Value Unit Item Unit Heat output Type of heat input for electr...

Page 37: ...ol on the product or on its packaging indicates that this product may not be treated as household waste Instead it must be brought to the applicable collection point for recycling of electrical and el...

Page 38: ...je y etiquetas promocionales Aseg rese de que los ni os no puedan jugar con el material de embalaje Este aparato es adecuado para su uso en el mbito dom stico y entornos similares como Zona de cocina...

Page 39: ...ales de embalaje y etiquetas de promoci n No inserte objetos en el ventilador ya que esto podr a ocasionar choques el ctricos y heridas u ocasionar da os en el dispositivo No bloquee ni obstaculice el...

Page 40: ...Cada vez que pulse un bot n el aparato emitir una se al sonora Puede activar o desactivar esta se al pulsando y manteniendo pulsados simult neamente el bot n de enfriamiento humidificaci n y el bot n...

Page 41: ...ire El s mbolo correspondiente aparecer en la pantalla Vuelva a pulsar este bot n para apagar la funci n Tambi n puede dirigir el flujo de aire ajustando las lamas horizontales Posicione las lamas en...

Page 42: ...cir sequedad en la piel o los ojos TEMPORIZADOR Puede ajustar el temporizador hasta 8 horas Cuando el tiempo programado haya transcurrido el aparato se apagar autom ticamente Pulse el bot n del tempor...

Page 43: ...pague el aparato con el interruptor de encendido apagado Quite siempre el enchufe de la toma de corriente antes de limpiar el aparato El filtro de polvo se puede limpiar con agua y un cepillo suave De...

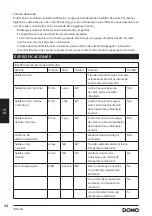
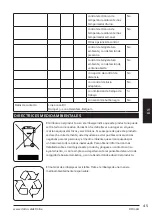
Page 44: ...alor Unidad Art culo Unidad Salida de calor Tipo de entrada de calor solo para calentadores el ctricos locales de almacenamiento el ctrico Salida de calor nominal Pnom 2 000 kW control manual de carga...

Page 45: ...ALES El s mbolo en el producto o en el embalaje indica que este producto no puede ser tratado como residuo dom stico Se debe llevar a un lugar en el que se reciclan equipos el ctricos y electr nicos S...

Page 46: ...gli eventuali adesivi promozionali Assicurarsi che i bambini non giochino con gli imballaggi Questo apparecchio destinato unicamente all uso domestico e in ambienti analoghi quali angoli cottura riser...

Page 47: ...calore Prima di utilizzare il prodotto togliere tutti gli imballi e gli eventuali adesivi promozionali Non inserire nessun oggetto nel ventilatore perch ci potrebbe causare scosse elettriche ferite o...

Page 48: ...reme un pulsante l apparecchio emette un segnale acustico possibile attivare o disattivare questo segnale tenendo premuti per 3 secondi contemporaneamente il pulsante per raffreddamento umidificazione...

Page 49: ...ne verticale dietro le lamelle orizzontali si muova da sinistra a destra per diffondere l aria Sul display compare il relativo simbolo Premere di nuovo lo stesso pulsante per spegnere la funzionalit p...

Page 50: ...iono alternatamente il tempo restante del timer e la temperatura ambiente In questa funzionalit possibile attivare anche la deumidificazione Cos non si soffrir di occhi o pelle secchi durante il risca...

Page 51: ...it bassa Normale Sul display non visualizzato alcun simbolo In questa modalit possibile sceglie tra 4 velocit mediante il pulsante velocit Il ventilatore manterr una velocit costante che quella selezi...

Page 52: ...i asciugatura prima del completamento premere il pulsante di accensione spegnimento A questo punto non sar pi possibile proseguire con la funzionalit di asciugatura Se si desidera riattivare la funzio...

Page 53: ...tals Belgium MISURE AMBIENTALI Il simbolo sul prodotto o sulla confezione indica che esso non deve essere trattato come rifiuto domestico Deve al contrario essere conferito al punto di raccolta predis...

Page 54: ...essoires en onderdelen online via of scan hier COMMANDEZ d authentiques accessoires et pi ces Domo en ligne sur ou scannez ici BESTELLEN SIE die Domo Original Zubeh r und Ersatzteile online ber oder h...

Reviews: