


Manual
English
3
Specification
Standards - IEEE 802.11b/g/n (2.4 GHz), 802.3/3u (10BASE-T/100BASE-TX)
IP Address Configuration – Automatic & Manual DHCP
Channels - 11 US/Canada , 13 Europe , 14 Japan
Wireless Encryption/Key - IEEE standard 64/128bit WEP/WPA/WPA2-PSK
Operating Frequency - 2.4 GHz 300Mbps LAN 10/100Mbps
Wireless Range (Maximum) - 100m (300ft)*
Maximum Output Resolution – VGA:1440x900, 32 bit color depth, HDMI: 720p (HD Ready)
Dimensions 13.9 x 10.8 x 3.7 cm (WxDxH) / Weight - 0.5 kg
* The actual operational distances depends on the surrounding environment
Installation
Important
BEFORE STARTING AN INSTALLATION ENSURE ALL DEVICES ARE POWERED OFF
The Wireless Projector Server is capable of receiving separate audio & video signals up to
100m from a transmission source. Actual operational distances depend on the construction of
the surrounding building and any walls or floors that are situated between the transmitting
computer and the Wireless Projector Servers receiving antenna.
Quick Setup
These steps follow an installation using HDMI or VGA equipment with Windows 7
1. Connect the Wireless Projector Server to a projector with a VGA or HDMI cable.
Power up the projector
Manual
English
4
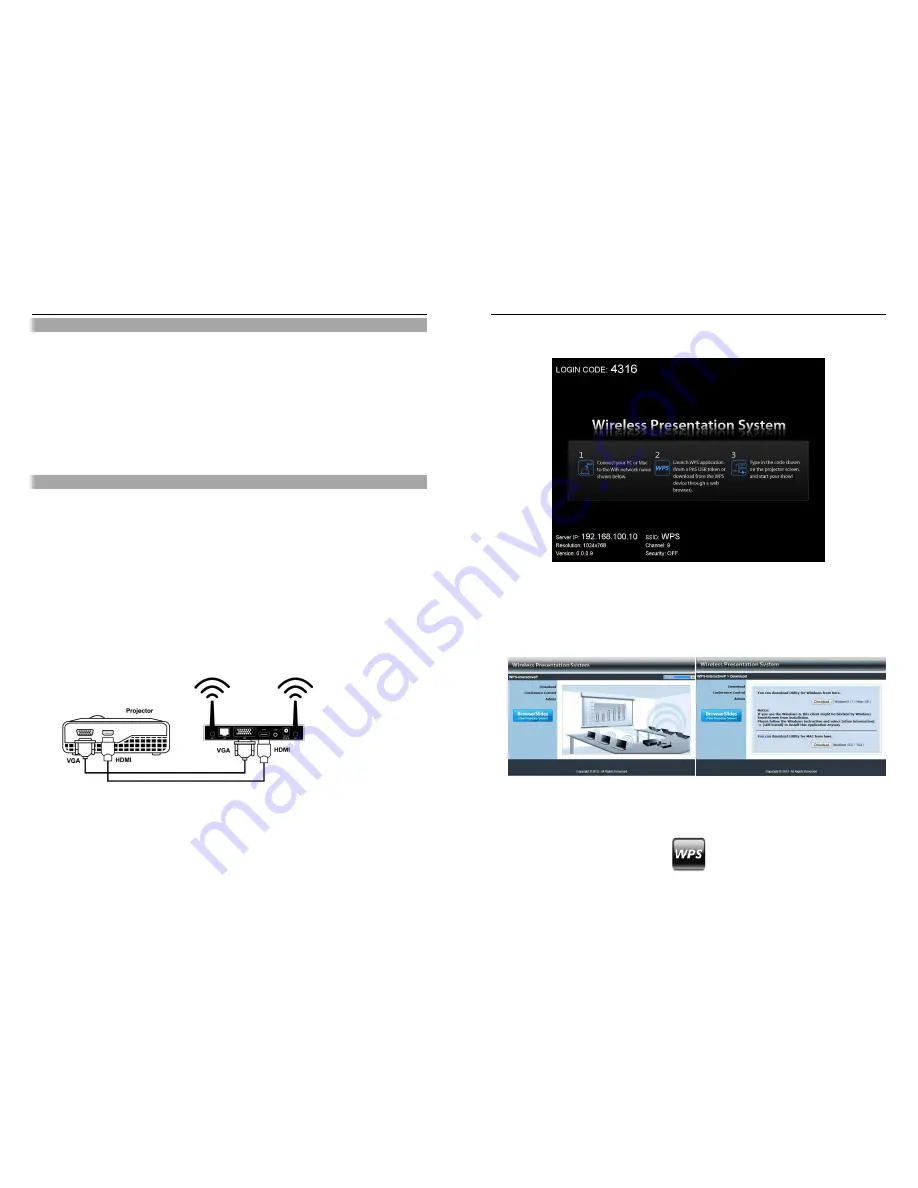
2. Power on the Wireless Projector Server. The Power LED will turn from Red to Green and
the projector screen will show the default menu screen as below. The Wireless Projector
Server is now ready to use
3. Enable your computers WiFi and connect your computer to the Wireless Projector Server
WLAN via Windows Control Panel > Network Settings
4. Open your preferred web browser. If you use WiFi to connect to the internet this should
redirect automatically to the Wireless Projector Server Management page. If not enter
the default IP address of the Wireless Projector Server 192.168.100.10 or refer to the IP
address shown in the bottom left corner of the projector screen
5. Unless you already installed the OS utility from the software disc, download the required
OS Utility for your Computers OS and follow its Installation Wizard. Ensure your firewall
allows the Wireless Projector Server software to pass through. After installation you will
see the Wireless Projector Server shortcut on your desktop


