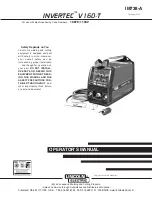
Lincoln Electric IMVERTEC IM738-A Operator'S Manual Download Page 1

INVERTEC     V160-T

OPERATOR’S MANUAL

IM738-A

November, 2010

Safety Depends on You

Lincoln  arc  welding  and  cutting
equipment  is  designed  and  built
with  safety  in  mind.  However,
your  overall  safety  can  be
increased  by  proper  installation
...  and  thoughtful  operation  on
your  part. 

DO  NOT  INSTALL,

OPERATE  OR  REPAIR  THIS
EQUIPMENT  WITHOUT  READ-
ING  THIS  MANUAL  AND  THE
SAFETY  PRECAUTIONS  CON-
TAINED  THROUGHOUT.

And,

most  importantly,  think  before
you act and be careful.

For use with machines having Code Numbers:

10878; 11032

• Sales and Service through Subsidiaries and Distributors Worldwide •

Cleveland, Ohio 44117-1199  U.S.A.   TEL: 216.481.8100   FAX: 216.486.1751   WEB SITE: www.lincolnelectric.com

• World's Leader in Welding and Cutting Products •

Copyright © Lincoln Global Inc.

Summary of Contents for IMVERTEC IM738-A

Page 1: ...T INSTALL OPERATE OR REPAIR THIS EQUIPMENT WITHOUT READ ING THIS MANUAL AND THE SAFETY PRECAUTIONS CON TAINED THROUGHOUT And most importantly think before you act and be careful For use with machines...

Page 2: ...KER WEARERS SHOULD CONSULT WITH THEIR DOCTOR bEFORE OPERATING Read and understand the following safety highlights For additional safety information it is strongly recommended that you purchase a copy...

Page 3: ...cooling 3 h Never simultaneously touch electrically hot parts of electrode holders connected to two welders because voltage between the two can be the total of the open circuit voltage of both welder...

Page 4: ...s to adjacent areas Avoid welding near hydraulic lines Have a fire extinguisher readily available 6 b Where compressed gases are to be used at the job site special precautions should be used to preven...

Page 5: ...opri s et non inflammables 4 Des gouttes de laitier en fusion sont mises de l arc de soudage Se prot ger avec des v tements de protection libres de l huile tels que les gants en cuir chemise paisse pa...

Page 6: ...ing the correct replacement parts On Line Product Registration Register your machine with Lincoln Electric either via fax or over the Internet For faxing Complete the form on the back of the warranty...

Page 7: ...ch 2 Preflow Timer B 6 DIP Switch 3 2 Step Restart Enable B 7 DIP Switch 4 4 Step Restart Enable B 8 B 9 DIP Switch 5 Low OCV Enable B 10 DIP Switch 6 European USA Machine Configuration B 10 DIP Switc...

Page 8: ...ING TEMPERATURE RANGE 20 C to 40 C STORAGE TEMPERATURE RANGE 50 C to 85 C RECOMMENDED INPUT WIRE AND FUSE SIzES FOR MAXIMUM RATED OUTPUT INPUT VOLTAGE FREQUENCY Hz 230 50 60 MAXIMUM TIME DELAY CIRCUIT...

Page 9: ...t ground or in puddles Locate the machine away from radio controlled machinery Normal operation may adversely affect the operation of nearby radio controlled machinery which may result in injury or eq...

Page 10: ...ll panels securely in place 7 All electrical conductors within 50 ft 15 2m of the welder should be enclosed in grounded rigid metal lic conduit or equivalent shielding Flexible metallic conduit is gen...

Page 11: ...s provided with an ARFU device It only operates when the input is con nected to an 115V supply and protects from input over current conditions When the ARFU has been activated due to an input over cur...

Page 12: ...imilar TIG torch can be used To attach the Twist Mate Plug to a Lincoln Torch slide the rubber boot onto the torch cable enlarge the boot opening if necessary screw the fitting on the torch cable into...

Page 13: ...le insulation 3 Slide rubber boot onto cable end The boot end may be trimmed to match the cable diameter Use soap or other nonpetroleum based lubricant to help slide the boot over the cable if needed...

Page 14: ...rt Tig Starting with excellent results WELDING CAPAbILITY The Invertec V160 T is rated at 160 amps 26 4 volts at 35 duty cycle on a ten minute basis It is capable of higher duty cycles at lower output...

Page 15: ...This switch changes the welding modes of the machine The V160 T has three weld ing modes Stick SMAW Lift TIG GTAW and HF TIG GTAW When the mode switch is in the Stick position the fol lowing welding...

Page 16: ...ible 8 Remote LED This indicator will turn ON when a remote control is connected to the machine via the remote control connector Using a remote control will change the function of the output current c...

Page 17: ...step mode which is selected with the Trigger Mode Switch DIP Switch functions are set by the factory For adjustments on DIP Switch settings and functions see DIP SWITCH FUNCTIONS in this Operations Se...

Page 18: ...r to start the main part of the weld The output current will increase to the welding current The time for this increase or upslope is presettable The default is 0 5 seconds 3 Press and hold the TIG to...

Page 19: ...shown in Figure B 3 Switch 1 is on the bottom and switch 8 is on the top When a switch is pushed to the right or to the back of the machine it is ON when it is pushed to the left or to the front of th...

Page 20: ...e downslope until the Start Crater current is reached and the output of the machine is turned OFF After the arc is turned OFF the gas valve will remain open for the duration of the post flow time FIGU...

Page 21: ...main part of the weld is complete The machine will now decrease the output current at a controlled rate downslope until the Start Crater current is reached This Start Crater current can be main taine...

Page 22: ...increase upslope to the welding current like in step 2 to continue welding When the main part of the weld is complete go to step 3 As shown in figure B 11 after the TIG torch trigger is quickly presse...

Page 23: ...func tions are clearly understood DIP Switch 1 OFF In TIG welding mode the following conditions can exist European Machine Configuration DIP Switch 6 OFF The TIG slope functions are always enabled Af...

Page 24: ...a TIG arc Connect the necessary equipment In both cases load bank or TIG arc a trigger must be connected to the machine If a load bank is used it must be setup for 160A and approximately 25V 3 Make su...

Page 25: ...used with the Invertec V160 T K1781 1 PTA 9 12 5 ft medium back cap K1781 3 PTA 9 25 ft medium back cap K1782 1 PTA 17 12 5 ft long back cap K1782 3 PTA 17 25 ft long back cap NOTE Each torch require...

Page 26: ...s and must be discharged before the machine can be serviced Discharging is done automatically by the machine each time the power is switched off However you must allow the machine to sit for at least...

Page 27: ...AUSE lists the obvious external possibilities that may contribute to the machine symptom Step 3 RECOMMENDED COURSE OF ACTION This column provides a course of action for the Possible Cause generally it...

Page 28: ...m piece 1 Poor cleanliness or distribution of the Welding passes 2 Improper movement of the elec trode 1 High progression speed 2 Welding current too low 3 Narrow chamfering 1 Arc too short 2 Current...

Page 29: ...lncorrect electrode sharpening 2 Electrode too small 3 Operating failure contact of the tip with the workpiece 1 Dirt on the edges 2 Dirt on the filler material 3 Excessive travel speed 4 Current int...

Page 30: ...Voltage 2 Faulty supply plug or cable 3 Internal fuse blown 1 Input voltage out of range less than 95 or greater than 265VAC 2 Input current too high due to oper ating beyond rated duty cycle 1 While...

Page 31: ...rate for all machines covered by this manual The specific diagram for a particular code is pasted inside the machine on one of the enclosure panels If the diagram is illegible write to the Service Dep...

Page 32: ...NOID W07X0262rev03 WARNING HIGH VOLTAGE CAN KILL Do not operate with covers removed Disconnect input power by unplugging power cord before servicing Do not touch electrically live parts Only qualified...

Page 33: ...NOTES V160 T...

Page 34: ...h electrically live parts or electrode with skin or wet clothing Insulate yourself from work and ground No toque las partes o los electrodos bajo carga con la piel o ropa moja da Aislese del trabajo y...

Page 35: ...te Be und Entl ftung des Arbeitsplatzes Mantenha seu rosto da fuma a Use ventila o e exhaust o para remover fumo da zona respirat ria Turn power off before servicing Desconectar el cable de ali mentac...

Page 36: ...and Service through Subsidiaries and Distributors Worldwide Cleveland Ohio 44117 1199 U S A TEL 216 481 8100 FAX 216 486 1751 WEB SITE www lincolnelectric com World s Leader in Welding and Cutting Pr...

Reviews: